Manage your MSP account
In this topic, you will learn how to manage the tenant organizations in your portfolio, and the settings specific to your own account, if you are a Portnox™ Cloud managed service provider (MSP) administrator.
If your Portnox Cloud account is set up as an MSP account, logging in does not take you directly into a single tenant. Instead, you land on the Organizations screen, which lists every tenant organization in your portfolio. Your MSP account also has its own settings and reports, separate from those of any tenant you manage.
Access and manage tenant organizations
In this section, you will learn how to access and manage the tenant organizations in your portfolio.
-
To log in as the MSP, simply log in to Portnox Cloud with your MSP administrator credentials.
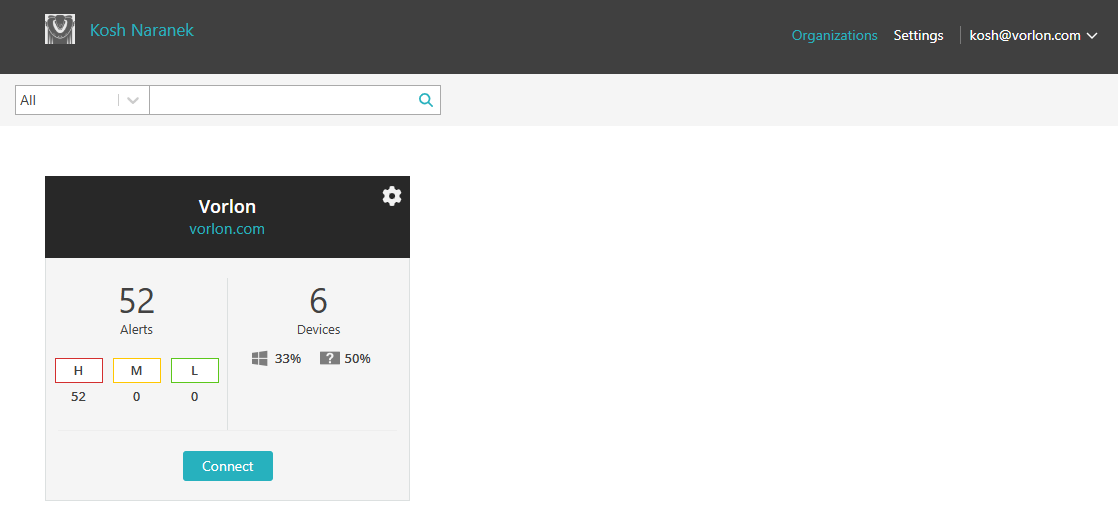
The Organizations screen is displayed. Each tenant organization you manage is shown as a card, with a summary of its alerts (by severity) and devices (by operating systems).
-
To manage a tenant without connecting to it, click on the ⚙ icon in
the top-right corner of that tenant’s card.
-
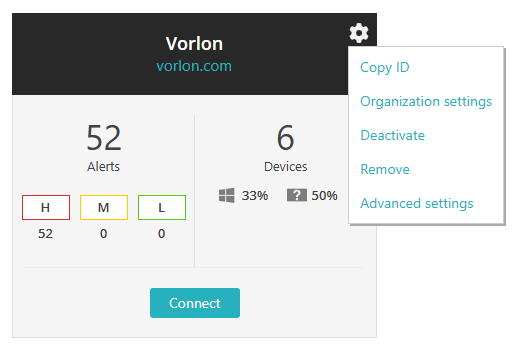
Copy ID: Copies the organization ID of the tenant. This is the same ID displayed elsewhere in that tenant’s own settings screens, for example as part of the SCEP URL.
-
Organization settings: Opens the tenant’s own Settings screen.
-
Deactivate: Immediately stops the tenant from processing authentication requests and makes it inaccessible from the admin portal, both for its own administrators and for you. Deactivating a tenant is reversible: an MSP administrator can reactivate it at any time.
-
Remove: Deletes the tenant, and everything associated with it, immediately and permanently.
Important:Unlike deactivation, removal cannot be reversed. Portnox Cloud enforces this behavior to comply with GDPR requirements. Deactivating a tenant first is not a requirement for removing it, but because deactivation is reversible and removal is not, consider deactivating a tenant before removing it, to make sure you no longer need it. -
Advanced settings: Opens a page of settings intended mainly for use by Portnox support staff. Currently, this page contains a single setting, Mab account authentication alerts cleaner settings, which lets Portnox Cloud ignore MAB failure alerts when a successful 802.1X authentication for the same MAC address occurs within a specified time range.
Note:Turning this feature on may cause delays to MAB failure alerts.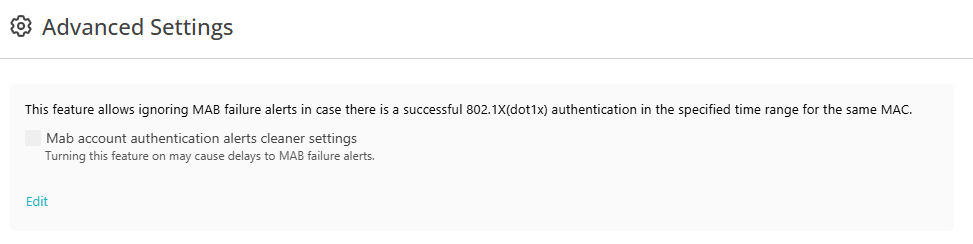
-
Manage your MSP account settings
In this section, you will learn how to manage the general settings, administrators, account details, and reports of your own MSP account, as opposed to those of an individual tenant.
-
Click on the Settings option in the top bar to manage settings for your MSP account itself,
separately from any of the tenants you manage.

The MSP Settings screen opens, with four sections in the left-hand side menu: SETTINGS, ADMINISTRATORS, ACCOUNT SETTINGS, and REPORTS.
-
In the SETTINGS section, click on the Edit link in the
GENERAL section to change your MSP organization name, contact e-mail, and preferred time
zone, or the Edit link under LOGO to add or change the logo shown on
the left side of your top bar.
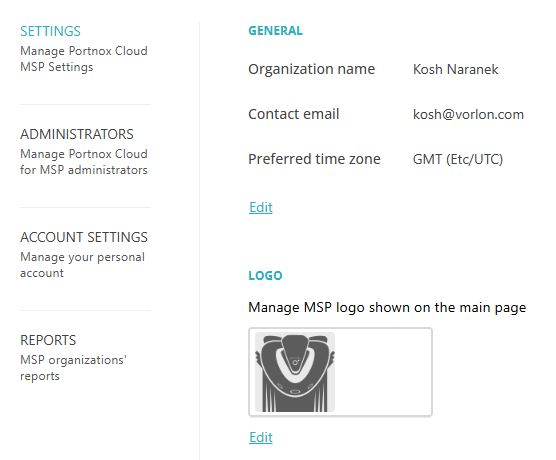
These fields work the same way as the equivalent fields for a single tenant; see Manage the organization data.
-
In the ADMINISTRATORS section, manage the administrators of your MSP account.
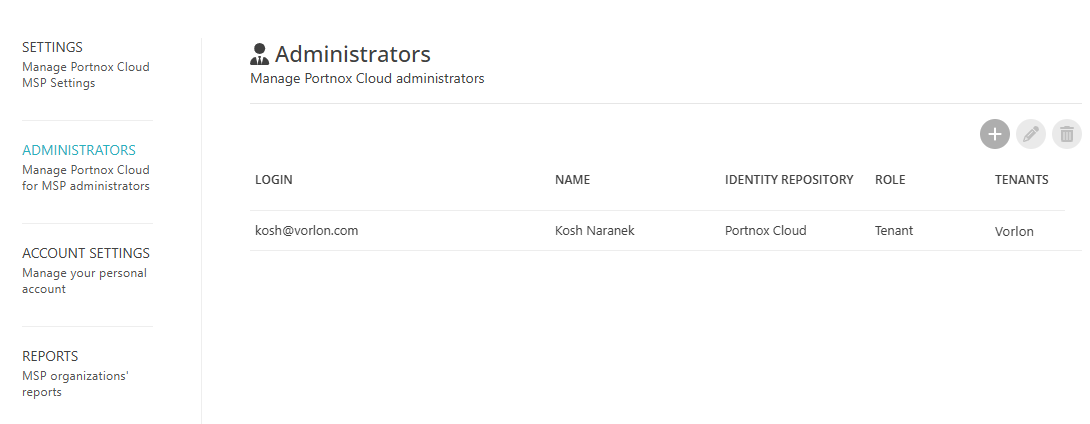 Important:This list is separate from the administrator list of any tenant you manage; see Manage other administrator accounts. Adding, editing, or removing an administrator here only affects who can access the MSP Organizations screen and the tenants assigned to them here – it does not add or remove that person as an administrator inside any individual tenant.
-
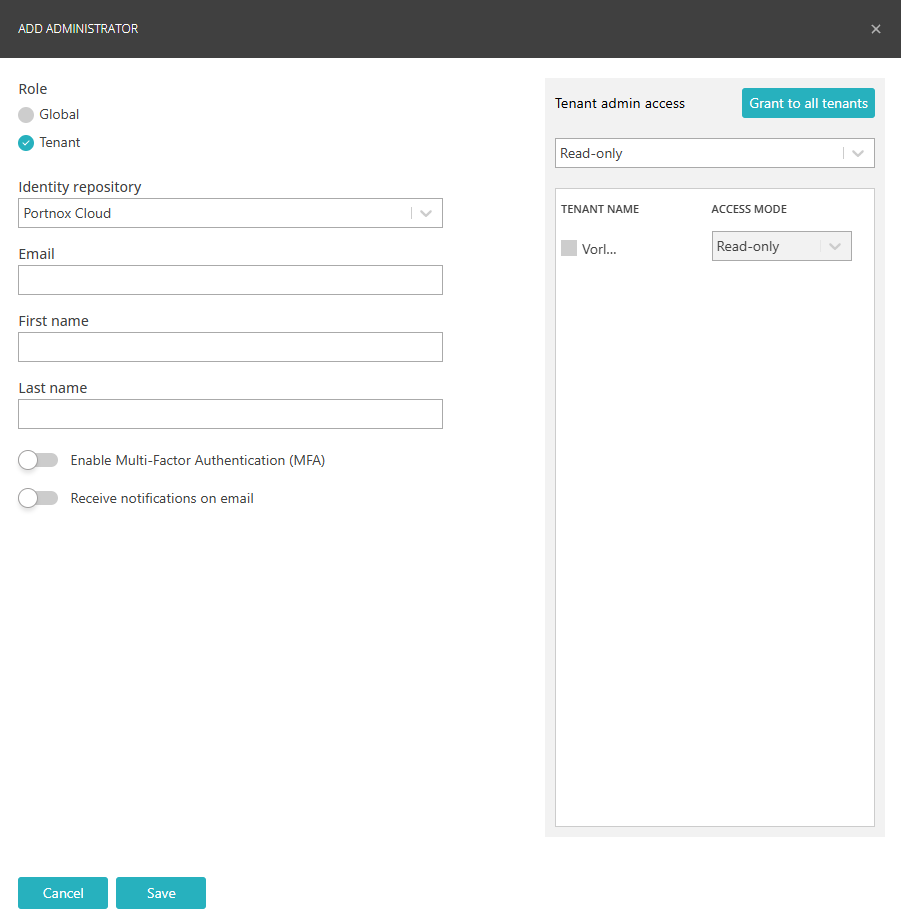
To add a new MSP administrator, click on the + icon in the
top-right section of the right-hand side pane.
The ADD ADMINISTRATOR window opens.
-
To add a new MSP administrator, click on the + icon in the
top-right section of the right-hand side pane.
-
In the ACCOUNT SETTINGS section, manage your own MSP administrator profile: your user name,
role, identity repository, and whether you receive e-mail alerts.
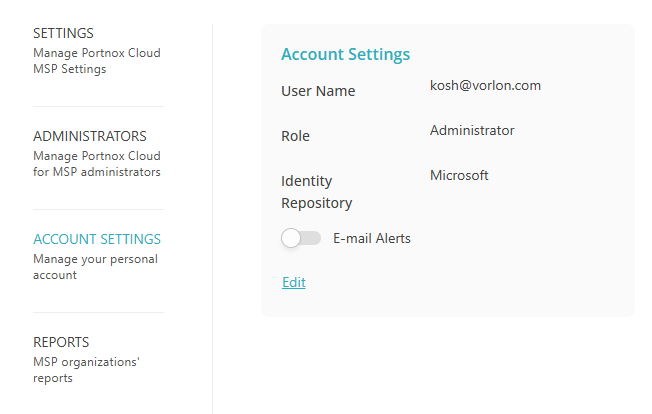 Note:This screen does not include the multi-factor authentication or CLOUD API TOKENS sections available on tenant administrator accounts; see Manage your administrator account.
 -
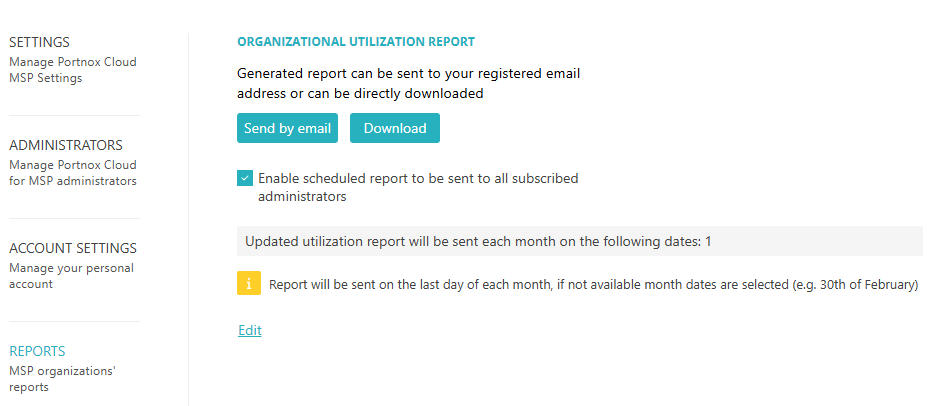
In the REPORTS section, download, e-mail, or schedule the organizational utilization report
across all the tenant organizations in your portfolio.