Integrate with Okta Wokforce Identity
In this topic, you will learn how to integrate Portnox™ Cloud with Okta Workforce Identity Cloud.
-
In the Cloud portal top menu, click on the Settings option.

-
In the Cloud portal left-hand side menu, click on the option.

-
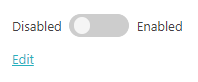
Under the Okta Universal Directory heading and description, click on the
Edit link.
-
Click on the Disabled/Enabled switch to put it in the Enabled
position.

-
In the Integration mode field, select the REST API option.

This option is selected by default.
Important:In this topic, you will integrate Portnox Cloud with Okta using the Okta REST API. If you would rather integrate using LDAP, go to the following topic: Integrate with Okta Workforce Identity using LDAP - Optional:
Create a list of secure network locations.
Note:This step is necessary only if later in this process, when creating the token, you want to be able to limit the IPs in the API calls made with this token must originate from field.
-
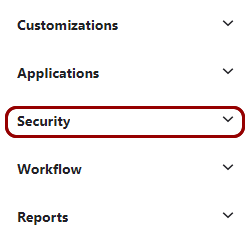
In the left-hand menu of the Okta administrative console, click on the Security option
to expand the menu.
-
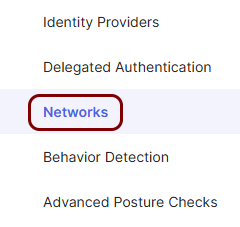
In the Security menu, find the Networks option and click on
it.
 Your browser will open the Okta Networks pane.
 -
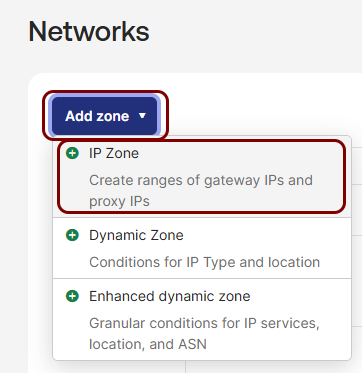
In the Networks pane, click on the Add zone button, and then select
the IP Zone option.
-
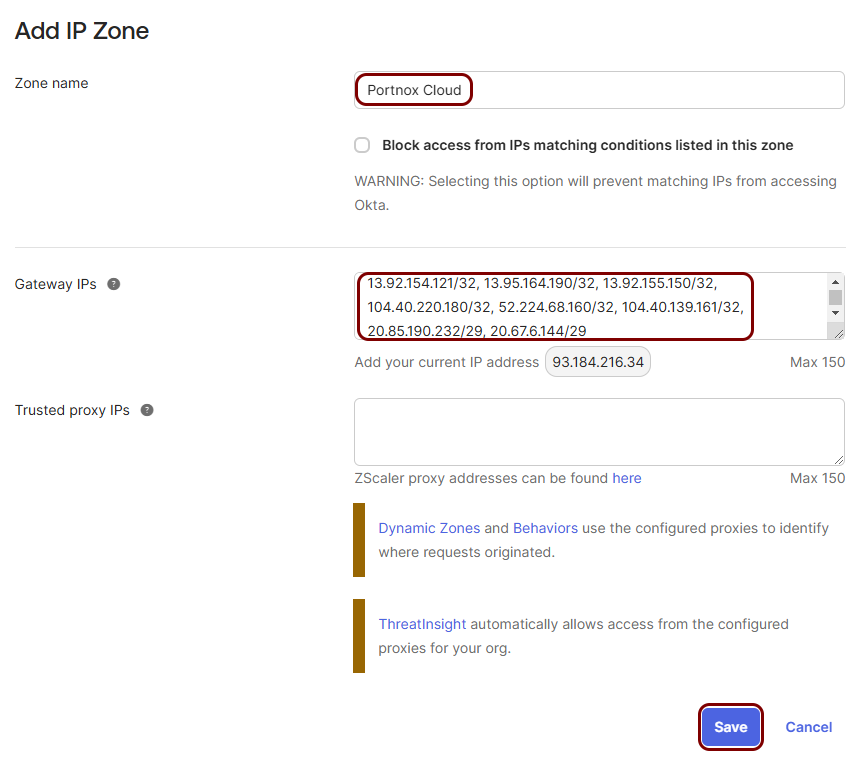
In the Add IP Zone pane, enter a Zone name, and in the
Gateway IPs field, enter the following IPs:
13.92.154.121/32,
13.95.164.190/32,
13.92.155.150/32,
104.40.220.180/32,
52.224.68.160/32,
104.40.139.161/32,
20.85.190.232/29,
20.67.6.144/29
Then, click on the Save button.
-
In the left-hand menu of the Okta administrative console, click on the Security option
to expand the menu.
-
Create an Okta API token to integrate with Portnox Cloud.
-
In the left-hand menu of the Okta administrative console, click on the Security option
to expand the menu.
-
In the Security menu, find the API option and click on it.
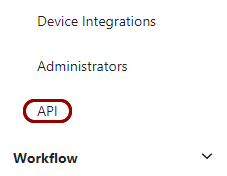 Your browser will open the Okta API pane.
 -
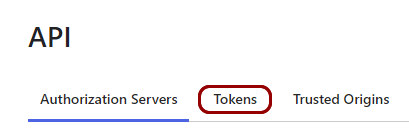
In the right-hand side of the API pane, click on the Tokens
tab.
-
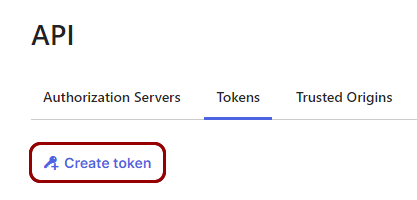
Click on the Create token button.
-
In the Create token window, enter a name for the token. In the API calls made
with this token must originate from field, select the In any of the following
zones option and then select the network zone you created earlier. Then, click on the
Create token button.
Note:If you skipped the optional creation of a network zone, you can choose the less secure option: Any IP.
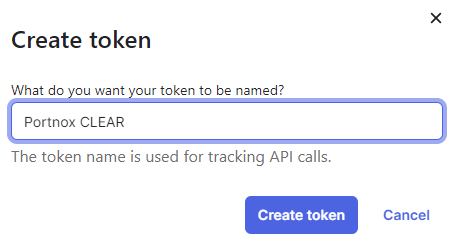
In this example, we used the name Portnox Cloud, but you can use any name you like.
-
In the Create token window, click on the copy button next to the Token
Value field to copy the token value, and then click on the OK, got it
button.
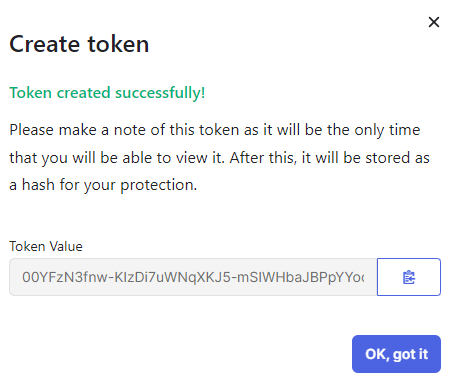 Important:You will not be able to copy this token value later.
-
In the left-hand menu of the Okta administrative console, click on the Security option
to expand the menu.
-
If you want to allow life cycle synchronization, click on the Allow lifecycle synchronization
checkbox to activate it.

Life cycle synchronization means that Portnox Cloud will react to changes in the directory. For example, if this setting is on, and if you disable or delete an Okta user, all the devices associated with this user will be unregistered from Cloud. If this setting is off, you will have to unregister devices manually or wait until the retention period expires. By default, life cycle synchronization is on.
-
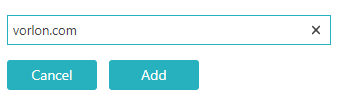
Add all domains that you want users to authenticate with. Repeat the following steps for all relevant domains:
You can use all domains in your Okta directory or only selected domains.
- Click on the Add domain name link next to the Domain names heading.
- In the text field that appears in place of the link, enter the domain name used by your Okta users and click on the Add button.
-
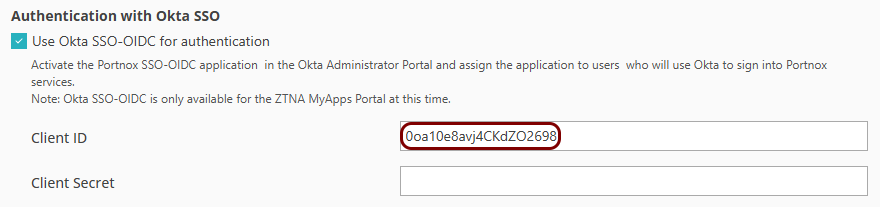
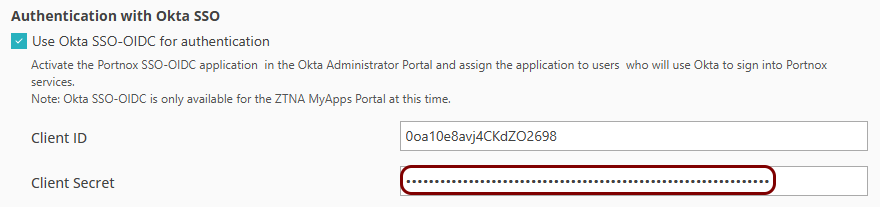
If you want users to use Okta SSO when logging in to the ZTNA Secure Access
Portal, in the Authentication with Okta SSO section, activate the Use Okta
SSO-OIDC for authentication checkbox.
Note:In the future, Okta OIDC may also be used for other services, not just the ZTNA Secure Access Portal.
To enable SSO for the ZTNA Secure Access Portal, you need to add an application to your Okta directory.
-
In the left-hand menu of the Okta administrative console, click on the Applications
option to expand the menu, and then click on the Applications option below.
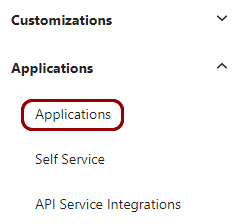 Your browser will open the Okta Applications pane.
 -
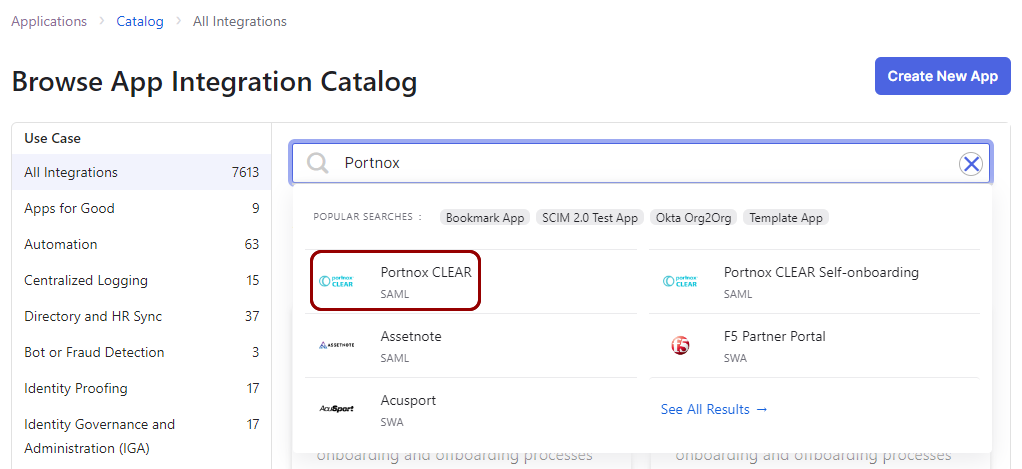
In the right-hand side pane of the Applications pane, click on the Browse App
Catalog button.

Your browser will open the Browse App Integration Catalog pane.
-
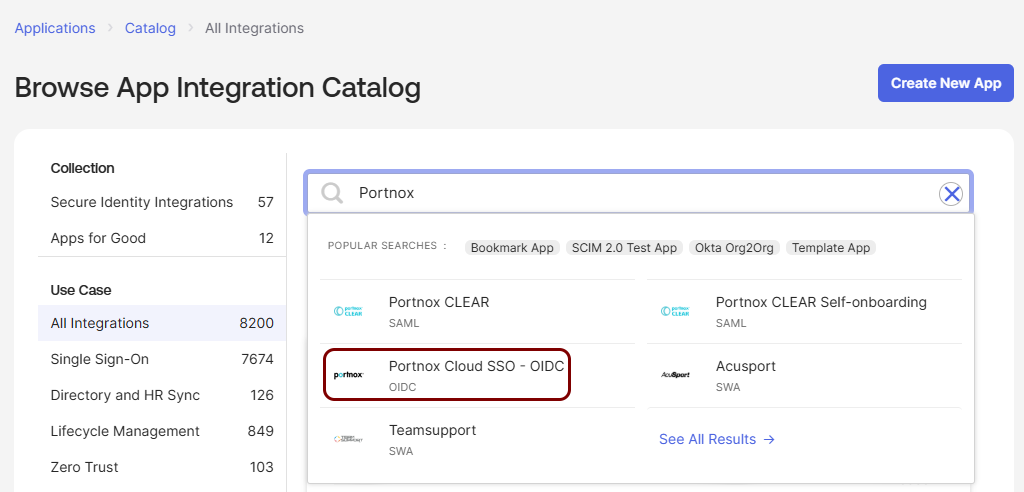
In the Search... field on the Browse App Integration Catalog pane,
type Portnox, then click on the Portnox Cloud SSO - OIDC
application tile below.
-
In the General settings Required pane, click on the Done
button.

-
In the Assignments tab, click on the Assign button to assign the
application to users or groups.
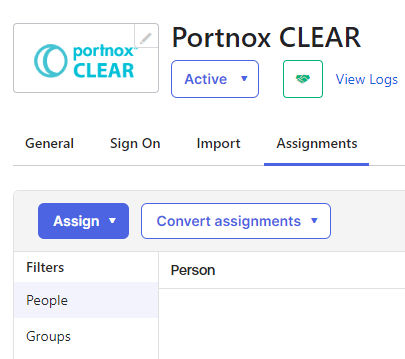 Important:You must assign the application to all Okta users or groups that you want to log in to the ZTNA Secure Access Portal using Okta SSO.
 -
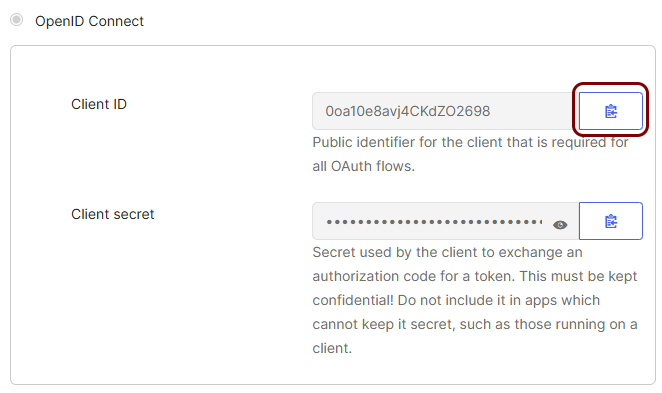
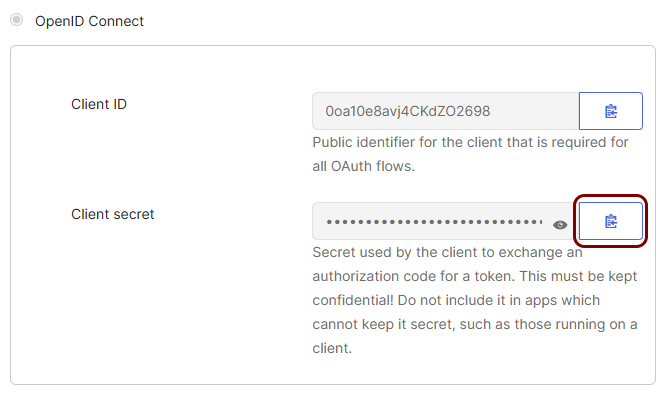
In the Sign On tab, scroll down to the OpenID Connect section and
click on the copy button to copy the Client ID value.
-
Go back to the Portnox Cloud screen on another browser tab. Paste the copied metadata URL into the
Client ID field.
-
Go back to the Okta screen on another browser tab. Click on the copy button to copy the Client
secret value.
-
Go back to the Portnox Cloud screen on another browser tab. Paste the copied metadata URL into the
Client Secret field.
-
In the left-hand menu of the Okta administrative console, click on the Applications
option to expand the menu, and then click on the Applications option below.
-
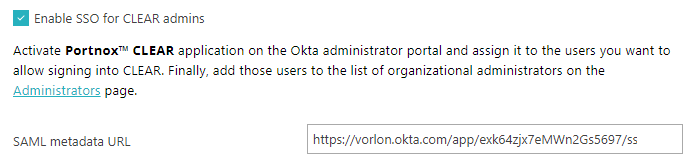
If you want users to use Okta SSO when logging in to Portnox Cloud, in the Logging into Portnox Cloud with
Okta SSO section, activate the Use Okta SSO-SAML for Portnox admins
checkbox.
To enable SSO for Portnox Cloud admins, you need to add an application to your Okta directory.
-
In the left-hand menu of the Okta administrative console, click on the Applications
option to expand the menu, and then click on the Applications option below.
Your browser will open the Okta Applications pane.
-
In the right-hand side pane of the Applications pane, click on the Browse App
Catalog button.
Your browser will open the Browse App Integration Catalog pane.
-
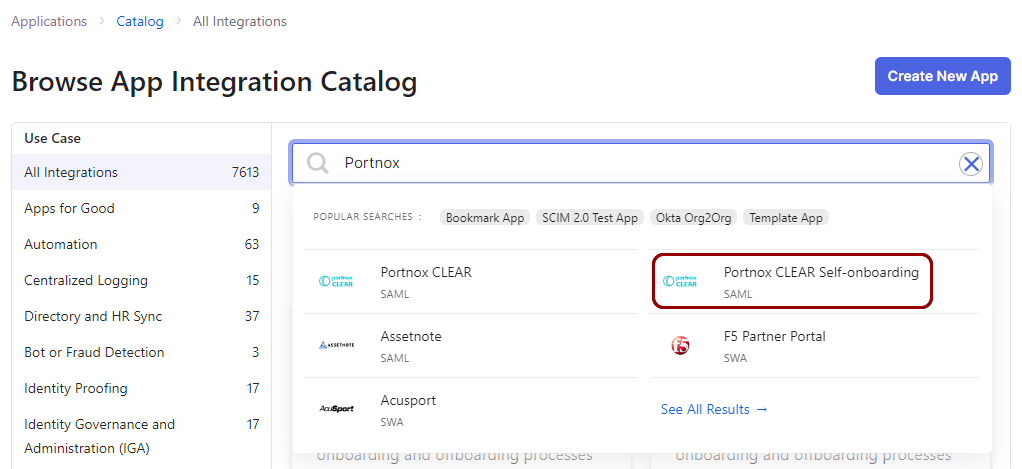
In the Search... field on the Browse App Integration Catalog pane,
type Portnox, then click on the Portnox CLEAR application tile
below.
-
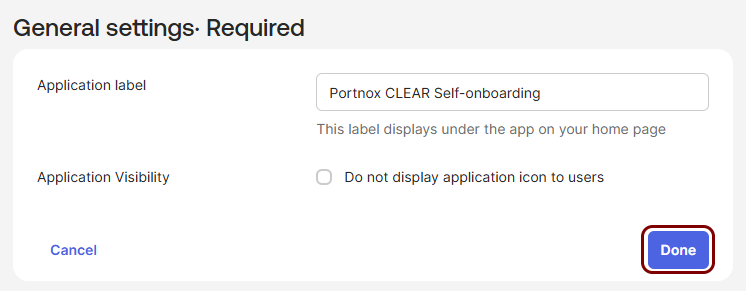
In the General settings Required pane, click on the Done
button.

-
In the Assignments tab, click on the Assign button to assign the
application to users or groups.
Important:You must assign the application to all Okta users or groups that you want to log in to Portnox Cloud as administrators using Okta SSO.
-
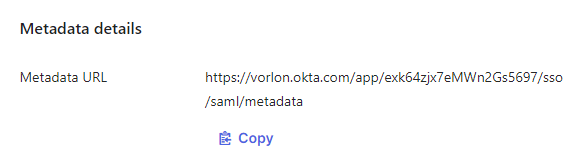
In the Sign On tab, scroll down to the Metadata details section and
click on the copy button to copy the Metadata URL value.
-
Go back to the Portnox Cloud screen on another browser tab. Paste the copied metadata URL into the
SAML metadata URL field.
-
In the left-hand menu of the Okta administrative console, click on the Applications
option to expand the menu, and then click on the Applications option below.
-
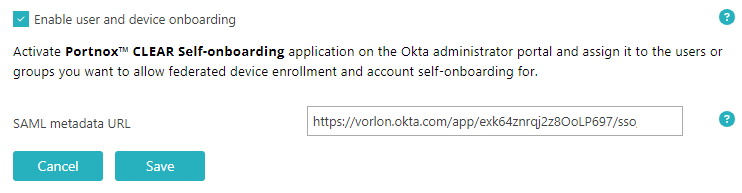
If you want to onboard users and devices onto your network using Okta SSO, in the Self onboarding with Okta
SSO section, activate the Use Okta SSO-SAML when onboarding users and devices onto the
network checkbox.
To enable Portnox Cloud onboarding through Okta SSO, you need to add an application to your Okta directory.
-
In the left-hand menu of the Okta administrative console, click on the Applications
option to expand the menu, and then click on the Applications option below.
Your browser will open the Okta Applications pane.
-
In the right-hand side pane of the Applications pane, click on the Browse App
Catalog button.
Your browser will open the Browse App Integration Catalog pane.
-
In the Search... field, type Portnox, then click on the
Portnox CLEAR Self-onboarding application tile below.
-
In the General settings Required pane, click on the Done
button.
-
In the Assignments tab, click on the Assign button to assign the
application to users or groups.
Important:You must assign the application to all Okta users or groups that you want to be able to connect to the networks managed by Portnox Cloud.
-
In the Sign On tab, scroll down to the Metadata details section and
click on the copy button to copy the Metadata URL value.
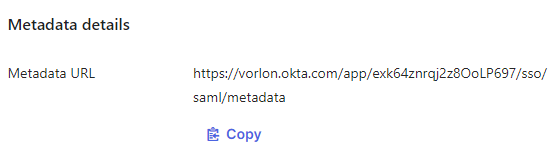
-
Go back to the Portnox Cloud screen on another browser tab. Paste the copied metadata URL into the
SAML metadata URL field.
-
In the left-hand menu of the Okta administrative console, click on the Applications
option to expand the menu, and then click on the Applications option below.
-
Under the OKTA UNIVERSAL DIRECTORY section, click on the Force sync
link.
Portnox Cloud will start synchronizing immediately in the background with your Okta directory. If you do not click Force sync, the synchronization process will be started automatically later.
 Note:If your Okta directory is very large, this process can take up to approximately an hour.
Result: Your Okta Workforce Identity Cloud integration is now active. You can authenticate devices on your network using the Okta directory.