Onboard a group of IoT devices using Meraki IPSK
In this topic, you will learn how to onboard a group of IoT devices to a network managed by Portnox™ Cloud by using the Cisco Meraki IPSK (identity pre-shared key) configuration.
Cisco Meraki switches provide an option to use identity pre-shared keys (IPSK) with third-party RADIUS servers. In simple terms, this means that different devices can use different pre-shared keys (PSK) to access the same SSID, and each pre-shared key is valid for specific MAC addresses only. This setup enhances security by introducing a key element in addition to the MAC address, and from the device’s point of view, the network appears just like a regular WPA2/WPA3 Personal network with a shared key.
Configure groups, policies, and accounts in Portnox Cloud for each IPSK
In this section, you will configure Portnox™ Cloud custom RADIUS policies, groups, and MAC-based accounts – one set for each specific identity pre-shared key (IPSK).
-
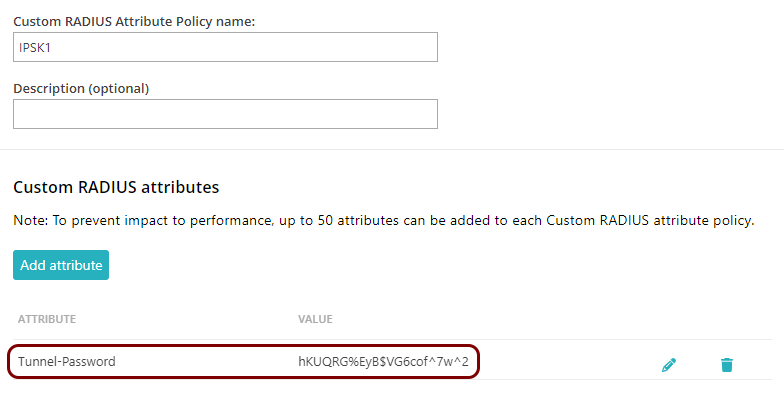
In Portnox Cloud, create a custom RADIUS attribute policy for the IPSK by clicking on .
Note: For more detailed information on how to configure custom RADIUS policies in Portnox Cloud, see the following topic: Create or edit a custom RADIUS attribute policy.
- Provide the Custom RADIUS Attribute Policy name that identifies this IPSK and click on the Add attribute button.
- As Attribute name, enter Tunnel-Password, and as Value, enter the pre-shared key.
- Click on the Save button to save the policy.
Example:
-
Create a new group for the IPSK by clicking on .
Note: For more detailed information on how to configure groups in Portnox Cloud, see the following topic: Create a group.
-
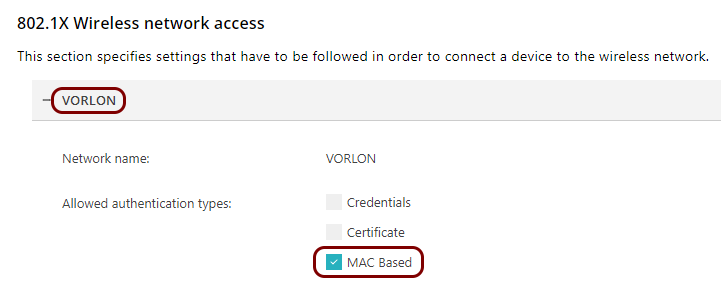
In the 802.1X Wireless network access section, click on the Add Wi-Fi
network link, provide the Network name (SSID), and activate the
MAC Based checkbox in the Allowed authentication types
section.
Example:
-
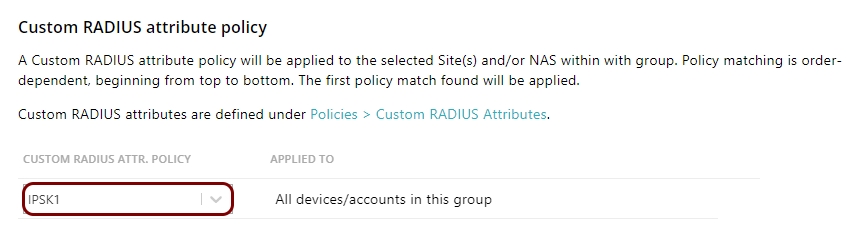
In , select the policy you created earlier.
Example:
-
In the 802.1X Wireless network access section, click on the Add Wi-Fi
network link, provide the Network name (SSID), and activate the
MAC Based checkbox in the Allowed authentication types
section.
-
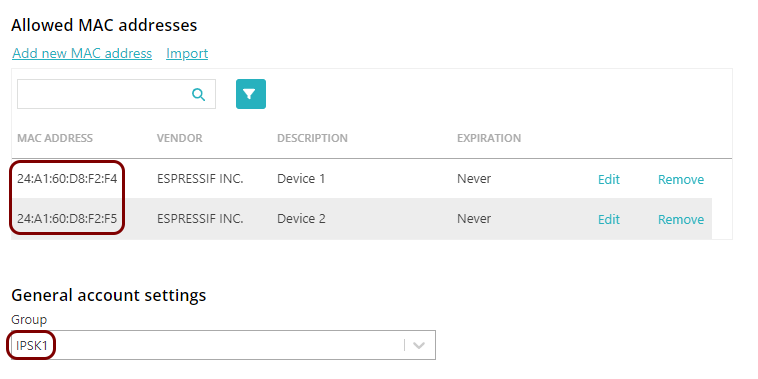
Create a new MAC-based account for the IPSK by clicking on
Note: For more detailed information on how to create MAC-based accounts in Portnox Cloud, see the following topic: Create a MAC-based account.
- In the Allowed MAC addresses section, add the MAC addresses of all the devices that are to use this identity pre-shared key (IPSK).
- In the General account settings section, select the group that you created earlier.
- Click on the SAVE ACCOUNT button to save the account.
Example:
Configure your Meraki access point to use identity pre-shared keys
In this section, you will configure your Meraki access point using the Meraki portal to use identity pre-shared keys (IPSK) with the Portnox RADIUS server.
- Configure a new SSID or an existing SSID in the Meraki portal by clicking on
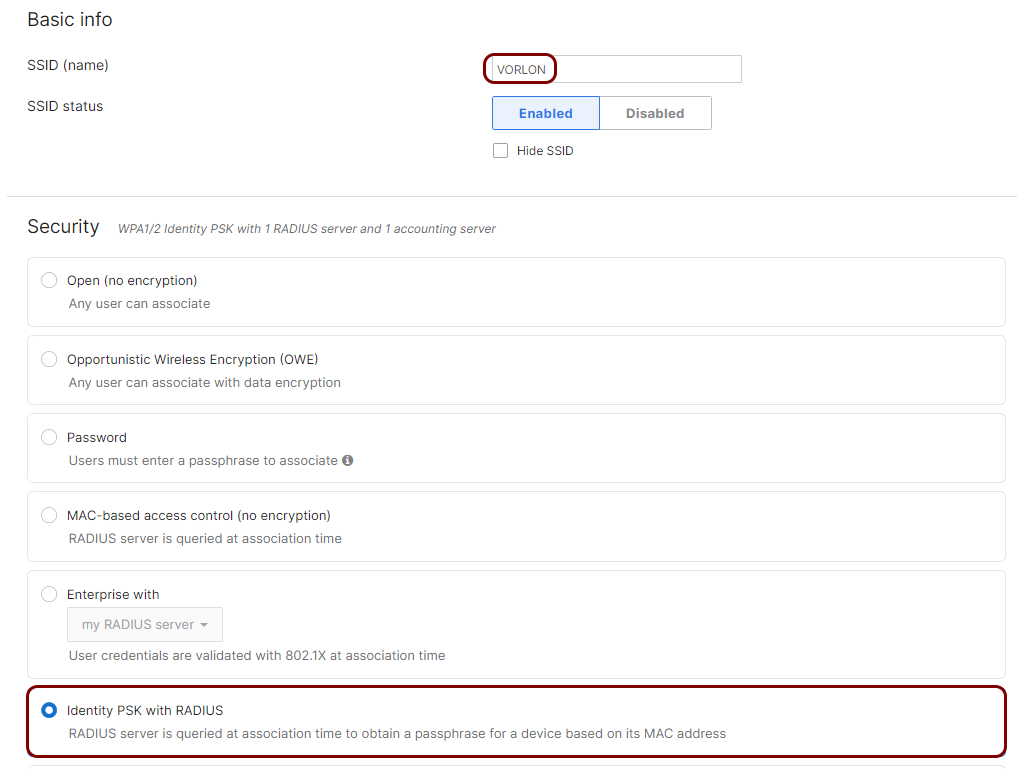
-
In the Security section, select the Identity PSK with RADIUS
option.
Example:
-
In the RADIUS section, add the Portnox Cloud RADIUS servers.
Note: For more detailed information on how to configure Meraki access points, see the following topic: Wi-Fi employee access – Cisco Meraki.
- Click on the Save button to save your configuration.
Configure the devices to use the identity pre-shared key
In this section, configure your devices just as if you were using a typical WPA2/WPA3 Personal network with a common shared key. Use specific identity pre-shared keys for specific MAC addresses.