Configure Private Access with Azure container instances
In this topic, you will learn how to configure the Portnox™ Private Access service to allow your users to access your private web applications hosted in Microsoft Azure and accessible within an Azure private network, by using a Docker container in an Azure container instance.
In this scenario:
-
You want your on-premises and remote users to be able to access private web applications that are hosted in Azure.
-
You need to host a Portnox Docker container in Azure, for example, in Azure container instances, and in the same Azure local network as the hosted web applications.
We assume that you have already configured Azure and that another container instance runs a web application, accessible via HTTP within your Azure local network.
Set up the Private Access gateway in Portnox Cloud
In this section, you will set up a Private Access gateway in Portnox Cloud, create a container instance in Azure, and run the Portnox Private Access Docker container.
-
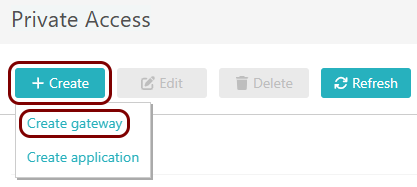
In the top menu of Portnox Cloud,
select the Private Access option. Then, on the Private Access screen,
click on the + Create button and select the Create gateway
option.
-
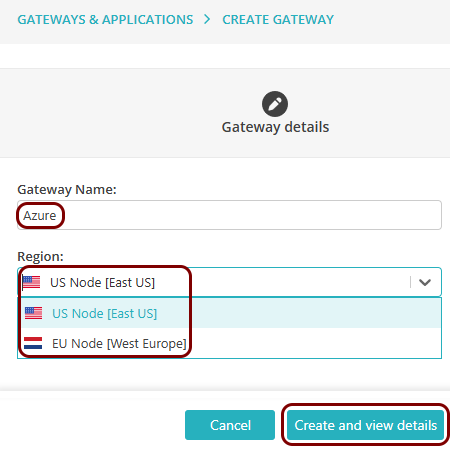
In the Gateway details step, enter a name for this gateway in the
Gateway Name field, and in the Gateway Region field, select either
US Node or EU Node. Then, click on the Create and view
details button.
-
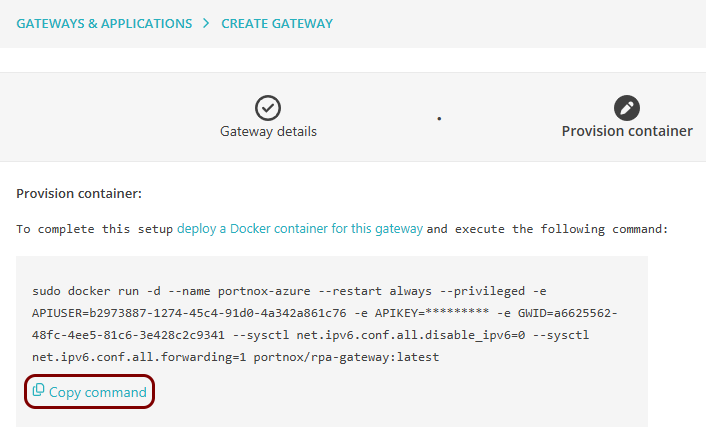
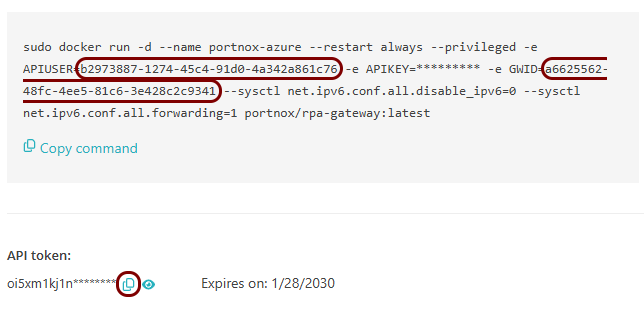
In the Provision container step, click on the Copy
command link under the displayed Docker command to copy the command to the clipboard.
-
Create an Azure container instance:
-
In the Azure portal, in the top-bar search field, type: container instances and then
click on the Container instances entry below.

-
On the Container instances pane, click on the Create button
to create a new container instance.

-
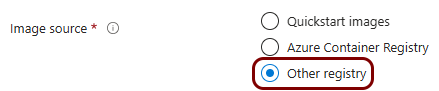
On the Create container instance pane, select and enter your details as required,
and in the Image source field, select the Other registry
option.
-
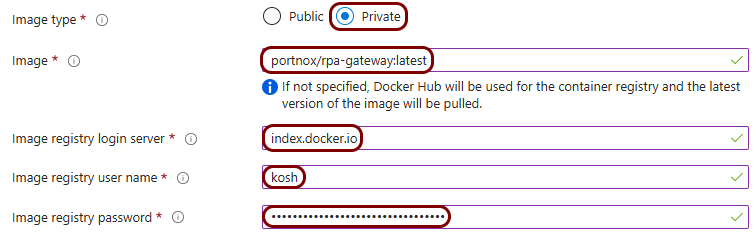
In the Image type field, select the Private option, in the
Image field, type portnox/rpa-gateway:latest, in the
Image registry login server, type index.docker.io, and in
the Image registry user name and Image registry password
fields, type your credentials for a free Docker Hub account.
Note: You can also select a Public registry, but Docker Hub has introduced a pull rate limit on Docker images, which may impact the creation of your container instance if not using a Docker Hub account.
-
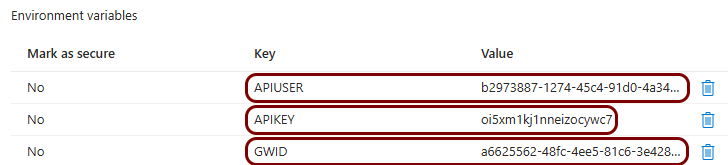
In the Advanced tab, in the Environment variables section,
add the following environment variables:
APIUSER The value in the Docker command after the APIUSER= string (see previous step) APIKEY The value copied from the API token section in Portnox Cloud by clicking the ⧉ icon. GWID The value in the Docker command after the GWID= string For example:
Docker command:
Environment variables:
-
In the Azure portal, in the top-bar search field, type: container instances and then
click on the Container instances entry below.
Set up the Private Access application in Portnox Cloud
In this section, you will set up a Private Access application in Portnox Cloud and configure it to access your private web application hosted in the same local network as the Docker container.
-
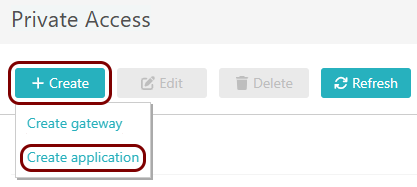
In the top menu of Portnox Cloud, select the Private Access option. Then, on the
Private Access screen, click on the + Create button and select
the Create application option.
-
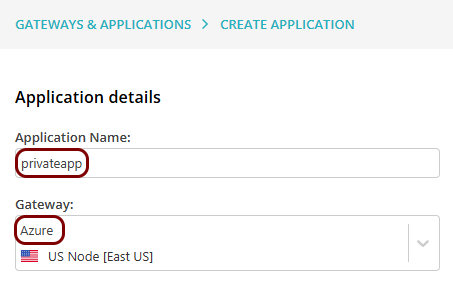
On the Application details screen, enter a name for the application in the
Application Name field, and in the Gateway field, select the
gateway that you have just created.
Note: The Application Name must be a valid subdomain name, because the URL will be constructed using this name. You should only use lowercase letters, digits, and hyphens.
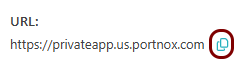
Result: If you want to use the Portnox URL, you can copy the URL for your application by clicking on the ⧉ icon.
- Optional:
If you want to use a URL in your own domain for the application:
-
Activate the Use a custom URL linked to an SSL certificate checkbox.

-
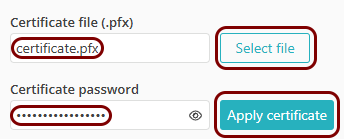
In the Upload SSL certificate section, click on the Select
file button, and upload the certificate and private key for the custom URL (in the PKCS #12 format). Then, enter the password for
the private key in the Certificate password field, and click on the Apply
certificate button.
 Note: You must buy the specific subdomain certificate from the relevant certificate authority, or you can use a wildcard certificate for all your subdomains.
 -
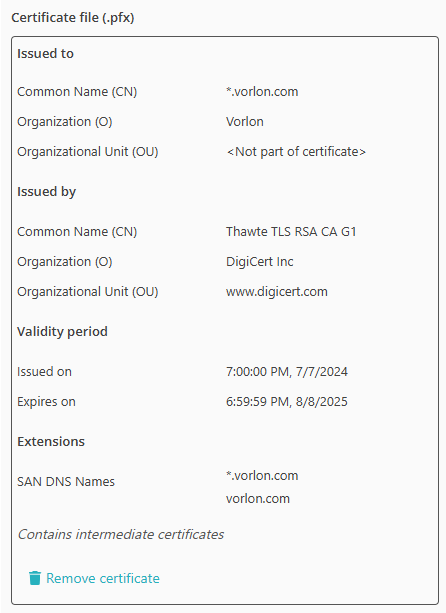
Verify the details displayed for the certificate.
-
If you are using a certificate with multiple domains/subdomains or a wildcard certificate, in the
Domain field, select the relevant domain for your application’s URL, and in the
Suffix field (if active – only for wildcard certificates), enter the
subdomain.
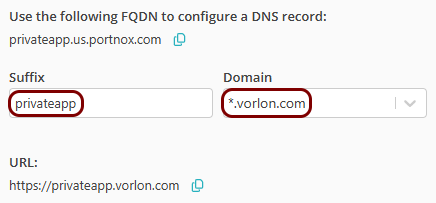
In this example, your application’s URL will be: privateapp.vorlon.com.
-
Activate the Use a custom URL linked to an SSL certificate checkbox.
-
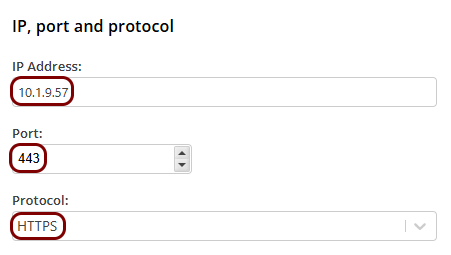
In the IP, port and protocol section, enter the details of the hosted web application in the
IP Address, Port, and Protocol
fields.
Note: Use the IP address and port configured in your Azure instance that hosts your application. Ensure that the Docker container and the web application instance use the same Azure virtual network.
- Optional: In the Policy assignments section, change the setting to Application-based and then select an access control policy and a risk assessment policy if you want to control access to this application without using groups.
- Click on the Save button to save your configuration.
Result: Your users can now access your private web application by typing the URL in their browser, as long as they are enrolled with AgentP. AgentP will validate their certificate and provide access based on Portnox Cloud access and risk assessment policies.