How to troubleshoot errors with the guest network and the captive portal service
In this topic, you will learn how to troubleshoot typical problems with the guest network and the captive portal.
HTTPS certificate errors
When guests connect to the guest portal on the NAS, they may see an error or may be unable to connect. Example errors: Your connection is not private; This site is not secure; Potential security risk ahead; Self-signed root certificate.
-
Potential reason 1: This is not caused by Portnox Cloud. Your guests connect to your NAS device’s web portal
first (to understand the process better, read this topic). Your NAS device’s
internal web server uses a self-signed certificate for the guest server’s domain name.
Solution: Purchase a certificate for your guest network domain name and configure your NAS’s web server to use this valid certificate instead of the self-signed certificate. Refer to your NAS documentation for more information.
-
Potential reason 2: You set up your NAS virtual interface incorrectly by using a non-private IP address.
This causes your router to connect you to the Internet instead of the virtual interface. As a result, your browser
tries to access another website that requires a secure connection.
Solution: Use a private IP address for your virtual interface: 10.x.x.x, 172.16.x.x–172.31.x.x, or 192.168.x.x. Do not use an IP address that is already used by another device in your network. Do not use 1.1.1.1, it is no longer a private address.
Chrome tracing
To help us diagnose problems with your captive portal configuration, we need you to provide us with a Chrome trace. Here are the steps to create such a trace on a Windows computer.
-
Install Chrome Canary.
The Chrome trace must be done on a browser with out-of-the box configuration and no extensions. The best way to do it is to install Chrome Canary, which is a standalone browser.
-
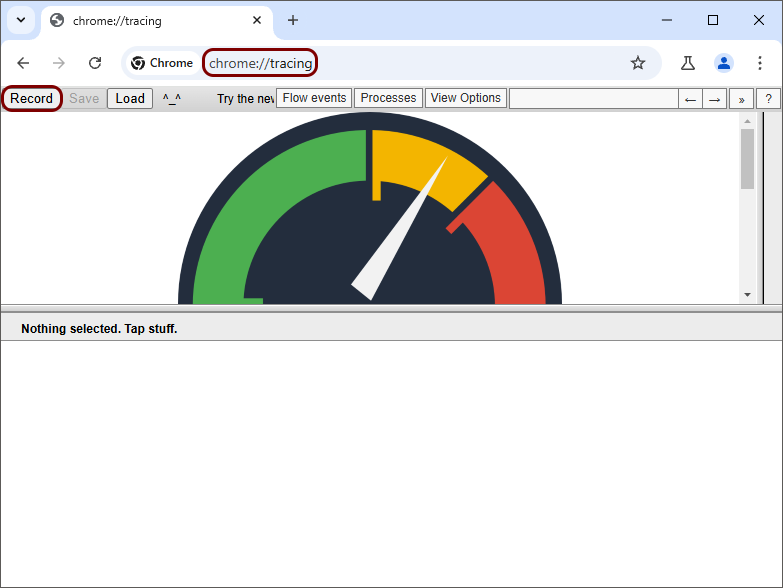
In the address bar, type: chrome:tracing, press Enter, and then click on the
Record button.

-
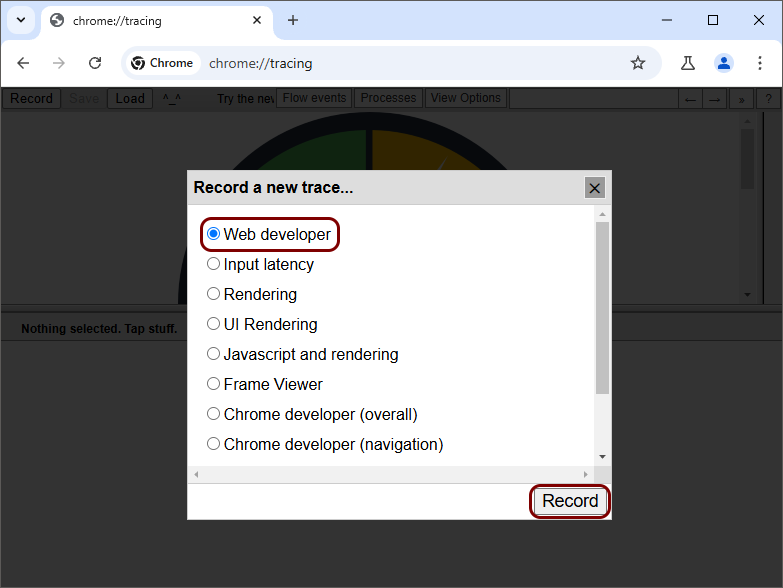
In the Record a new trace window, select the Web developer option, and
then click on the Record button.

- Change your Wi-Fi configuration to the guest network, and then open the captive portal in Chrome Canary in a new tab.
-
When you’re done recreating the steps that need to be recorded for troubleshooting purposes, go back to the first
tab, and then click on the Stop button.

-
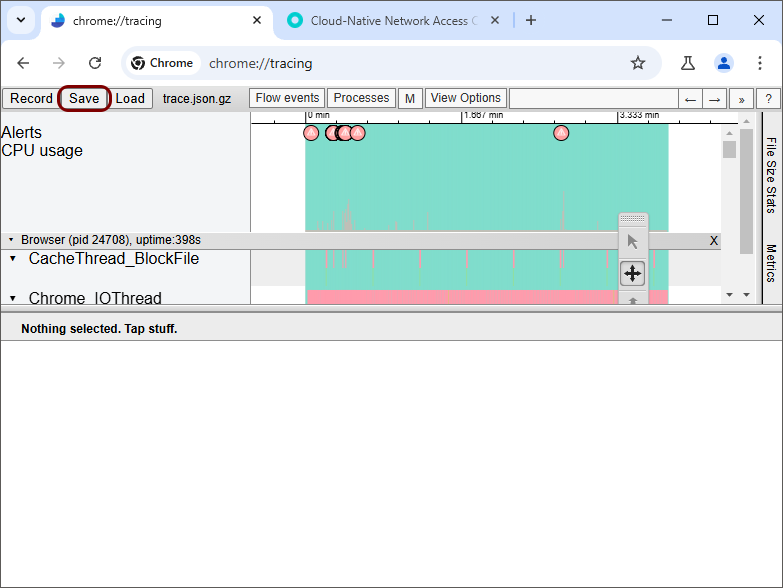
When Chrome is finished with processing the trace, click on the Save button and save the
.tar.gz trace file.

- Send the .tar.gz file to Portnox Support by email or attach it to your support ticket.

