Provision administrator accounts from Okta using SCIM
In this topic, you will learn how to create and manage Portnox™ Cloud administrator accounts in Okta using SCIM.
Before you begin, you must integrate Portnox Cloud with Okta and turn on Okta SSO for Portnox Cloud administrators. Portnox Cloud administrators from the Okta repository need this integration to log in with Okta SSO. For more information, see the following topic: Integrate with Okta Workforce Identity.
SCIM (System for Cross-domain Identity Management) is an open standard protocol for managing user identities across applications. With SCIM, you create and manage Portnox Cloud administrator accounts in Okta. When you assign Okta users to the SCIM application, Portnox Cloud creates administrator accounts for these users. When you change the attributes of these users in Okta, Portnox Cloud updates their administrator accounts. When you unassign users, Portnox Cloud deactivates their administrator accounts.
Create an application API integration in Portnox Cloud
In this section, you will create a SCIM application API integration in Portnox Cloud.
-
In the Cloud portal top menu, click on the Settings option.

-
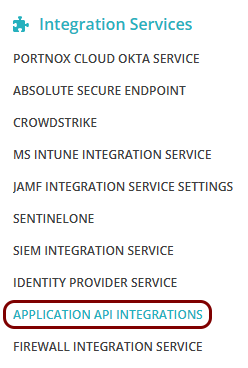
In the Cloud portal left-hand side menu, click on the option.
-
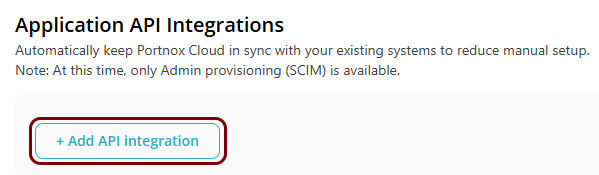
Click on the Add API integration button.
-
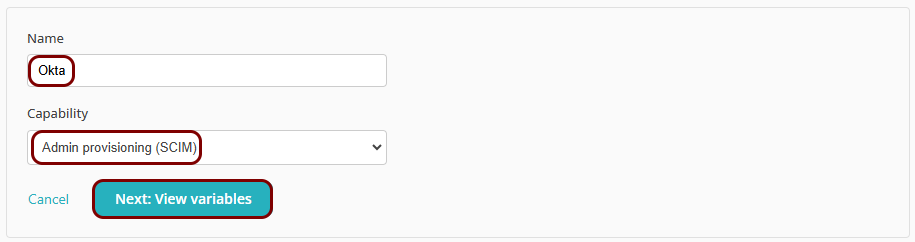
Enter a Name for the integration and in the
Capability field, select the Admin provisioning (SCIM) option.
Then, click on the Next: View variables button.
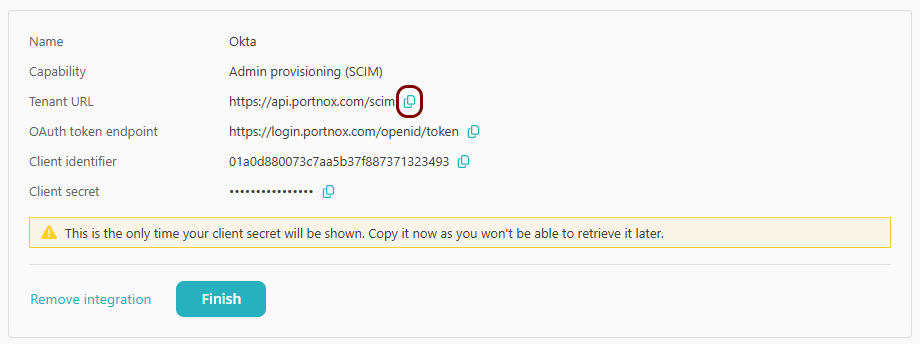
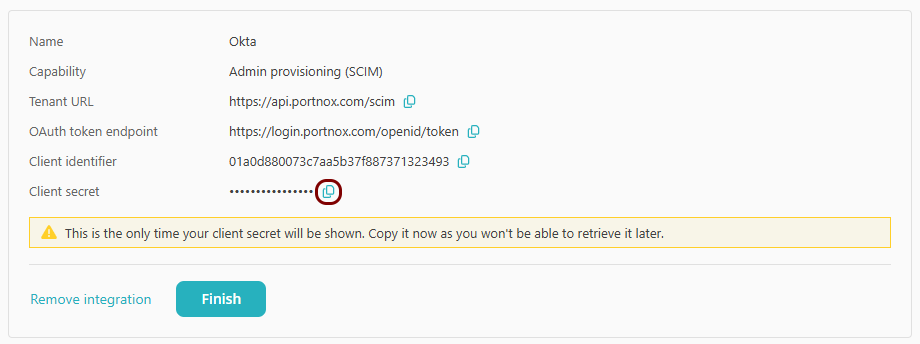
Result: Portnox Cloud displays the values that you need for the Okta application: Tenant URL, OAuth token endpoint, Client identifier, and Client secret.

Create a new Okta app integration
In this section, you will access the Okta Admin Console and use it to create a new app integration for SCIM provisioning.
-
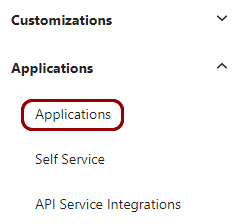
In the left-hand side menu, click on the option.
-
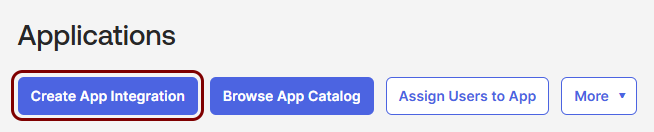
In the right-hand side pane, click on the Create App Integration button.
-
In the Create app integration window, select the SAML 2.0 option, and
then click on the Next button.
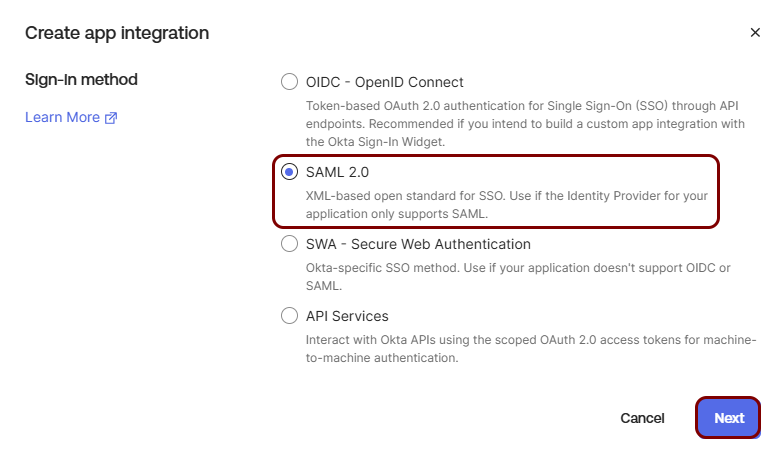 Note:Okta offers SCIM provisioning only for custom SAML 2.0 and SWA app integrations. Do not select the OIDC - OpenID Connect or API Services option.
 -
In the General Settings step, enter a name in the App name field, and
then click on the Next button.

In this example, we used the name Portnox SCIM integration for the new application but you can use any name you like.
-
In the Configure SAML step, enter https://portnox.com in the
Single sign-on URL and Audience URI (SP Entity ID) fields. Then,
click on the Next button.
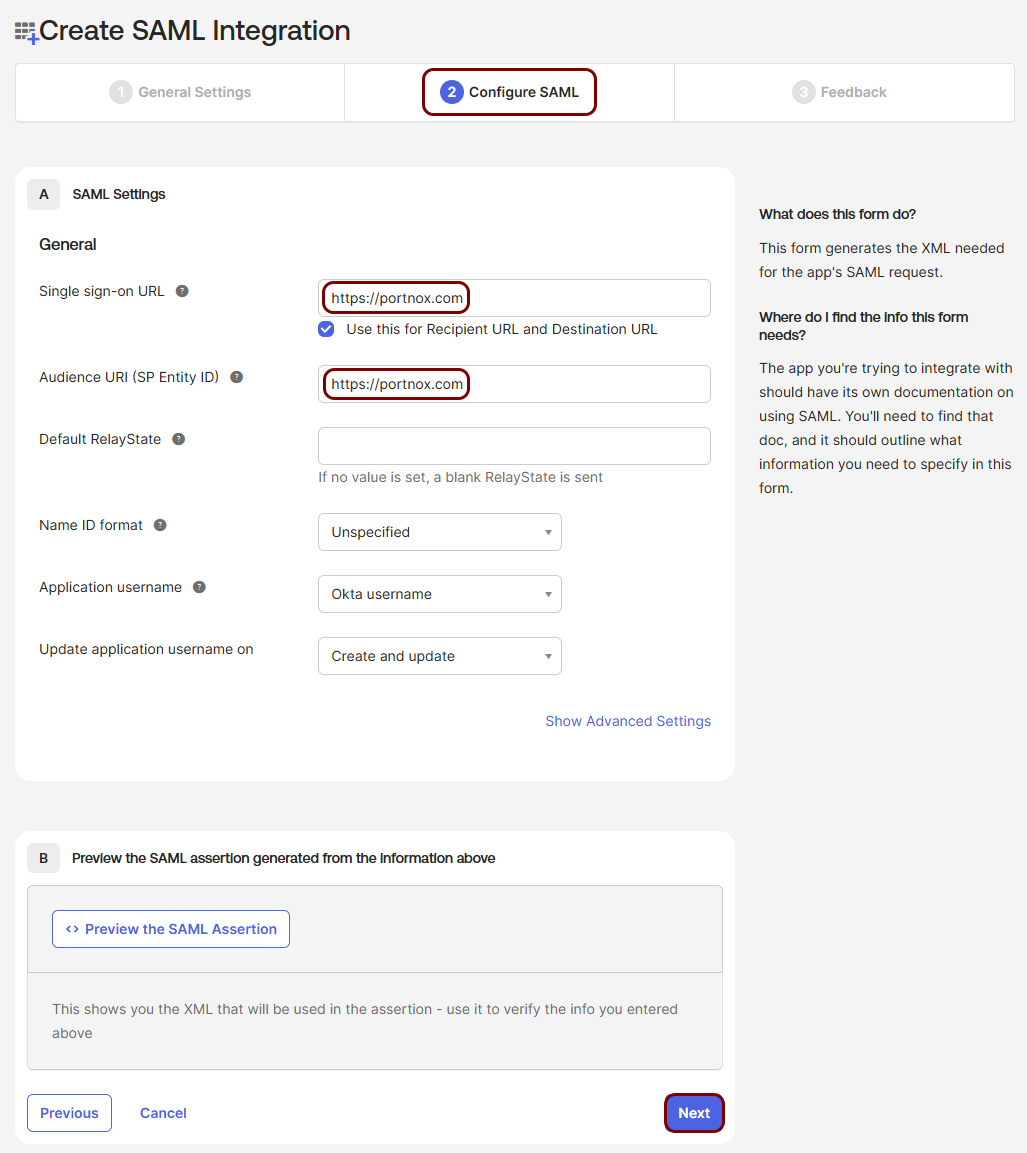 Note:Portnox Cloud uses this application only for provisioning, not for single sign-on. The SAML values are placeholders.
 -
In the Feedback step, select the option This is an internal app that we have
created, and then click on the Finish button.

-
Enable SCIM provisioning for the application.
-
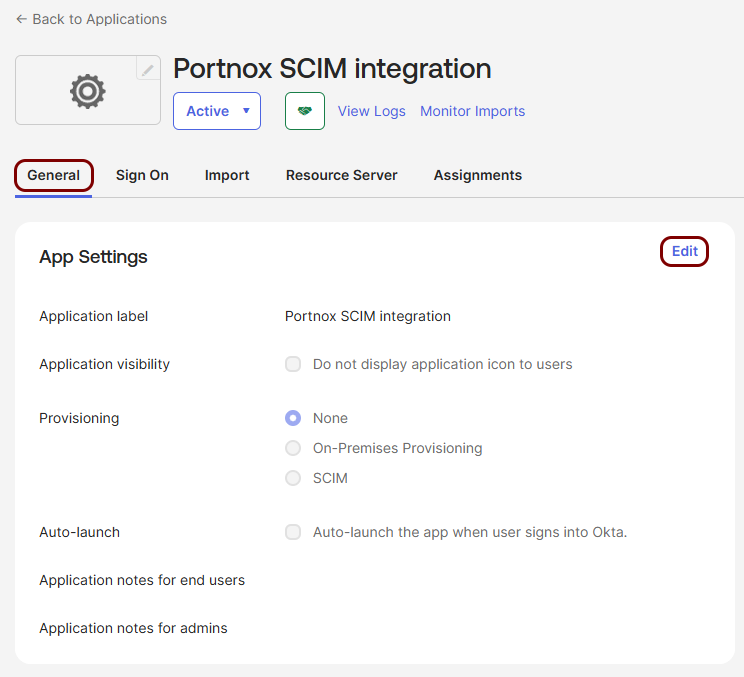
In the General tab, in the App Settings section, click on the
Edit link.
-
In the Provisioning field, select the SCIM option and then
click on the Save button.
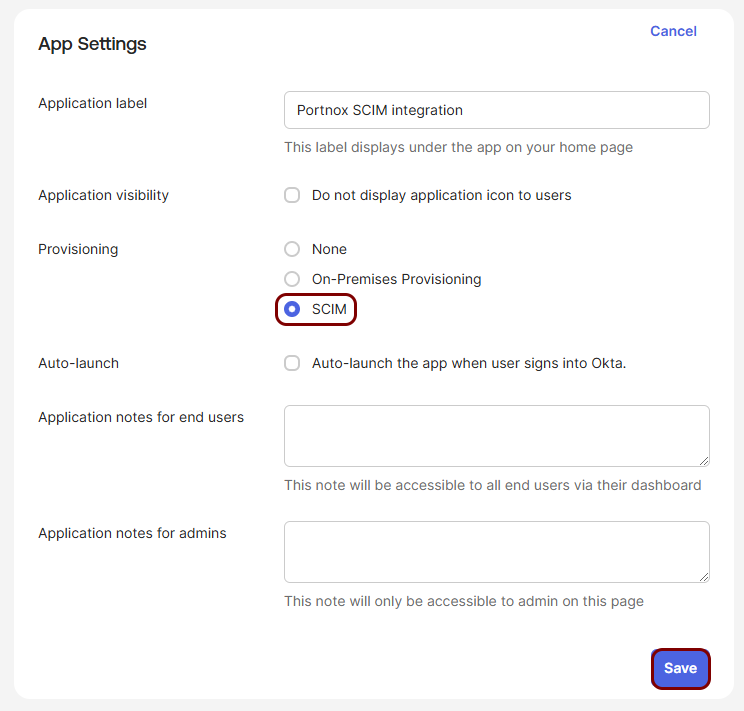
Result: The Provisioning tab appears next to the other tabs of the application.
-
In the General tab, in the App Settings section, click on the
Edit link.
Connect the Okta application to Portnox Cloud
In this section, you will copy the values displayed by Portnox Cloud and paste them in the SCIM connection settings of the Okta application. Then, you will enable the provisioning actions that Okta performs in Portnox Cloud.
-
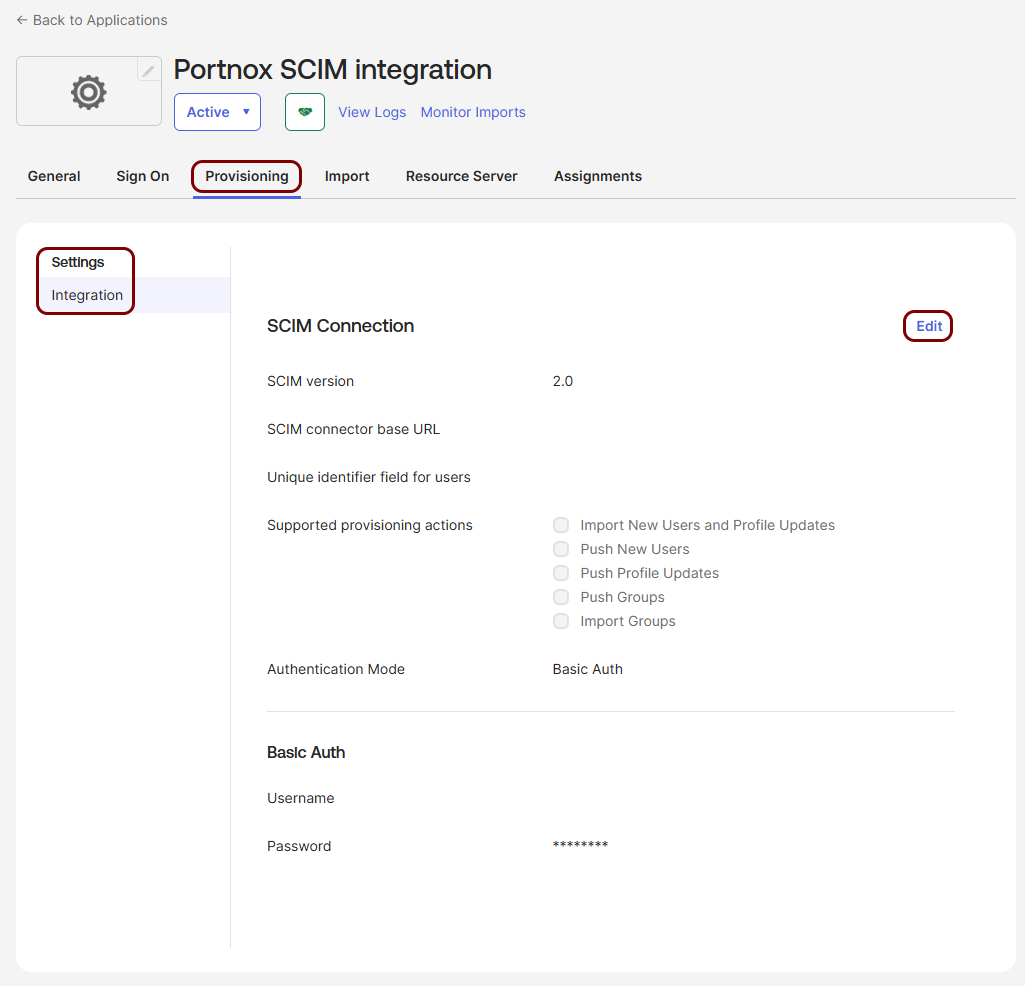
In the Okta tab, click on the Provisioning tab. Then, in the Settings
menu, click on the Integration option, and click on the Edit link in
the SCIM Connection section.
-
In the Portnox tab, click on the ⧉ icon next to the Tenant
URL field to copy the value to the clipboard.
-
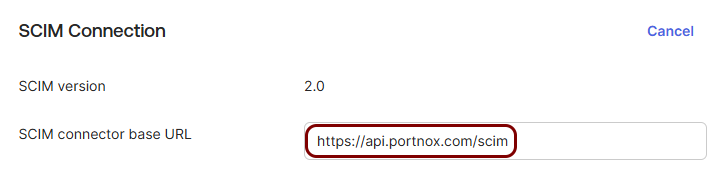
In the Okta tab, paste the copied value into the SCIM connector base URL field.
-
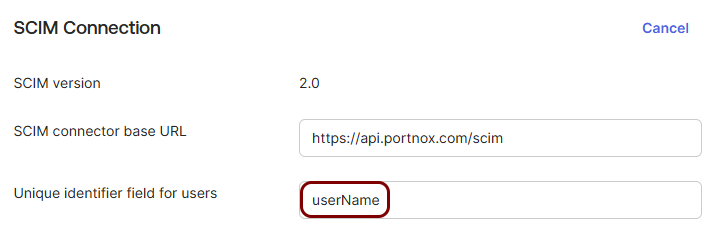
In the Unique identifier field for users field, enter userName.
-
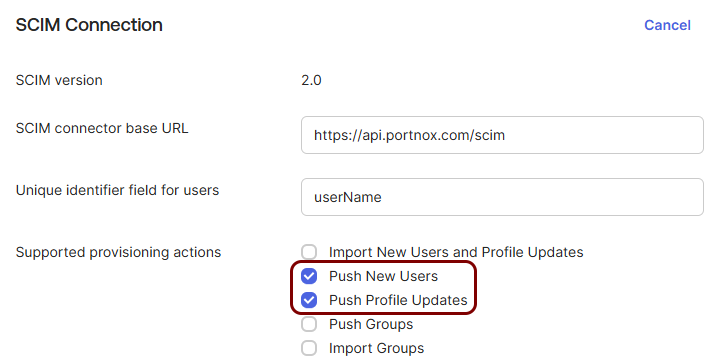
In the Supported provisioning actions field, select the Push New
Users and Push Profile Updates checkboxes. Leave the other checkboxes
cleared.
-
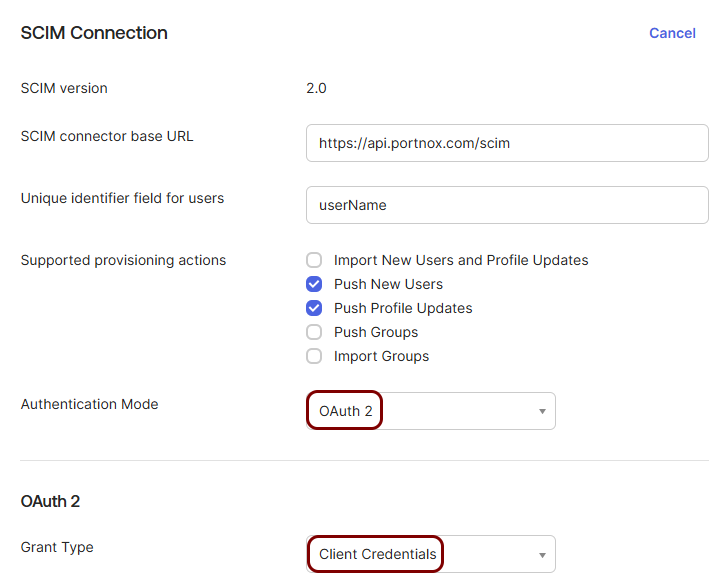
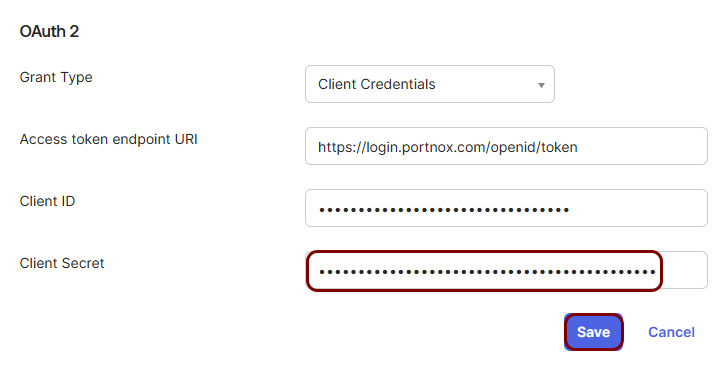
In the Authentication Mode field, select the OAuth 2 option. Then, in
the Grant Type field, select the Client Credentials option.
-
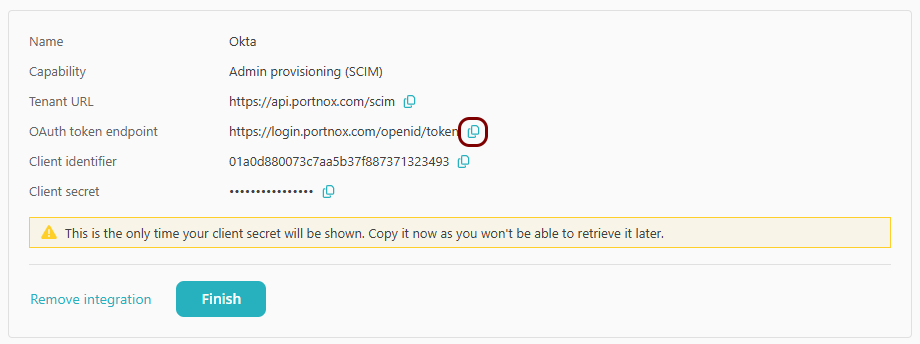
In the Portnox tab, click on the ⧉ icon next to the OAuth token
endpoint field to copy the value to the clipboard.
-
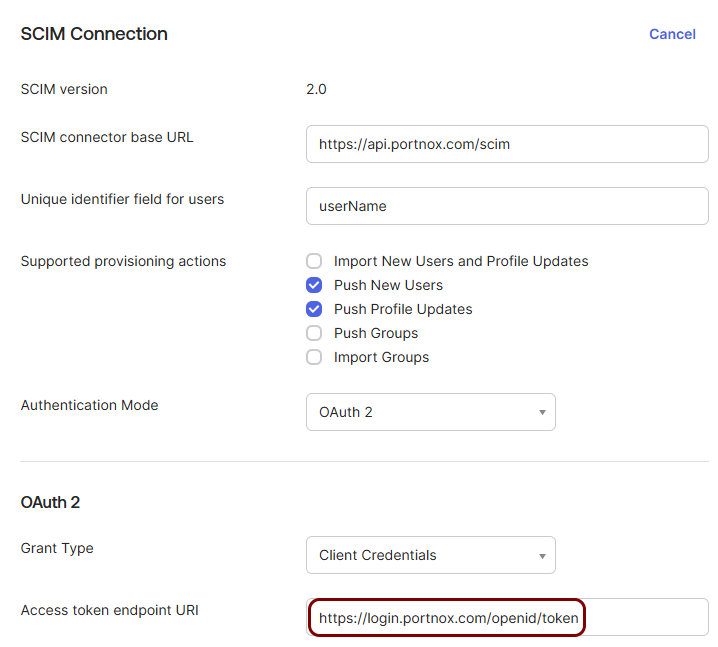
In the Okta tab, paste the copied value into the Access token endpoint URI field.
-
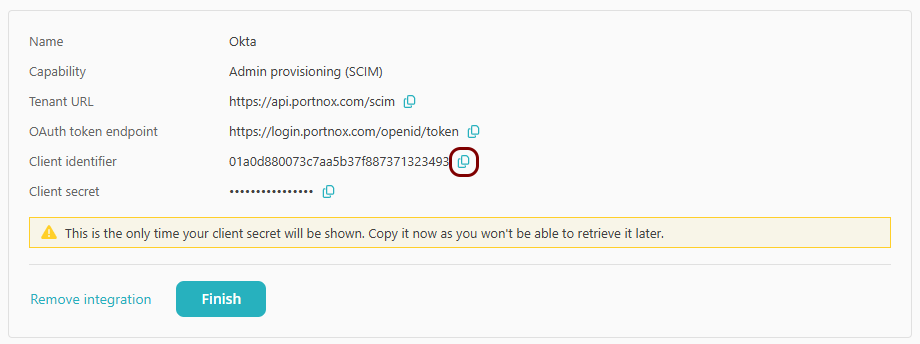
In the Portnox tab, click on the ⧉ icon next to the Client
identifier field to copy the value to the clipboard.
-
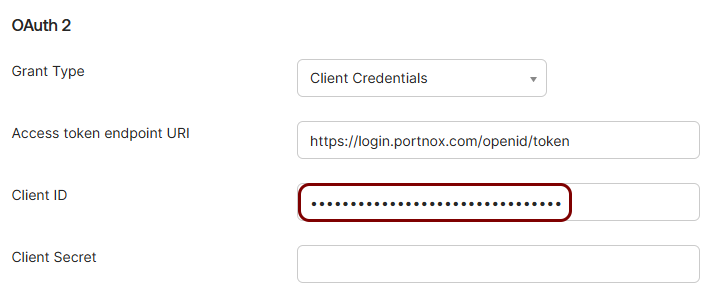
In the Okta tab, paste the copied value into the Client ID field.
-
In the Portnox tab, click on the ⧉ icon next to the Client
secret field to copy the value to the clipboard.
-
In the Okta tab, paste the copied value into the Client Secret field. Then, click on the
Save button.
-
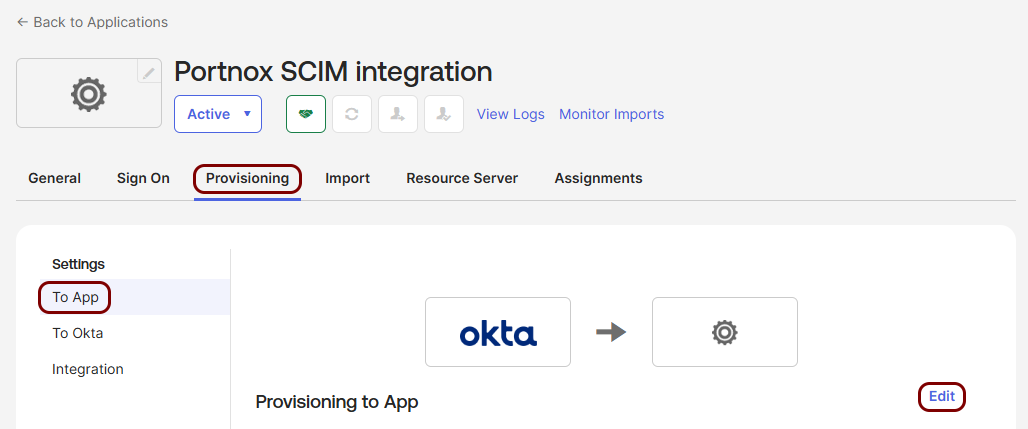
In the Provisioning tab, in the Settings menu, click on the
To App option. Then, click on the Edit link next to the
Provisioning to App heading.
-
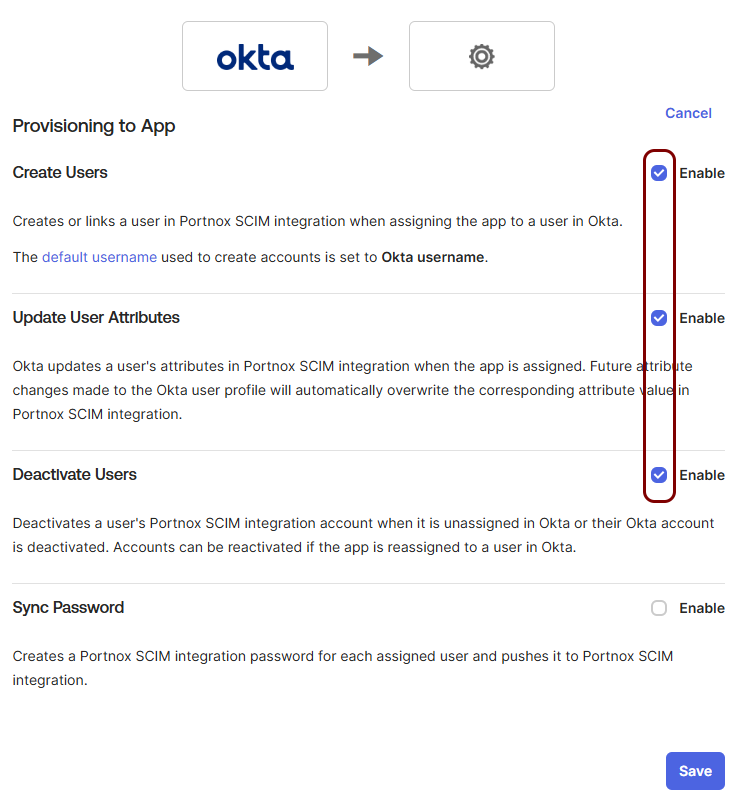
Select the Enable checkboxes next to Create Users, Update
User Attributes, and Deactivate Users. Leave the Sync
Password checkbox deactivated. Then, click on the Save button.
Map the administrator attributes
In this section, you will map the Okta attributes that set the repository and the administrator type of each Portnox Cloud administrator account.
Portnox Cloud uses the following SCIM attributes:
| Target attribute | Purpose | Value | Result |
|---|---|---|---|
| userType | Sets the identity repository of the administrator account. Portnox Cloud uses this repository to authenticate the administrator at login. | Clear | Portnox Cloud repository |
| EntraId | Entra ID repository | ||
| Google Workspace repository | |||
| Okta | Okta repository | ||
| roles[primary eq "True"].value | Sets the administrator type. | FullAdmin | Administrator |
| ReadOnlyAdmin | Read-only Administrator | ||
| GuestAdmin | Guest Administrator | ||
| ReadOnlyGuestAdmin | Guest Administrator + Read-only |
We recommend that you use Okta for the userType attribute.
-
Set the value for the repository.
-
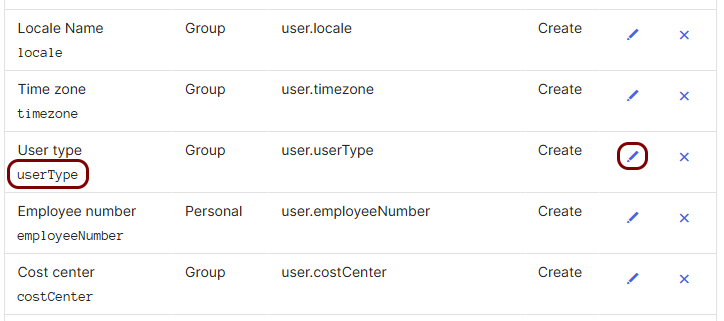
In the Okta tab, in the Provisioning tab, in the SCIM Attribute
Mappings section, scroll down to the list of attributes and then click on the ✎ icon next to the User type attribute.
-
In the Attribute value field, select the Same value for all
users option, and then enter Okta in the field next to it. In the
Apply on field, select the Create and update option. Then,
click on the Save button.

-
In the Okta tab, in the Provisioning tab, in the SCIM Attribute
Mappings section, scroll down to the list of attributes and then click on the ✎ icon next to the User type attribute.
-
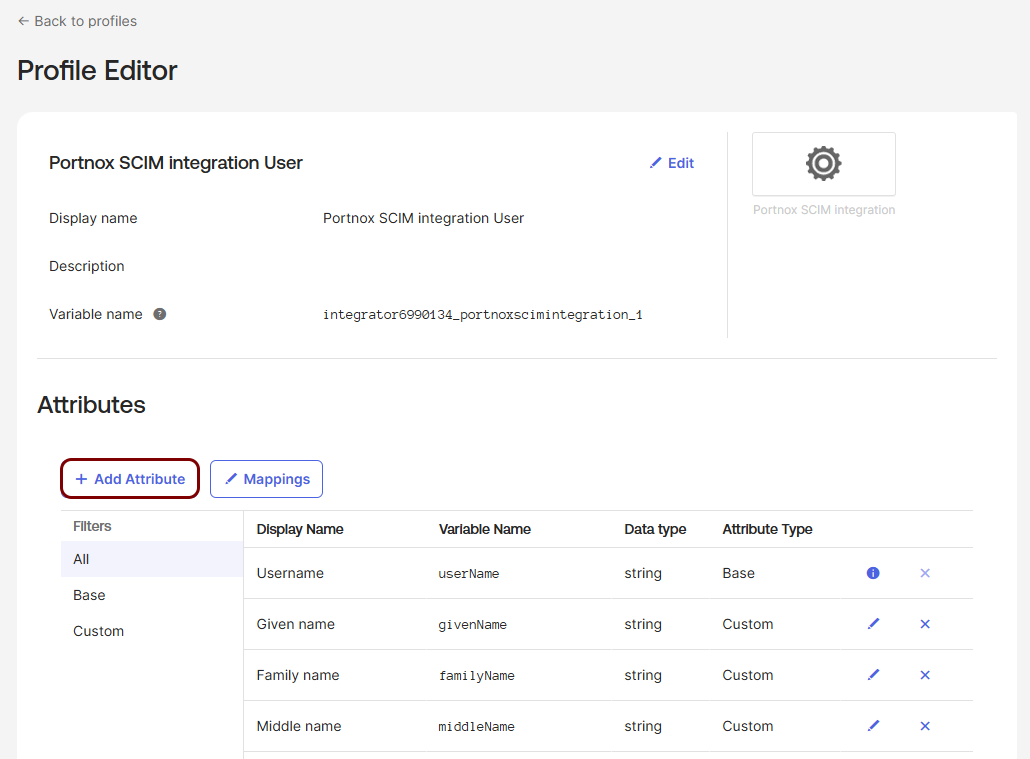
Scroll back up to the top of the section and click on the Go to Profile Editor button.

-
In the Profile Editor pane, click on the Add Attribute button.
-
Add the attribute for the administrator type.
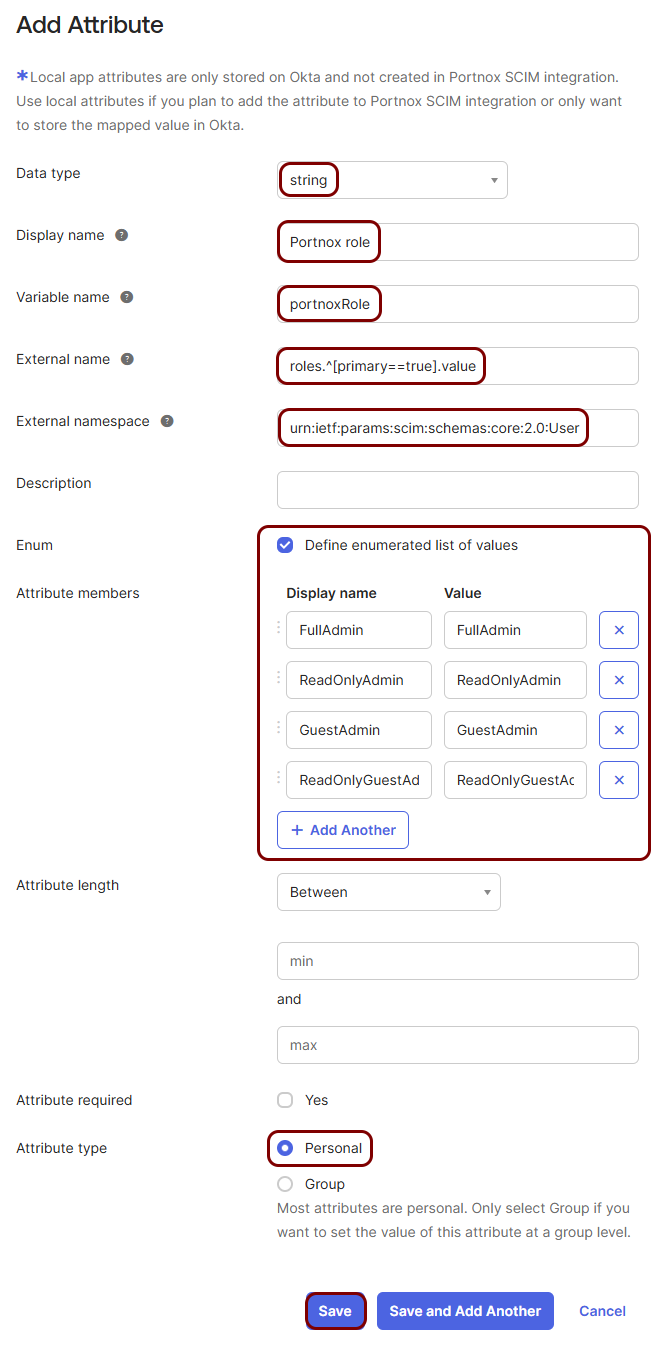
- In the Data type field, select the string option.
- In the Display name field, enter Portnox role.
- In the Variable name field, enter portnoxRole.
- In the External name field, enter roles.^[primary==true].value.
- In the External namespace field, enter urn:ietf:params:scim:schemas:core:2.0:User.
- Select the Define enumerated list of values checkbox, and add the four roles[primary eq "True"].value values from the table above.
- In the Attribute type field, select the Personal option.
- Click on the Save button.
-
Go back to the application. In the left-hand side menu, click on the option, click on the name of the application that you created for SCIM provisioning, and then click
on the Provisioning tab. Then, scroll all the way to the bottom and click on the
Show Unmapped Attributes link.
Result: You can see the Portnox role attribute at the bottom of the SCIM Attribute Mappings list with the Not mapped value.
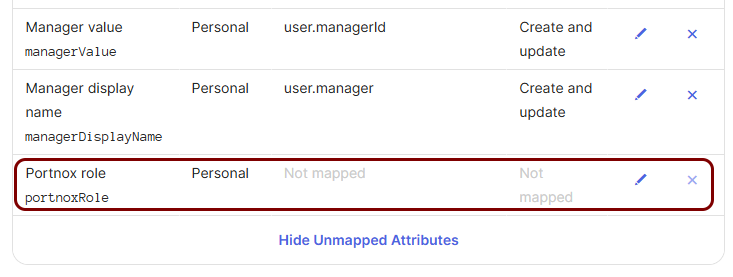
Then, set the administrator type using one of the two approaches described in the following sections.
Map administrator types using an expression
In this section, you will map the administrator type of each Portnox Cloud administrator account using an expression based on Okta user attributes.
In this approach, an expression sets the administrator type of each user based on their Okta attributes, for example their department or job title.
Advantages:
-
You can assign many users to the application at once. Okta sets the administrator type of each user based on their attributes.
-
When users move to a different department or job, Okta updates their administrator type. You only change the application assignments to add or remove Portnox Cloud administrators.
-
You don’t need to choose an administrator type when you assign users. Their department or job title decides it.
Disadvantages:
-
Less granular control. All users with the same attribute value get the same administrator type.
-
You must remember which attribute values give which administrator type.
-
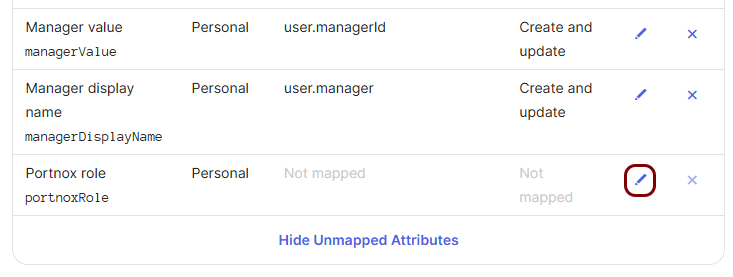
In the Okta tab, in the SCIM Attribute Mappings section, click on the ✎ icon next to the Portnox role attribute.
-
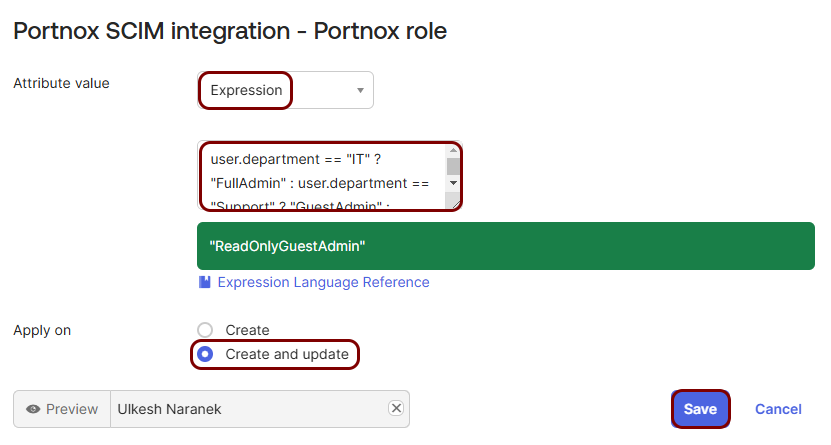
Set the expression for the administrator type.
Set administrator types when assigning users
In this section, you will prepare the administrator type attribute so that you can select the administrator type for each user when you assign them to the application.
In this approach, you select the administrator type for each user when you assign them to the application.
Advantages:
-
Granular control. You choose the administrator type for each user, regardless of their department or job title. For example, if two network administrators work in the IT department, you can give full access to one and read-only access to the other.
Disadvantages:
-
More work when assigning users. You must select the administrator type for each user.
-
More work when managing users. To change the administrator type of a user, you must change their assignment in the application. Changes in the directory don’t affect it.
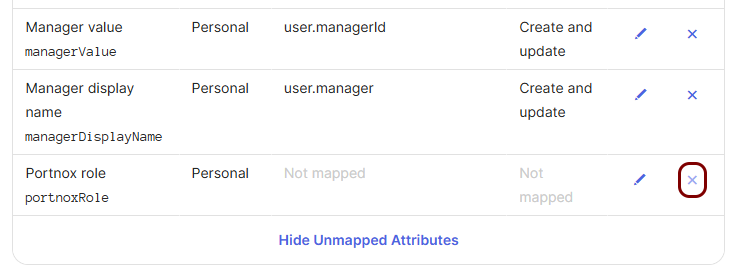
If you map this attribute, Okta overwrites the value that you select when you assign users.
Assign users
In this section, you will select the Okta users that become Portnox Cloud administrators.
-
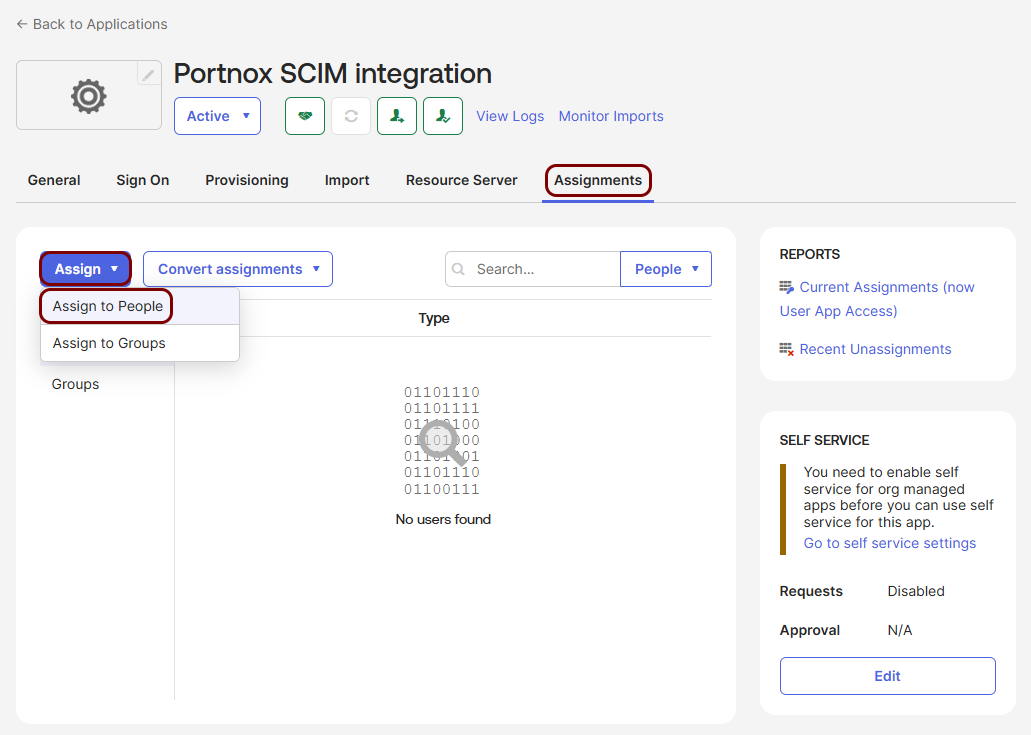
In the Okta tab, click on the Assignments tab of the application, click on the
Assign button, and then select the Assign to People option.
-
Click on the Assign button next to a user that should have a Portnox Cloud administrator
account.
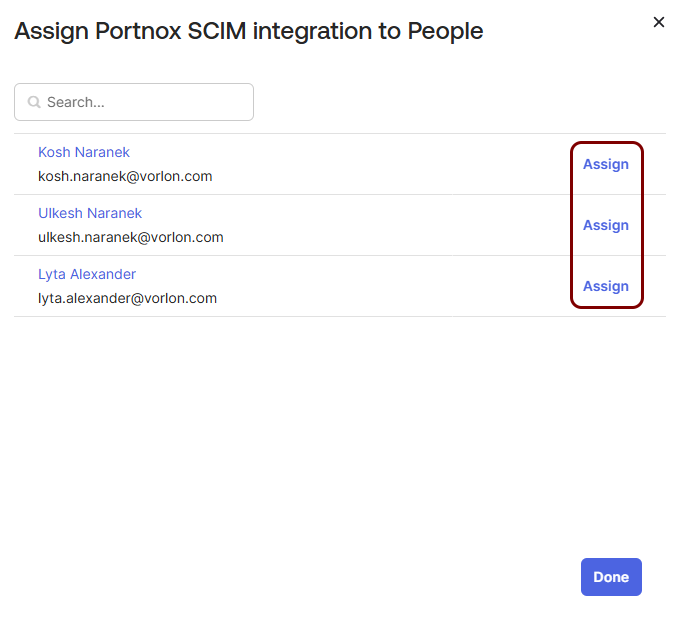 Note:Repeat this step and the next step for each user.
 - Optional:
If you set administrator types when assigning users, in the Portnox role field, select the
administrator type for the user.

Result: The assigned users show in the Assignments tab of the application. Okta provisions them to Portnox Cloud immediately.
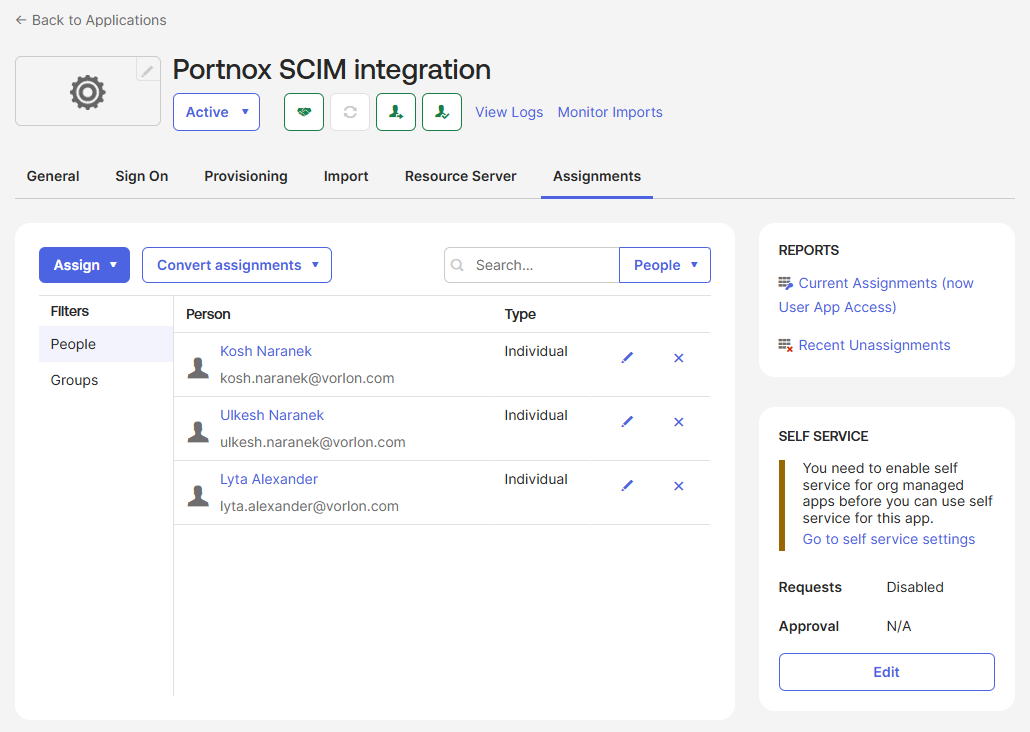
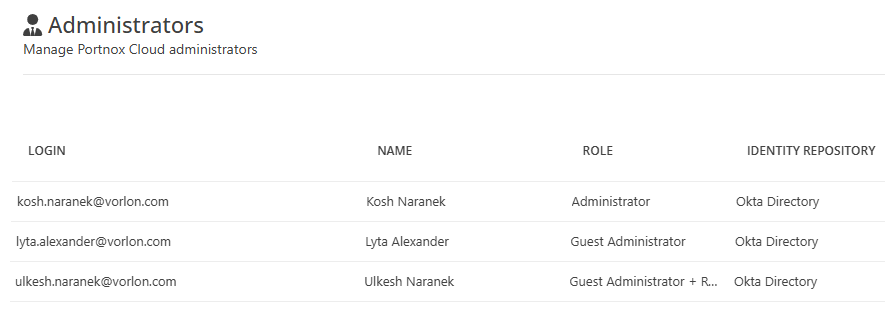
The accounts show in the list in Portnox Cloud.