Edit and configure a group
In this topic, you will learn how to edit a group in Portnox™ Cloud and configure its advanced settings.
Before you begin, you must create a group in Portnox Cloud. To create a group and configure its basic settings, read the following topic: Create a group.
To understand what are groups in Portnox Cloud and how they work together with accounts and policies, read the following topic: What are groups in Portnox Cloud?.
-
In the Cloud portal top menu, click on the Groups option.

-
Click on the ⋮ icon on the right-hand side of the selected group name and
select the Group settings option from the pop-up menu to begin the process of editing the
selected group.
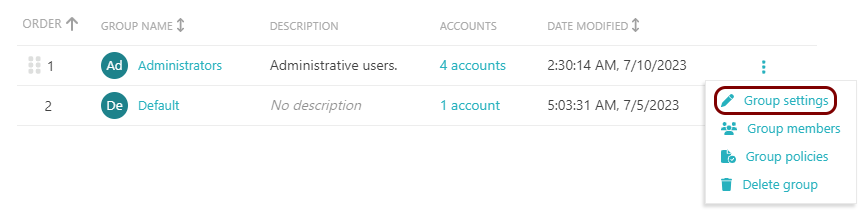
You can also delete the group by selecting the Delete group option. All the group settings will be lost and all accounts assigned to this group will be reassigned to the Default group.
You can also change the priority of groups by dragging and dropping the ⠿ icon. When a new user/account accesses the network, it will be assigned to the first group in ORDER listed here, where it matches the criteria.
Using this menu, you can also assign policies to the group. For more information, see the following topic: Assign policies to a group.
-
In the Automatic device onboarding section, click on the Enable automatic LDAP-based
device onboarding checkbox to activate or deactivate it.
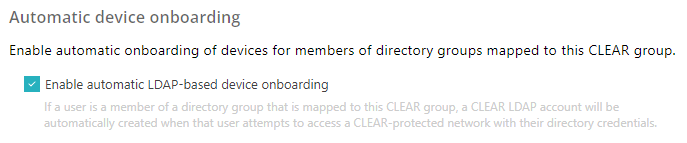
If this setting is turned on, Portnox Cloud automatically creates LDAP accounts for users who authenticate for the first time using credentials, based on the integrated authentication repositories. We strongly recommend keeping this setting turned on in most scenarios. It can be turned off, for example, if you use Okta for SSO but prefer to manually create Cloud accounts, contractor accounts, or MAB accounts, or if you want to use Cloud with third-party certificate auto-enrollment (just for the certificate, not the identity).
Important:This setting must be turned on if you want to map entire groups or organizational units from your integrated authentication repositories to Portnox Cloud. If this setting is not turned on, you must manually create each LDAP account in Cloud and link it to the relevant entry in the authentication repository, or else access will be denied. This option has no effect if you use certificate-based authentication. If you use AgentP or self-onboarding, the account is created during AgentP enrollment or during generation of the self-onboarding certificate. -
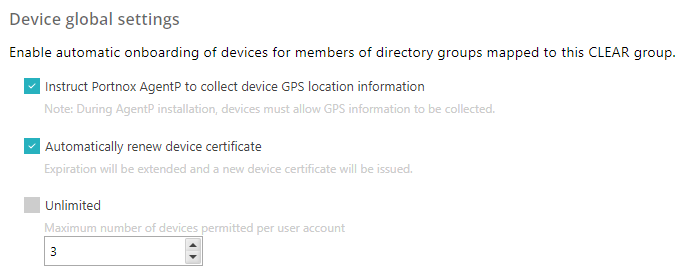
In the Device global settings section, edit the settings that apply to devices in this group
independent on the network they are connected to:
-
In the AgentP settings section, click on the Allow enrollment only from specific
OSs switch to activate or deactivate it.

If this setting is on, Portnox Cloud will allow accounts in this group to authenticate using AgentP only if the device has one of the selected operating systems. If the device has a deselected operating system, Portnox Cloud will deny it network access.
- In the Allowed OS types field, click on the field to display the choices and then click on an entry to select it. Repeat for other entries if necessary.
- To remove an entry, click on the x symbol next to the entry.
-
In the Authentication certificate section, select one of the available options:

Default root certificate generated by Portnox Cloud: Portnox Cloud will generate certificates for devices using the default tenant CA certificate.
Issued by custom trusted root certificate: Portnox Cloud will generate certificates for devices using a custom CA certificate uploaded by a Cloud administrator.
Before you select this option, you must first upload the custom CA certificate to Portnox Cloud. You can do this in: . Only then the custom CA certificate will be available to select from the list.
-
In the 802.1X Wireless network access section, you can click on the Edit
link next to a Wi-Fi network that you added before (see: Create a group), and configure additional
advanced settings.

-
In the Authentication type field, select one of the available options.
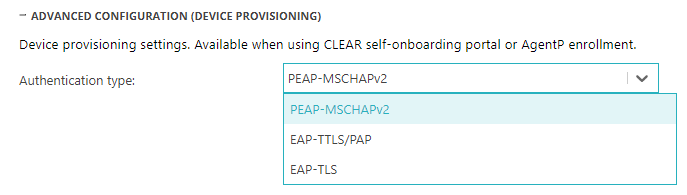
When the user is using the Portnox Cloud self-onboarding portal or when AgentP is being enrolled, the portal or the agent need to authenticate the user by communicating with relevant directory services. This field determines the protocol that is used during this authentication.
-
PEAP-MSCHAPv2: Credential-based authentication, available only if you have configured integration with Active Directory services.
-
EAP-TTLS/PAP: Credential-based authentication, available for LDAP servers other than Active Directory, such as OpenLDAP.
-
EAP-TLS: Certificate-based authentication, available for all authentication repositories.
-
- Optional:
Activate the Network Requires WPA3 192-bit Mode if you use AgentP and you want AgentP to
configure your network adapter to connect to this Wi-Fi network using WPA3 in 192-bit mode.

-
In the 802.1X authentication mode (for Windows OS 10+ systems) section, select one of
the available options.
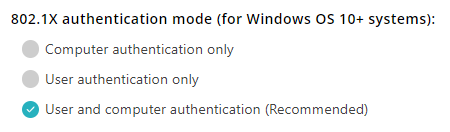 Note:These options let you decide how AgentP configures the network adapter when connecting to the secure network. They apply only if you choose EAP-TLS in the Authentication type field and only to devices with AgentP. For more information about this, see the following FAQ topic: AgentP and certificates.
Computer authentication only: AgentP configures the network adapter to always use the certificate from the computer store. This means that the network adapter will use the same certificate when there is no logged-in user, and when a user is logged in, independent of what user is logged in.
User authentication only: AgentP configures the network adapter to use the certificate from the user store only. This means that when there is no logged-in user, the computer will not be able to access the networks protected by Portnox Cloud. When a user is logged in, the network adapter will use the certificate of the logged-in user.
User or computer authentication (Recommended): AgentP configures the network adapter to use the certificate from the computer store when there is no logged-in user, and a certificate from the user store when a user is logged in. You can also use this setting for personal devices and for kiosk devices. This lets you switch between different modes of operation without the need to reconfigure Portnox Cloud.
-
Click on the Save button to save the settings for this network or click on the
Cancel button to abandon all changes.

-
In the Authentication type field, select one of the available options.
-
In the 802.1X Wired network access section, click on the ADVANCED CONFIGURATION
(DEVICE PROVISIONING) heading to expand the section.
-
In the Authentication type field, select one of the available options.
When the user is using the Portnox Cloud self-onboarding portal or when AgentP is being enrolled, the portal or the agent need to authenticate the user by communicating with relevant directory services. This field determines the protocol that is used during this authentication.
-
PEAP-MSCHAPv2: Credential-based authentication, available only if you have configured integration with Active Directory services.
-
EAP-TTLS/PAP: Credential-based authentication, available for LDAP servers other than Active Directory, such as OpenLDAP.
-
EAP-TLS: Certificate-based authentication, available for all authentication repositories.
-
-
In the 802.1X authentication mode (for Windows OS 10+ systems) section, select one of
the available options.
Note:These options let you decide how AgentP configures the network adapter when connecting to the secure network. They apply only if you choose EAP-TLS in the Authentication type field and only to devices with AgentP. For more information about this, see the following FAQ topic: AgentP and certificates.
Computer authentication only: AgentP configures the network adapter to always use the certificate from the computer store. This means that the network adapter will use the same certificate when there is no logged-in user, and when a user is logged in, independent of what user is logged in.
User authentication only: AgentP configures the network adapter to use the certificate from the user store only. This means that when there is no logged-in user, the computer will not be able to access the networks protected by Portnox Cloud. When a user is logged in, the network adapter will use the certificate of the logged-in user.
User or computer authentication (Recommended): AgentP configures the network adapter to use the certificate from the computer store when there is no logged-in user, and a certificate from the user store when a user is logged in. You can also use this setting for personal devices and for kiosk devices. This lets you switch between different modes of operation without the need to reconfigure Portnox Cloud.
-
In the Authentication type field, select one of the available options.
-
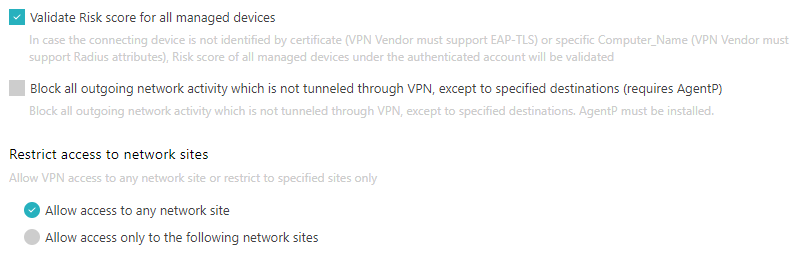
In the VPN Access section, configure additional advanced settings:
-
In the TACACS+ access section, click on the Enable TACACS+ MFA authentication for all
accounts this group switch to activate or deactivate it.
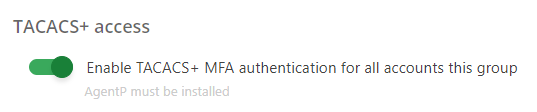
If this setting is turned on, when a user that belongs to this group attempts to authenticate and/or send a command to a device that uses Portnox TACACS+, an MFA request for confirmation will be sent to AgentP installations belonging to that user. To authenticate and/or authorize, the used needs to open their AgentP user interface and confirm the authentication/authorization attempt.
-
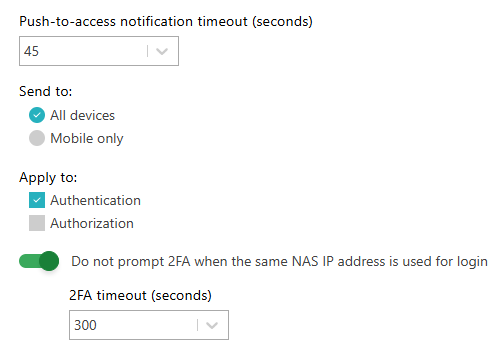
In the Push-to-access notification timeout (seconds) field, set the number of seconds after which the MFA request in AgentP will expire and fail.
-
In the Send to section, choose the All devices option if you want the MFA request to be sent to all user’s AgentP installations (Windows, macOS, Linux, Android, iOS), or choose the Mobile only option if you want the MFA request to be sent to mobile AgentP installations only (Android, iOS).
-
In the Apply to section, activate the Authentication checkbox if you want all authentication attempts to trigger an MFA request, and activate the Authorization checkbox if you want all commands that require authorization to trigger an MFA request.
-
Activate the Do not prompt 2FA when the same NAS IP address is used for login switch to reduce the number of MFA requests. In the 2FA timeout (seconds) field, enter the number of seconds to trust the IP address after an initial MFA request is confirmed.
-
-
In the Okta access section, click on the Enable Okta access to devices in this
group switch to activate or deactivate it.

If this setting is turned on, devices in this group will be able to use Okta integration functionality.
Note:To learn about Okta functionality available through integration, visit the following topic: Other integrations. -
To save your group settings, click on the Save button on the bottom right of the page.