Integrate with Datadog using a syslog forwarder and TLS

In this topic, you will learn how to send Portnox™ Cloud alerts to the Datadog SIEM solution using a syslog forwarder with TLS for increased security.

Note: Portnox Cloud now has a direct Datadog integration, so this method is no longer recommended. However, we are keeping this documentation for reference purposes.

To integrate with Datadog using a syslog forwarder and TLS:

  • Deploy a machine or a virtual machine as a syslog message collector.
  • Install syslog-ng (or similar software) on this machine and accept syslog events via TLS from Portnox Cloud.
  • Send the syslog events to the Datadog HTTPS intake API via HTTPS.

In this example configuration, we are using a virtual machine in Microsoft Azure with syslog-ng and a TLS connection. Using this configuration, the entire communications is encrypted using TLS (Portnox Cloud to syslog collector) and HTTPS (syslog collector to Datadog).

Create a Linux virtual machine

To integrate with Datadog, you need to run syslog software on a physical or virtual machine, so that it can collect alert data from Portnox™ Cloud and send that data to Datadog. In this section, you will learn how to create and configure such a virtual machine in Microsoft Azure based on the Linux Ubuntu operating system.

  1. Open the Azure Portal dashboard in your browser.
  2. In the Azure services menu on your dashboard, click on the Create a Resource option.

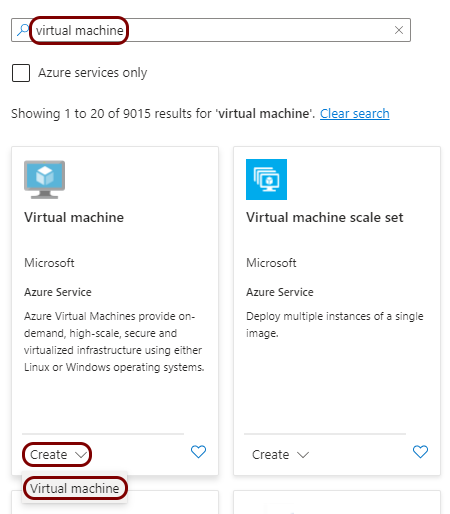
  3. In the Marketplace pane, in the Search the Marketplace field, type virtual machine and press the  ↩  key. In the Virtual machine tile below, click on the Create button and select the Virtual machine option from the context menu.

  4. In the Create a virtual machine pane, enter the details for your virtual machine and then click on the Create button to create it.
    Note: Select one of the available Linux images, for example, Ubuntu Server 20.04 LTS - x64 Gen2 and its parameters according to your business, access, and security needs. Since the parameters of the virtual machine greatly depend on your specific environment and needs, the guidance on these parameters is beyond the scope of this guide and you should treat the example below as a lab environment only.
  5. In the virtual machine pane, click on the public IP assigned to this machine to open the Configuration pane for the IP address associated with the machine.

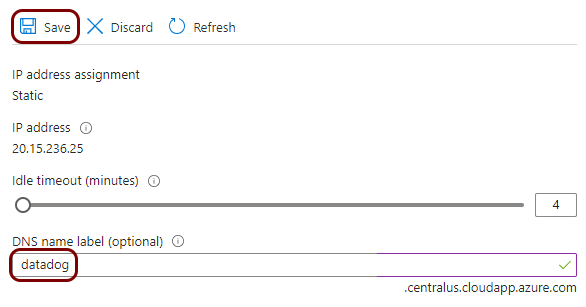
  6. In the Configuration pane for the IP address of the virtual machine, in the DNS name label (optional) field, enter a unique name that will form part of the FQDN for your virtual machine, and then click on the Save button.

    In this example, we used the name datadog but you can use any name you like.

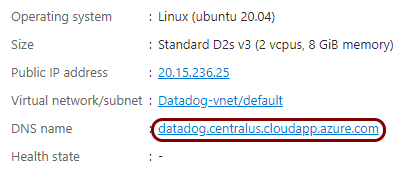
    The FQDN of your virtual machine is the label that you enter followed by the domain name shown under the DNS name label field. You can also see it on the Overview pane as DNS name.

  7. Create a port rule to open port 6514.

    This is the standard port used by syslog software to collect alerts from external sources such as Portnox Cloud using TLS. The virtual machine must be able to accept information from Portnox Cloud on this port. You can use a different port number than 6514, if needed, but then you have to modify the configuration of syslog-ng and Portnox Cloud.

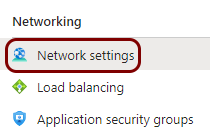
    1. In the virtual machine pane, in the left-hand side menu, click on the Network settings option.

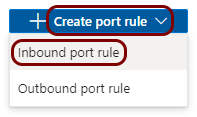
    2. On the right-hand side, click on the Create port rule button, and then select the Inbound port rule option from the context menu.

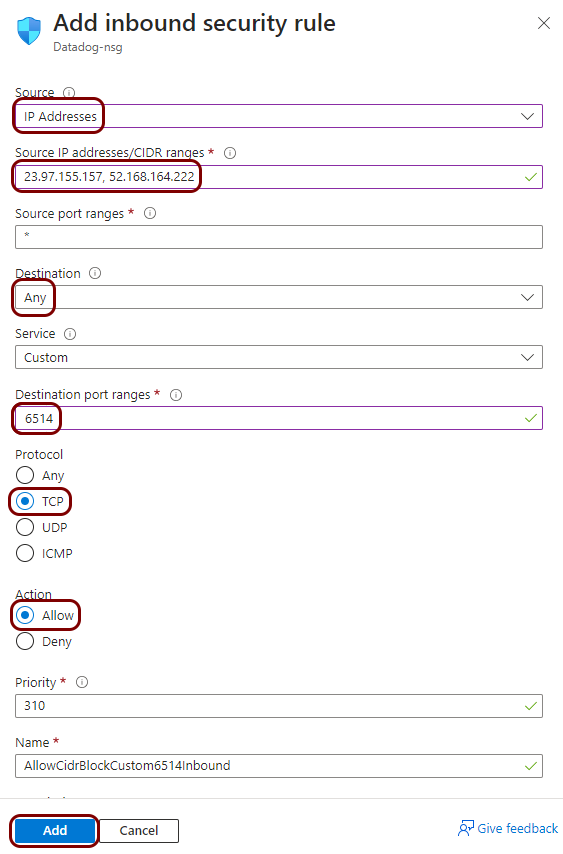
    3. In the Add inbound security rule pane, fill in the following fields and then click on the Add button:
      • In the Source field, select IP Addresses
      • In the Source IP addresses/CIDR ranges, type 23.97.155.157, 52.168.164.222 (these are the Portnox Cloud IP addresses from which information is sent to SIEM software)
      • In the Destination field, select Any
      • In the Destination port ranges field, type 6514
      • In the Protocol field, select TCP
      • In the Action field, select Allow

Generate a certificate for your syslog collector

In this section, you will use OpenSSL software on the virtual machine to generate a self-signed certificate, which Portnox Cloud will use to connect to the collector via TLS.

  1. In the virtual machine pane, in the left-hand side menu, click on the Connect option.

  2. In the Connect pane, select the preferred SSH connection method to connect to the virtual machine.
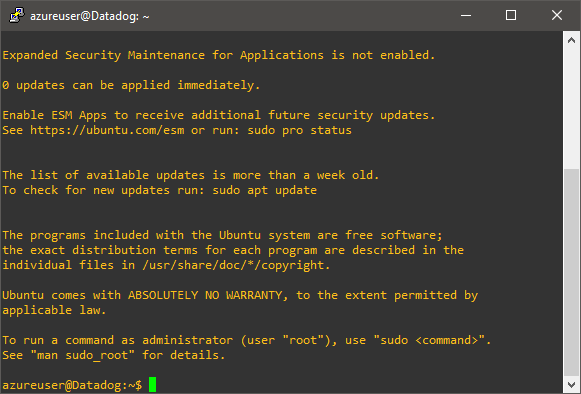
    Note: Since the connection method depends on your specific environment, needs, and software, the guidance on the specific method is beyond the scope of this guide. For example, you can use native SSH connection using PuTTY software on Windows and the local key downloaded while creating the virtual machine.

  3. Optional: If OpenSSL is not installed by default, in your SSH window, type the following commands: sudo apt-get update and sudo apt-get install openssl to install OpenSSL.
  4. Generate the certificate using OpenSSL by typing the following commands in your SSH window:
    Note: In this example, we use the /etc/ssl/ directory but you can use another directory if you like. However, you will need to adjust further configuration steps.
    1. Type: cd /etc/ssl/ to change to the destination directory.
    2. Type: sudo openssl genrsa -out mykey.key 2048 to generate a private key for your certificate.
    3. Type: sudo openssl req -new -key mykey.key -out mycsr.csr to create a certificate request that uses the key that you just created.
      Note: You will be asked for details such as the country, city, and other information for the certificate. Enter information that is relevant to your business. When asked for the Common Name, enter the FQDN of your virtual machine, in this example: datadog.centralus.cloudapp.azure.com.
    4. Type: sudo openssl x509 -req -days 365 -in mycsr.csr -signkey mykey.key -out mycert.crt to generate a certificate on the basis of the request that you just created.
      Note: This example certificate is valid for 1 year only. Adjust the parameters as needed.
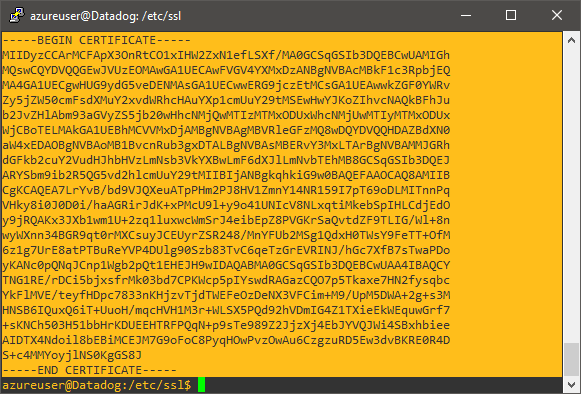
    5. Type: cat /etc/ssl/mycert.crt to print the certificate to the SSH console. Copy the entire text from the SSH console, paste it into a local text file, and save that file locally.

      You will need this file to configure Portnox Cloud to communicate with the collector using TLS.

      In this example, we saved the certificate as datadog-vm.crt.

Install and configure syslog-ng

In this section, you will install syslog-ng on the virtual machine, and configure it to accept events from the network via TLS and send them to Datadog via HTTPS.

  1. In your SSH window, type the following commands: sudo apt-get update and sudo apt-get install syslog-ng to install syslog-ng software.
  2. Then, type the following command: sudo nano /etc/syslog-ng/syslog-ng.conf to edit syslog-ng configuration.
  3. Follow the steps described in the Datadog documentation for syslog-ng to add the following configuration sections to the syslog-ng.conf file but modify them as follows:
    1. Add a new source definition to obtain logs from the network via port 6514 and TLS.
      source s_tls {
          network(
              ip(0.0.0.0)
              port(6514)
              transport("tls")
              tls(
                  key-file("/etc/ssl/mykey.key")
                  cert-file("/etc/ssl/mycert.crt")
                  peer-verify(optional-untrusted)
              )
          );
      };

      This source represents the logs incoming from Portnox Cloud through a TLS connection.

      Note: If you used different directory or file names when creating the private key and the certificate, adjust the paths in the configuration.
    2. Do not add the s_files source as described in Datadog documentation, because it is not needed if the logs are collected from an external source (Portnox Cloud).
    3. In the destination section, add a pointer to the certificate authority file.
      destination d_datadog {
          http(
              url("https://http-intake.logs.datadoghq.eu/api/v2/logs?ddsource=<SOURCE>&ddtags=<TAG_1:VALUE_1,TAG_2:VALUE_2>")
              method("POST")
              ca-file("/etc/ssl/certs/ca-certificates.crt")
              headers("Content-Type: application/json", "Accept: application/json", "DD-API-KEY: DATADOG_API_KEY")
              body("<${PRI}>1 ${ISODATE} ${HOST:--} ${PROGRAM:--} ${PID:--} ${MSGID:--} ${SDATA:--} $MSG\n")
              );
          };
      Note: You don’t have to add the ca-file line unless you encounter certificate-related errors when trying to connect to the Datadog HTTPS intake. You may need to modify the path to the file, if your operating system CA file is in a different location.

      Instead of the ca-file line, you can add peer-verify(no), but this is recommended only for lab purposes, because it turns off the verification of the remote peer certificate and makes man-in-the-middle attacks possible.

    4. In the log path section, instead of the configuration proposed by Datadog, add the following log path definition:
      log { source(s_tls); destination(d_datadog); };

      This means that the only logs sent to Datadog will be logs received through TLS from Portnox Cloud, not the local virtual machine logs.

    5. Save your configuration to the /etc/syslog-ng/syslog-ng.conf file.

      For example, if using the nano editor, press CTRL+O to write the file and then CRTL+X to exit.

  4. In your SSH window, type the following command: sudo systemctl restart syslog-ng to restart syslog-ng after configuration changes.

Result: The syslog-ng software is configured, running, and waiting for events coming through TLS from Portnox Cloud.

Configure Portnox Cloud

In this section, you will learn how to configure Portnox™ Cloud to send alert data using TLS to the virtual machine with syslog-ng so that it forwards the data to the Datadog intake.

  1. In the Cloud portal top menu, click on the Settings option.

  2. In the Cloud portal left-hand menu, click on the Integration Services > SIEM INTEGRATION SERVICE option.

  3. Create a new SIEM integration with Datadog via the collector virtual machine.
    1. In the SIEM integration service section, click on the Add new SIEM link.

      The NEW SIEM INTEGRATION section opens.

    2. In the Type field, select the Custom option.

    3. In the Name field, enter the name for the new integration.

      In this example, we used the name Datadog but you can use any name you like.

    4. In the Status field, select the Enabled option.

    5. In the Protocol type field, select the Syslog over TLS option.

    6. In the Server certificate trust field, select the Server certificate option.

    7. Click on the Browse button under the Upload server certificate heading, and upload the certificate file that you saved earlier.

      In this example, we saved the file locally earlier as datadog-vm.crt.

    8. In the Authentication field, select the None option.

      Note: You can also set up authentication using a certificate, but you will need to upload your certificate to the collector virtual machine and configure syslog-ng to verify this certificate.
    9. In the Host name field, enter the FQDN of your virtual machine that you created earlier in Azure.

      In this example, the FQDN is datadog.centralus.cloudapp.azure.com.

    10. In the Port field, type 6514.

      This is the port number that you opened on the virtual machine, which is the standard port number for syslog-ng external log collection through TLS.

    11. In the Communication method field, select the Direct option.

    12. In the Data format field, select the CEF option.

    13. Click on the Save button to add the integration.

    14. Optional: Test the configuration by clicking on the Test button.

  4. Optional: To configure the types of alerts sent to your SIEM solution, see the following topic: Portnox Cloud alerts.
    Note: To learn more about the content and format of alert messages sent to SIEM solutions, see the following topic: Format and content of alert information for SIEM.

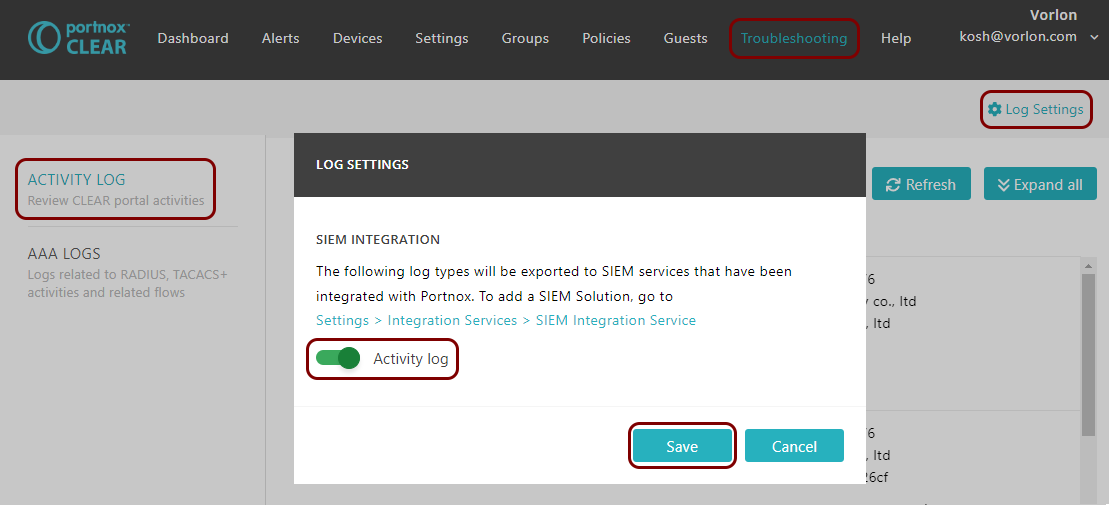
    You can also send all of the Portnox Cloud activity log (activities performed by administrators in Portnox Cloud) to your SIEM solution. To do this, go to Troubleshooting > ACTIVITY LOG > Log Settings, activate the Activity log switch, and click on the Save button.

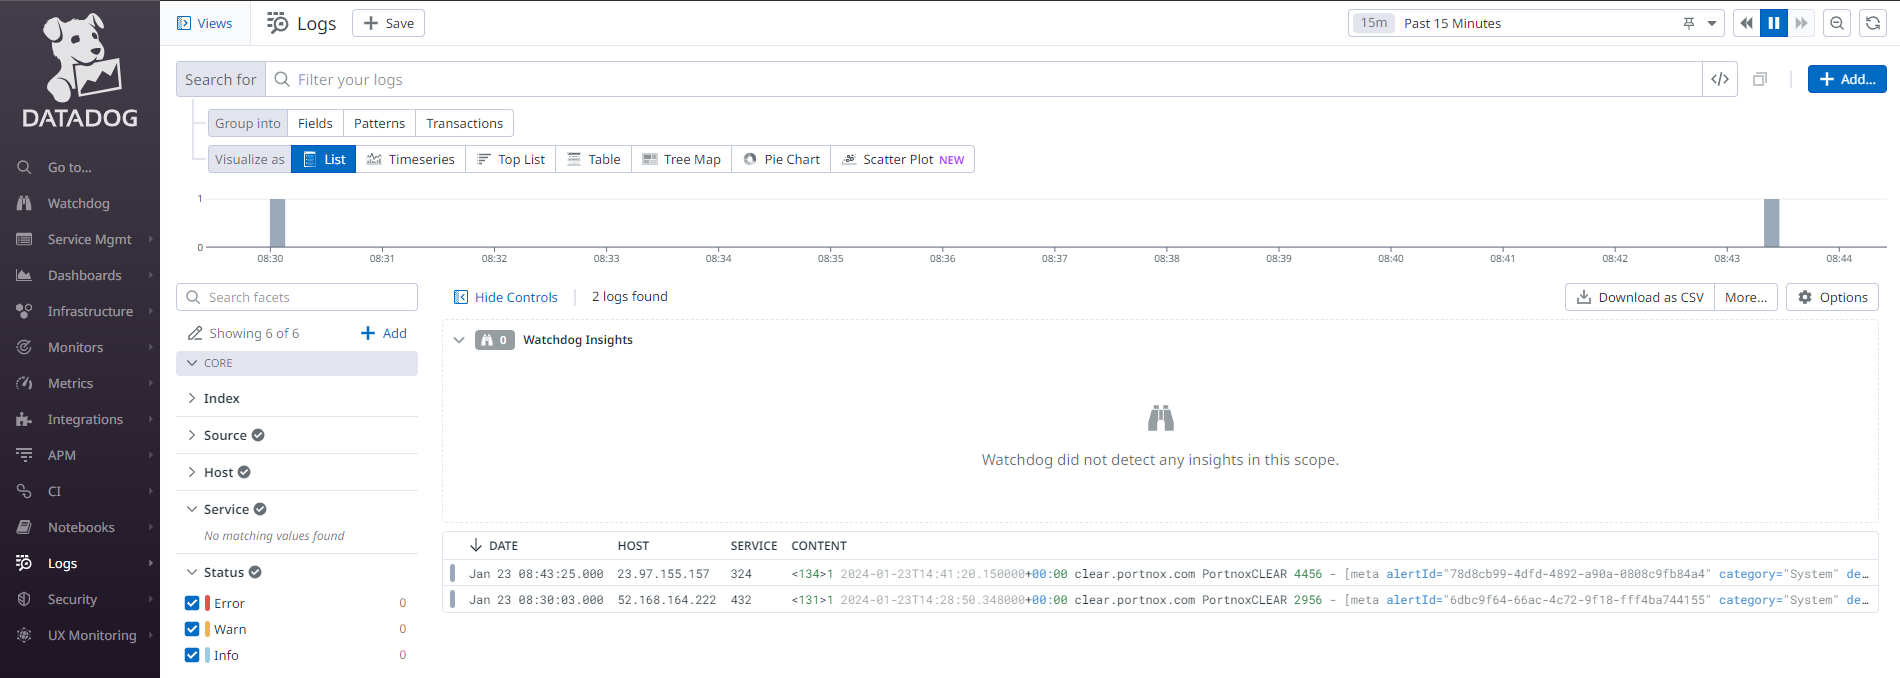
Result: Datadog is receiving alerts from Portnox Cloud through a secure connection.

You can confirm that, for example, by accessing the Log Explorer.