Wi-Fi employee access – Cisco Meraki
In this topic, you will learn how to configure Cisco Meraki access points to work together with Portnox™ Cloud and 802.1X RADIUS authentication for Wi-Fi connections.
Standard RADIUS configuration
In this topic, you will learn how to configure Cisco Meraki access points to work together with Portnox™ Cloud using standard RADIUS connections without TLS.
-
In the Meraki web interface, select your network, and then click on the menu option.

-
In the Access control pane, select the SSID that you want to edit.
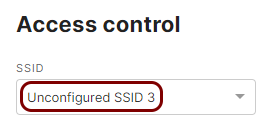 Note:You can choose an existing SSID to reconfigure it or one of the unconfigured SSIDs.
 -
In the Basic info section, enter the SSID for your network if you are configuring an
unconfigured SSID or keep/modify your current SSID as needed. Also, make sure that the SSID
status is set to Enabled.
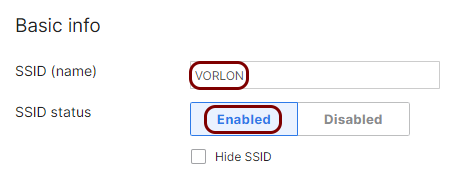
In this example, we used the SSID VORLON, but you can use any SSID you like.
-
Choose one of the following options depending on whether you want to configure this SSID for standard 802.1X or
whether you want to use the IPSK
feature of Portnox Cloud.
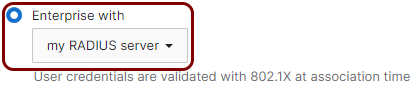
802.1x: In the Security section, select the Enterprise with option, and from the drop-down menu, select the my RADIUS server option.
IPSK: In the Security section, select the Identity PSK with RADIUS option.

Important:Unlike many NAS devices from other manufacturers, Meraki devices do not support using 802.1X authentication together with MAC-based authentication on the same SSID. If you want to use MAC-based authentication, select the MAC-based access control option. -
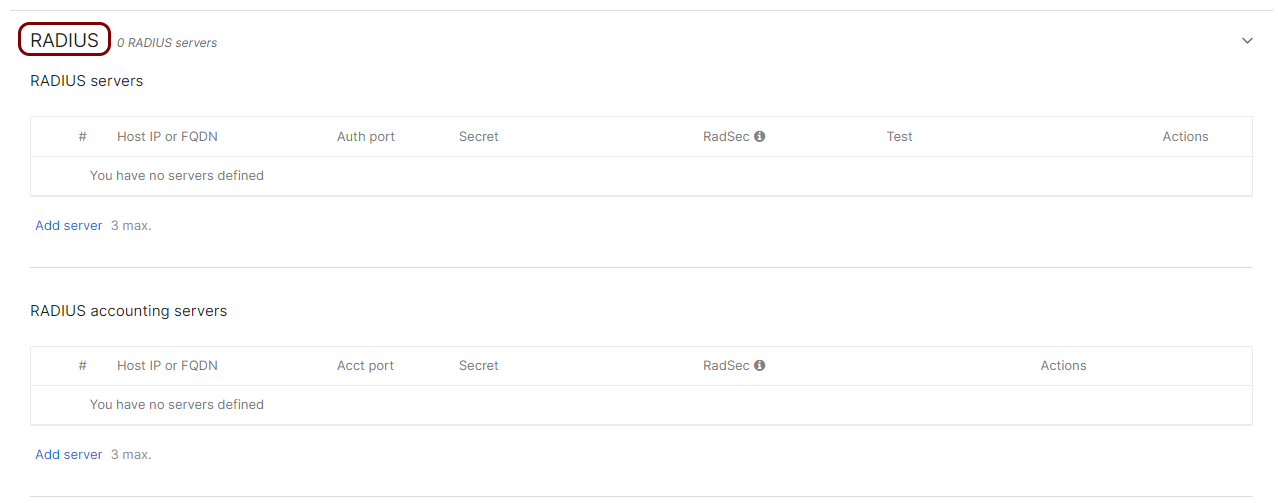
Scroll down to the RADIUS section and click on the heading to expand this section.
-
In the RADIUS servers subsection, click on the Add server link to add
the Portnox Cloud RADIUS server.

-
In the Host IP or FQDN field, enter the IP address of the Portnox Cloud RADIUS server that you created earlier, in the Auth port field,
enter the authentication port for this RADIUS server, and in the Secret field, enter the
shared secret for this server.

- Optional:
Test the connectivity to the server. Enter the credentials of a Portnox account in the
Username and Password fields, and then click on the
Begin test button.
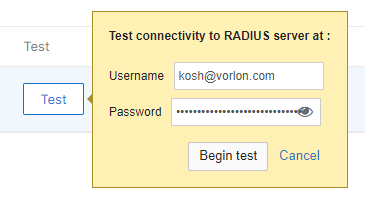 Note:We strongly recommend creating a temporary Portnox account for this purpose because the password is sent via MSCHAPv2 without a secure tunnel. Alternatively, you can use any account with an incorrect password and monitor Alerts for authentication failures. If an authentication failure appears in Alerts, it confirms that the RADIUS server is configured correctly.
 -
Click on the Done button to add the Cloud RADIUS server.

- Optional:
Test the connectivity to the server. Enter the credentials of a Portnox account in the
Username and Password fields, and then click on the
Begin test button.
-
Repeat the above steps in the RADIUS accounting servers section, entering the
same IP address and shared secret, and the Acct port number from your Cloud RADIUS server
configuration (for one or two servers, depending on your configuration).

The above screenshot shows an example configuration for two Cloud RADIUS region servers. Adjust the IP addresses and port numbers to your tenant configuration.
- Optional:
Configure the timeouts to the values recommended by Portnox for communication with Cloud RADIUS servers.
-
Click on the Advanced RADIUS settings heading under the list of RADIUS servers to
expand this subsection.

-
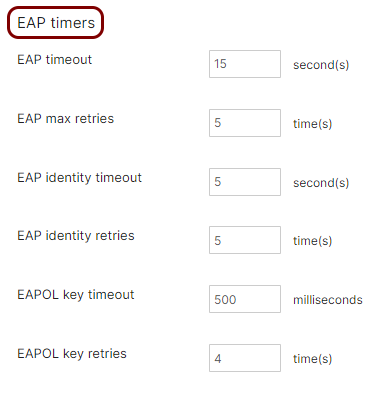
Enter the following recommended values for RADIUS timeouts:

- Server timeout: 10
- Retry count: 2
- RADIUS fallback: Active
-
Click on the EAP timers heading to expand this subsection.
-
Click on the Advanced RADIUS settings heading under the list of RADIUS servers to
expand this subsection.
-
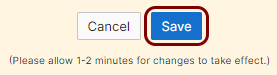
Click on the Save button to save your configuration.
RadSec with server-only authentication
In this topic, you will learn how to configure Cisco Meraki access points to work together with Portnox™ Cloud using RadSec connections with server-only authentication.
-
Upload the Portnox Cloud root CA certificate (DigiCert Trusted Root G4 certificate) using the Meraki web
interface:
-
In the Meraki web interface, go to . Then, in the RADSEC tab, click on the Upload CA
certificate button, and select the file you downloaded from DigiCert.
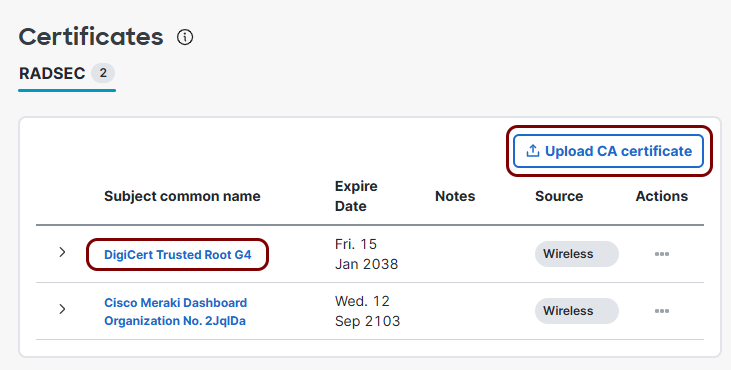
Result: The CA certificate will be uploaded and trusted by all networks in your Meraki environment.
-
In the Meraki web interface, go to . Then, in the RADSEC tab, click on the Upload CA
certificate button, and select the file you downloaded from DigiCert.
-
Configure your Portnox Cloud RADIUS server for RadSec with server-only authentication:
-
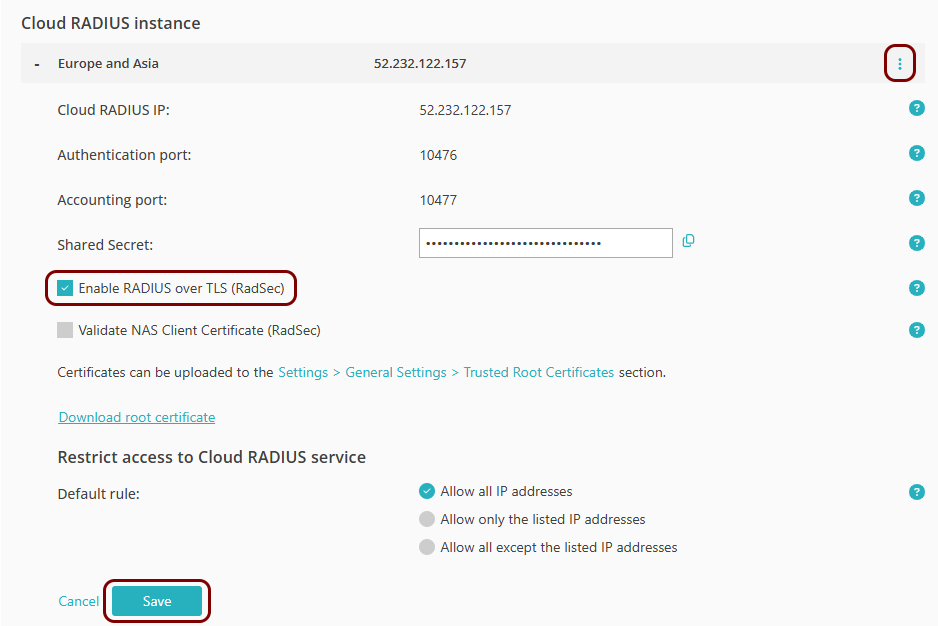
Select the instance that you want to configure for RadSec (either Europe and Asia or
United States and North America), click on , and activate the Enable RADIUS over TLS (RadSec) checkbox. Then,
click on the Save button.
-
Select the instance that you want to configure for RadSec (either Europe and Asia or
United States and North America), click on , and activate the Enable RADIUS over TLS (RadSec) checkbox. Then,
click on the Save button.
-
In the Meraki web interface, select your network, and then click on the menu option.
-
In the Access control pane, select the SSID that you want to edit.
Note:You can choose an existing SSID to reconfigure it or one of the unconfigured SSIDs.
-
In the Basic info section, enter the SSID for your network if you are configuring an
unconfigured SSID or keep/modify your current SSID as needed. Also, make sure that the SSID
status is set to Enabled.
In this example, we used the SSID VORLON, but you can use any SSID you like.
-
Choose one of the following options depending on whether you want to configure this SSID for standard 802.1X or
whether you want to use the IPSK
feature of Portnox Cloud.
802.1x: In the Security section, select the Enterprise with option, and from the drop-down menu, select the my RADIUS server option.
IPSK: In the Security section, select the Identity PSK with RADIUS option.
Important:Unlike many NAS devices from other manufacturers, Meraki devices do not support using 802.1X authentication together with MAC-based authentication on the same SSID. If you want to use MAC-based authentication, select the MAC-based access control option. -
Scroll down to the RADIUS section and click on the heading to expand this section.
-
In the RADIUS servers subsection, click on the Add server link to add
the Portnox Cloud RADIUS server.
-
In the Host IP or FQDN field, enter the IP address of the Portnox Cloud RADIUS server
instance, in the Auth port field, enter the authentication port for this RADIUS server, and
in the Secret field, enter the string radsec. Then, activate the
RadSec checkbox.
 Important:Do not enter the shared secret copied from the Portnox Cloud RADIUS configuration. Otherwise, the connection will not work.
- Optional:
Test the connectivity to the server. Enter the credentials of a Portnox account in the
Username and Password fields, and then click on the
Begin test button.
Note:We strongly recommend creating a temporary Portnox account for this purpose because the password is sent via MSCHAPv2 without a secure tunnel. Alternatively, you can use any account with an incorrect password and monitor Alerts for authentication failures. If an authentication failure appears in Alerts, it confirms that the RADIUS server is configured correctly.
-
Click on the Done button to add the Cloud RADIUS server.

- Optional:
Test the connectivity to the server. Enter the credentials of a Portnox account in the
Username and Password fields, and then click on the
Begin test button.
-
Repeat the above steps in the RADIUS accounting servers section, entering the same IP
address, the radsec shared secret, and the Acct port number from your
Cloud RADIUS server configuration (for one or two servers, depending on your configuration).
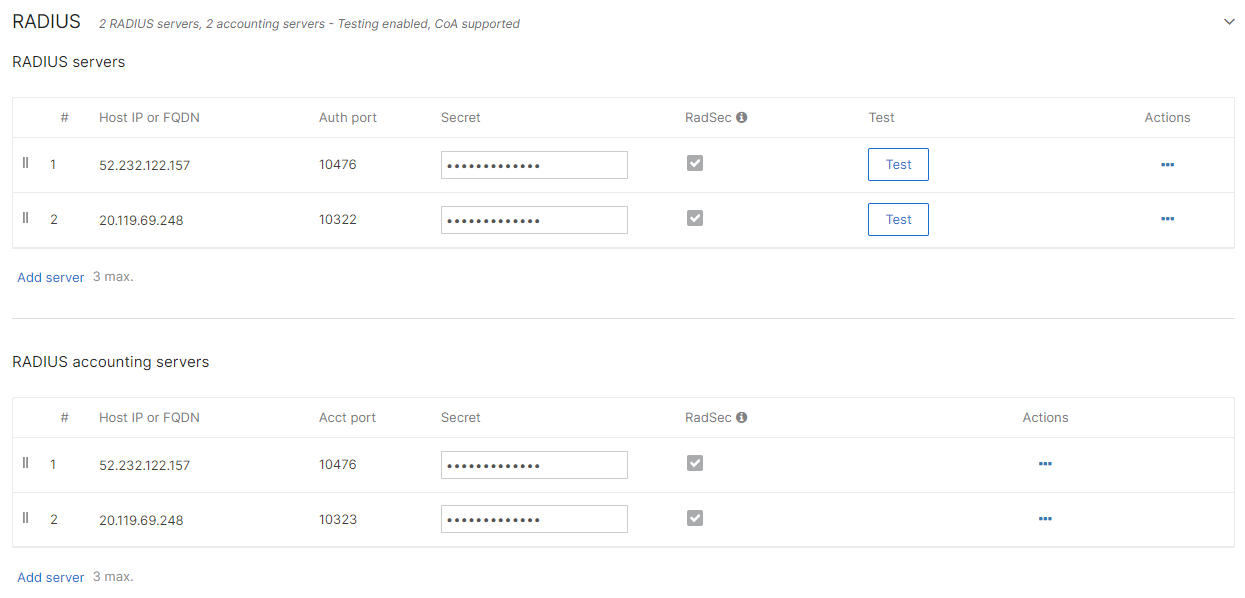
The above screenshot shows an example configuration for two Cloud RADIUS region servers. Adjust the IP addresses and port numbers to your tenant configuration.
- Optional:
Configure the timeouts to the values recommended by Portnox for communication with Cloud RADIUS servers.
-
Click on the Advanced RADIUS settings heading under the list of RADIUS servers to
expand this subsection.
-
Enter the following recommended values for RADIUS timeouts:
- Server timeout: 10
- Retry count: 2
- RADIUS fallback: Active
-
Click on the EAP timers heading to expand this subsection.
-
Click on the Advanced RADIUS settings heading under the list of RADIUS servers to
expand this subsection.
-
Click on the Save button to save your configuration.
RadSec with mutual TLS (mTLS)
In this topic, you will learn how to configure Cisco Meraki access points to work together with Portnox™ Cloud using RadSec connections with mutual TLS authentication (mTLS).
-
Upload the Portnox Cloud root CA certificate (DigiCert Trusted Root G4 certificate) using the Meraki web
interface:
-
In the Meraki web interface, go to . Then, in the RADSEC tab, click on the Upload CA
certificate button, and select the file you downloaded from DigiCert.
Result: The CA certificate will be uploaded and trusted by all networks in your Meraki environment.
-
In the Meraki web interface, go to . Then, in the RADSEC tab, click on the Upload CA
certificate button, and select the file you downloaded from DigiCert.
-
Download the client certificate from Meraki and upload it to Portnox Cloud:
-
In the Meraki web interface, go to . Then, in the RADSEC tab, scroll down to the RadSec AP
Certificates section and click on the Download CA button to save the
client certificate to local drive.

-
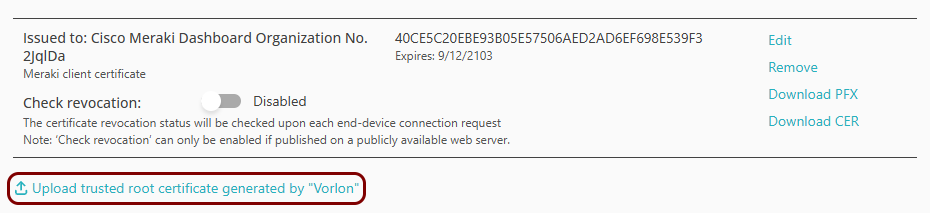
In Portnox Cloud, go to . Then, click on the Upload trusted root certificate generated by ...
link and click the Certificate button to select the file you just downloaded from
Meraki. Then, click on the Save button.
-
In the Meraki web interface, go to . Then, in the RADSEC tab, scroll down to the RadSec AP
Certificates section and click on the Download CA button to save the
client certificate to local drive.
-
Configure your Portnox Cloud RADIUS server for RadSec with mTLS authentication:
-
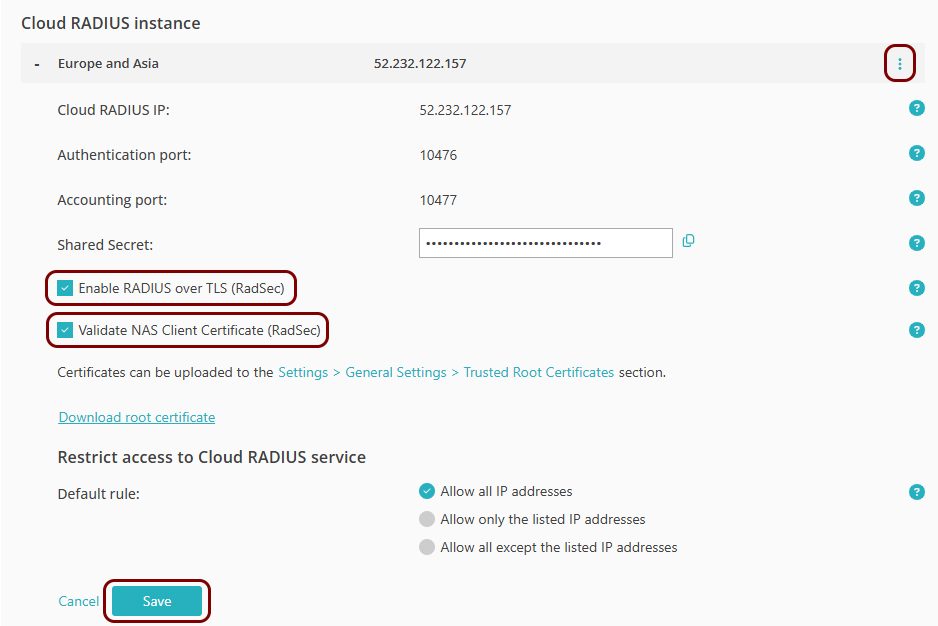
Select the instance that you want to configure for RadSec (either Europe and Asia or
United States and North America), click on , and activate the Enable RADIUS over TLS (RadSec) checkbox and the V
Validate NAS Client Certificate (RadSec) checkbox. Then, click on the
Save button.
-
Select the instance that you want to configure for RadSec (either Europe and Asia or
United States and North America), click on , and activate the Enable RADIUS over TLS (RadSec) checkbox and the V
Validate NAS Client Certificate (RadSec) checkbox. Then, click on the
Save button.
-
In the Meraki web interface, select your network, and then click on the menu option.
-
In the Access control pane, select the SSID that you want to edit.
Note:You can choose an existing SSID to reconfigure it or one of the unconfigured SSIDs.
-
In the Basic info section, enter the SSID for your network if you are configuring an
unconfigured SSID or keep/modify your current SSID as needed. Also, make sure that the SSID
status is set to Enabled.
In this example, we used the SSID VORLON, but you can use any SSID you like.
-
Choose one of the following options depending on whether you want to configure this SSID for standard 802.1X or
whether you want to use the IPSK
feature of Portnox Cloud.
802.1x: In the Security section, select the Enterprise with option, and from the drop-down menu, select the my RADIUS server option.
IPSK: In the Security section, select the Identity PSK with RADIUS option.
Important:Unlike many NAS devices from other manufacturers, Meraki devices do not support using 802.1X authentication together with MAC-based authentication on the same SSID. If you want to use MAC-based authentication, select the MAC-based access control option. -
Scroll down to the RADIUS section and click on the heading to expand this section.
-
In the RADIUS servers subsection, click on the Add server link to add
the Portnox Cloud RADIUS server.
-
In the Host IP or FQDN field, enter the IP address of the Portnox Cloud RADIUS server
instance, in the Auth port field, enter the authentication port for this RADIUS server, and
in the Secret field, enter the string radsec. Then, activate the
RadSec checkbox.
Important:Do not enter the shared secret copied from the Portnox Cloud RADIUS configuration. Otherwise, the connection will not work.
- Optional:
Test the connectivity to the server. Enter the credentials of a Portnox account in the
Username and Password fields, and then click on the
Begin test button.
Note:We strongly recommend creating a temporary Portnox account for this purpose because the password is sent via MSCHAPv2 without a secure tunnel. Alternatively, you can use any account with an incorrect password and monitor Alerts for authentication failures. If an authentication failure appears in Alerts, it confirms that the RADIUS server is configured correctly.
-
Click on the Done button to add the Cloud RADIUS server.
- Optional:
Test the connectivity to the server. Enter the credentials of a Portnox account in the
Username and Password fields, and then click on the
Begin test button.
-
Repeat the above steps in the RADIUS accounting servers section, entering the same IP
address, the radsec shared secret, and the Acct port number from your
Cloud RADIUS server configuration (for one or two servers, depending on your configuration).
The above screenshot shows an example configuration for two Cloud RADIUS region servers. Adjust the IP addresses and port numbers to your tenant configuration.
- Optional:
Configure the timeouts to the values recommended by Portnox for communication with Cloud RADIUS servers.
-
Click on the Advanced RADIUS settings heading under the list of RADIUS servers to
expand this subsection.
-
Enter the following recommended values for RADIUS timeouts:
- Server timeout: 10
- Retry count: 2
- RADIUS fallback: Active
-
Click on the EAP timers heading to expand this subsection.
-
Click on the Advanced RADIUS settings heading under the list of RADIUS servers to
expand this subsection.
-
Click on the Save button to save your configuration.