
Wi-Fi employee access – Juniper Mist
In this topic, you will learn how to configure access points managed by Juniper Mist to authenticate Wi-Fi devices with Portnox™ Cloud using 802.1X, 802.1X over RadSec, MAC-based authentication, and identity pre-shared keys (IPSK).
Create an SSID for 802.1X authentication
In this section, you will create a new SSID and configure it for WPA2 or WPA3 Enterprise authentication, using the Portnox Cloud RADIUS servers.
-
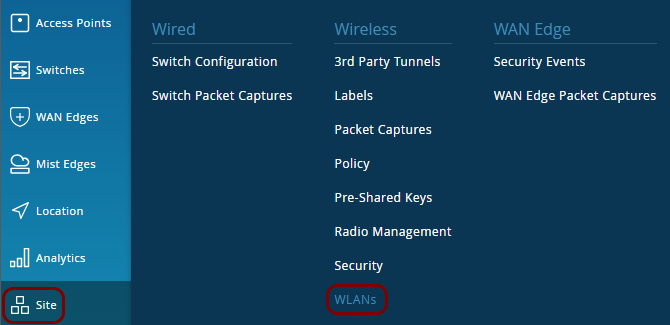
In the left-hand side menu of the Mist Cloud, click on the following menu options: .
-
In the WLANs pane, click on the Add WLAN button in the top-right
corner.
-
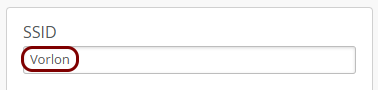
In the New WLAN pane, in the SSID field, type the SSID of your new
WLAN.
-
Deactivate the Wi-Fi features that limit the available security options:
Note:If the 6 GHz checkbox is active or Wi-Fi 7 is enabled, the WPA2 and Open Access options are not available in the Security section.
-
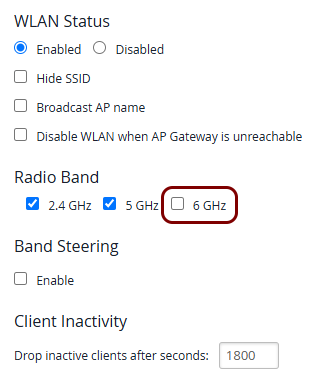
In the Radio Band section, deactivate the 6 GHz
checkbox.
-
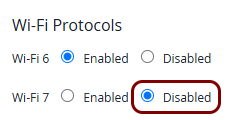
In the Wi-Fi Protocols section, make sure that the Disabled
option is selected in the Wi-Fi 7 row.
-
In the Radio Band section, deactivate the 6 GHz
checkbox.
-
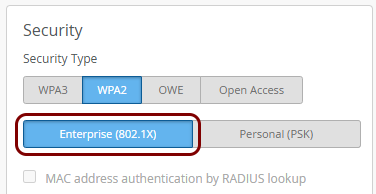
In the Security section, click on either the WPA3 or the
WPA2 tile, and then click on the Enterprise (802.1X) tile
below.
-
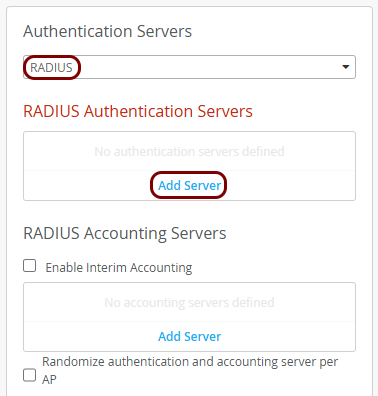
In the Authentication Servers section, select the RADIUS option, and
then in the RADIUS Authentication Servers section, click on the Add
Server link.
-
In the New Server section, enter the details of the authentication server:
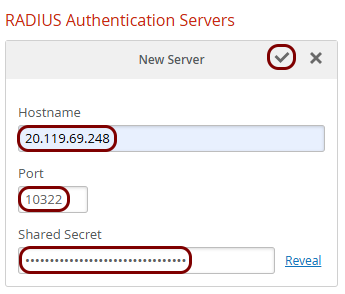
- In the Hostname field, enter the Cloud RADIUS IP value, which you got when you created your RADIUS servers.
- In the Port field, replace the default value with the Authentication Port value, which you also got when you created your RADIUS servers.
- In the Shared Secret field, enter the Shared Secret value, which you also got when you created your RADIUS servers.
- Click on the ✓ icon in the New Server header to save the server.
-
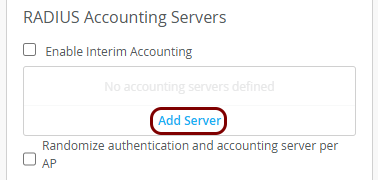
In the RADIUS Accounting Servers section, click on the Add Server
link.
-
In the New Server section, enter the details of the accounting server:

- In the Hostname field, enter the Cloud RADIUS IP value, which you got when you created your RADIUS servers.
- In the Port field, replace the default value with the Accounting Port value, which you also got when you created your RADIUS servers.
- In the Shared Secret field, enter the Shared Secret value, which you also got when you created your RADIUS servers.
- Click on the ✓ icon in the New Server header to save the server.
- Optional:
Repeat the previous four steps for the other Cloud RADIUS server, if necessary, or for both Cloud RADIUS servers if
you added your local RADIUS server as the primary server.
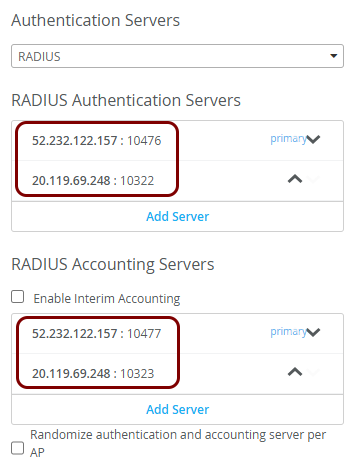
Use the arrow icons next to the servers to change their order. The server at the top of the list is the primary server.
-
Click on the Create button in the top-right corner of the New WLAN pane
to create the new WLAN.

Result: You created an SSID that authenticates employee Wi-Fi devices using 802.1X and the Portnox Cloud RADIUS servers.
Optional: Create an SSID for RadSec authentication
This is an optional task. Follow this task only if you want your SSID to connect to Portnox Cloud RADIUS servers using RadSec.
Add the RadSec certificates
In this section, you will add the Cloud RADIUS root certificate to Mist, so that your access points can verify Portnox Cloud, and add the Mist certificate to Portnox Cloud, so that Portnox Cloud can verify your access points.
Before you begin, in Portnox Cloud, go to , select the relevant RADIUS instance, and select . Activate the Enable RADIUS over TLS (RadSec) option and the Validate NAS Client Certificate (RadSec) option, and click on the Save button.
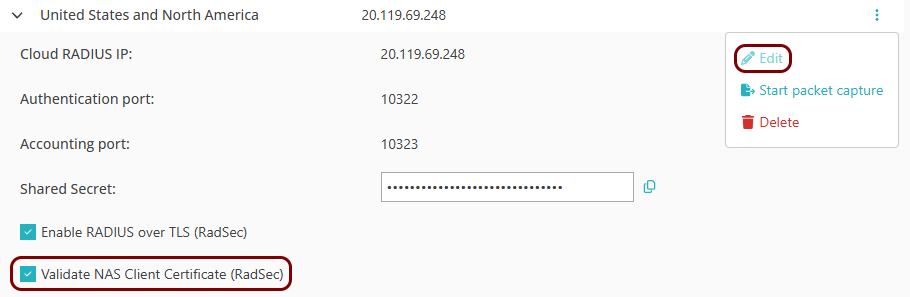
Mist generates a certificate authority for your organization and issues certificates to your access points automatically. You do not need to create any certificates yourself.
-
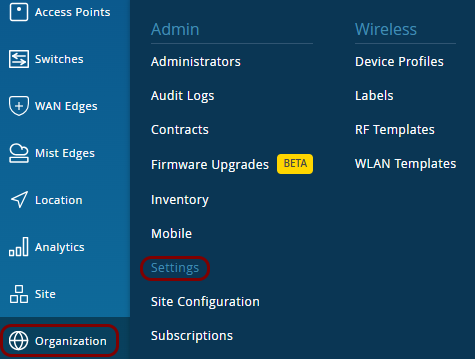
In the left-hand side menu of the Mist Cloud, click on the following menu options: .
-
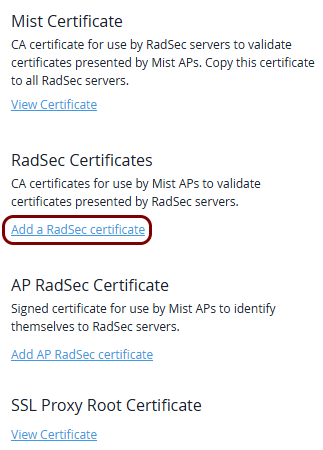
In the RadSec Certificates section, click on the Add a RadSec
certificate link.
-
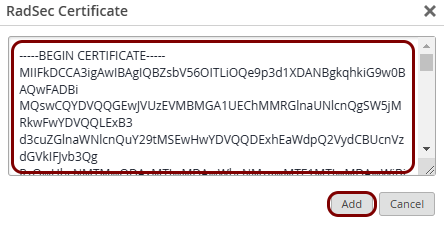
In the RadSec Certificate window, paste the content of the DigiCert certificate, and click
on the Add button.
-
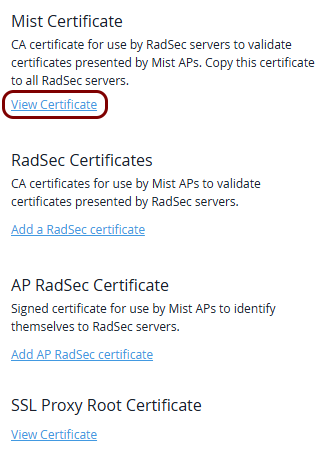
In the Mist Certificate section, click on the View Certificate
link.
-
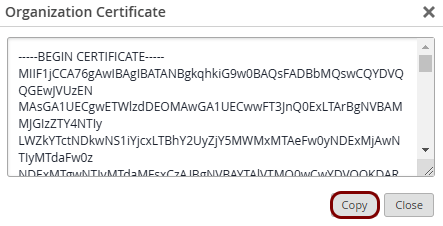
In the Organization Certificate window, click on the Copy button,
and then click on the Close button.
-
Click on the Save button in the top-right corner of the Organization
Settings page.

-
In Portnox Cloud, go to , and upload the mist_ca.pem file.
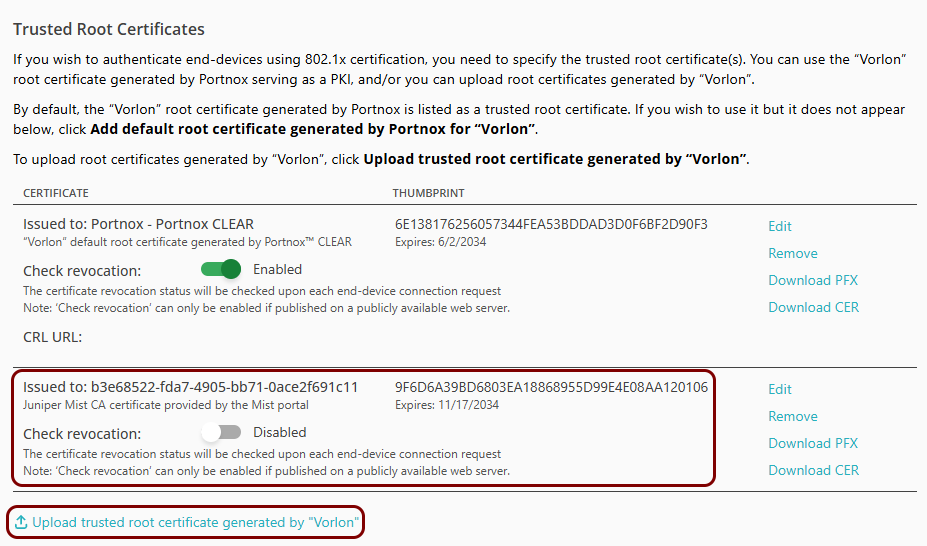
Result: Your access points trust the Cloud RADIUS servers, and Portnox Cloud trusts the certificates of your access points.
Configure the SSID
In this section, you will create a new SSID for 802.1X authentication that connects to the Portnox Cloud RADIUS servers using RadSec.
-
In the left-hand side menu of the Mist Cloud, click on the following menu options: .
-
In the WLANs pane, click on the Add WLAN button in the top-right
corner.
-
In the New WLAN pane, in the SSID field, type the SSID of your new
WLAN.

-
Deactivate the Wi-Fi features that limit the available security options:
Note:If the 6 GHz checkbox is active or Wi-Fi 7 is enabled, the WPA2 and Open Access options are not available in the Security section.
-
In the Radio Band section, deactivate the 6 GHz
checkbox.
-
In the Wi-Fi Protocols section, make sure that the Disabled
option is selected in the Wi-Fi 7 row.
-
In the Radio Band section, deactivate the 6 GHz
checkbox.
-
In the Security section, click on either the WPA3 or the
WPA2 tile, and then click on the Enterprise (802.1X) tile
below.
-
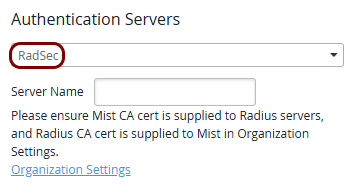
In the Authentication Servers section, select the RadSec option,
and leave the Server Name field empty.
-
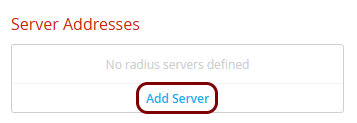
In the Server Addresses section, click on the Add Server
link.
-
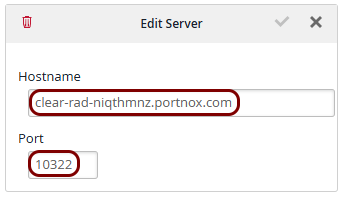
In the New Server section, enter the details of the RadSec server:
- Optional:
Repeat the previous two steps for the other Cloud RADIUS server, if necessary.
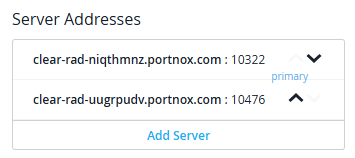
Use the arrow icons next to the servers to change their order. The server at the top of the list is the primary server.
-
Click on the Create button in the top-right corner of the New WLAN pane
to create the new WLAN.
Result: You created an SSID that authenticates employee Wi-Fi devices using 802.1X and the Portnox Cloud RADIUS servers, over RadSec.
Optional: Create an SSID for MAC-based authentication
This is an optional task. Follow this task only if you want to authenticate devices, such as IoT devices, that do not support 802.1X, using their MAC address instead. Skip this task if you do not need MAC-based authentication.
-
In the left-hand side menu of the Mist Cloud, click on the following menu options: .
-
In the WLANs pane, click on the Add WLAN button in the top-right
corner.
-
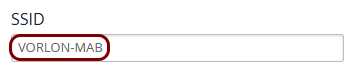
In the New WLAN pane, in the SSID field, type the SSID of your new
WLAN.
-
Deactivate the Wi-Fi features that limit the available security options:
Note:If the 6 GHz checkbox is active or Wi-Fi 7 is enabled, the WPA2 and Open Access options are not available in the Security section.
-
In the Radio Band section, deactivate the 6 GHz
checkbox.
-
In the Wi-Fi Protocols section, make sure that the Disabled
option is selected in the Wi-Fi 7 row.
-
In the Radio Band section, deactivate the 6 GHz
checkbox.
-
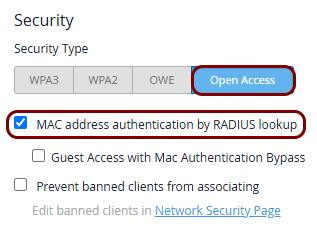
In the Security section, click on the Open Access tile, and then
activate the MAC address authentication by RADIUS lookup checkbox.
-
In the Authentication Servers section, select the RADIUS option, and
then in the RADIUS Authentication Servers section, click on the Add
Server link.
-
In the New Server section, enter the details of the authentication server:
- In the Hostname field, enter the Cloud RADIUS IP value, which you got when you created your RADIUS servers.
- In the Port field, replace the default value with the Authentication Port value, which you also got when you created your RADIUS servers.
- In the Shared Secret field, enter the Shared Secret value, which you also got when you created your RADIUS servers.
- Click on the ✓ icon in the New Server header to save the server.
-
In the RADIUS Accounting Servers section, click on the Add Server
link.
-
In the New Server section, enter the details of the accounting server:
- In the Hostname field, enter the Cloud RADIUS IP value, which you got when you created your RADIUS servers.
- In the Port field, replace the default value with the Accounting Port value, which you also got when you created your RADIUS servers.
- In the Shared Secret field, enter the Shared Secret value, which you also got when you created your RADIUS servers.
- Click on the ✓ icon in the New Server header to save the server.
- Optional:
Repeat the previous four steps for the other Cloud RADIUS server, if necessary, or for both Cloud RADIUS servers if
you added your local RADIUS server as the primary server.
Use the arrow icons next to the servers to change their order. The server at the top of the list is the primary server.
-
Click on the Create button in the top-right corner of the New WLAN pane
to create the new WLAN.
Result: You created a separate SSID that authenticates IoT devices by their MAC address using the Portnox Cloud RADIUS servers on the basis of MAC-based accounts.
Optional: Create an SSID for IPSK authentication
This is an optional task. Follow this task only if you want to authenticate devices using RADIUS-based identity pre-shared keys (IPSK). Juniper Mist calls this feature RADIUS PSK. Skip this task if you do not need IPSK authentication.
For more information about IPSK in Portnox Cloud, see the following topic: Create a MAC-based account.
-
In the left-hand side menu of the Mist Cloud, click on the following menu options: .
-
In the WLANs pane, click on the Add WLAN button in the top-right
corner.
-
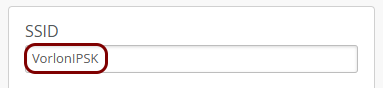
In the New WLAN pane, in the SSID field, type the SSID of your new
WLAN.
-
Deactivate the Wi-Fi features that limit the available security options:
Note:If the 6 GHz checkbox is active or Wi-Fi 7 is enabled, the WPA2 and Open Access options are not available in the Security section.
-
In the Radio Band section, deactivate the 6 GHz
checkbox.
-
In the Wi-Fi Protocols section, make sure that the Disabled
option is selected in the Wi-Fi 7 row.
-
In the Radio Band section, deactivate the 6 GHz
checkbox.
-
In the Security section, click on the WPA2 tile, then click on the
Personal (PSK) tile below, then select the Multiple passphrases
option, and select the RADIUS PSK option. Leave the Default PSK and
Default VLAN ID fields empty.

If you enter a default PSK, devices without an IPSK from Portnox Cloud can connect using that key.
-
In the Authentication Servers section, select the RADIUS option, and
then in the RADIUS Authentication Servers section, click on the Add
Server link.
-
In the New Server section, enter the details of the authentication server:
- In the Hostname field, enter the Cloud RADIUS IP value, which you got when you created your RADIUS servers.
- In the Port field, replace the default value with the Authentication Port value, which you also got when you created your RADIUS servers.
- In the Shared Secret field, enter the Shared Secret value, which you also got when you created your RADIUS servers.
- Click on the ✓ icon in the New Server header to save the server.
-
In the RADIUS Accounting Servers section, click on the Add Server
link.
-
In the New Server section, enter the details of the accounting server:
- In the Hostname field, enter the Cloud RADIUS IP value, which you got when you created your RADIUS servers.
- In the Port field, replace the default value with the Accounting Port value, which you also got when you created your RADIUS servers.
- In the Shared Secret field, enter the Shared Secret value, which you also got when you created your RADIUS servers.
- Click on the ✓ icon in the New Server header to save the server.
- Optional:
Repeat the previous four steps for the other Cloud RADIUS server, if necessary, or for both Cloud RADIUS servers if
you added your local RADIUS server as the primary server.
Use the arrow icons next to the servers to change their order. The server at the top of the list is the primary server.
-
Click on the Create button in the top-right corner of the New WLAN pane
to create the new WLAN.
Result: You created a separate SSID that authenticates devices using identity pre-shared keys from Portnox Cloud.