
Guest access – HPE Aruba Networking Central
In this topic, you will learn how to configure access points managed by HPE Aruba Networking Central to work together with the Portnox™ Cloud captive portal for guest user authentication.
Create RADIUS server profiles
In this section, you will create authentication server profiles for the Portnox™ Cloud RADIUS servers, and add them to an authentication server group. You will use this server group later when you configure your SSIDs.
-
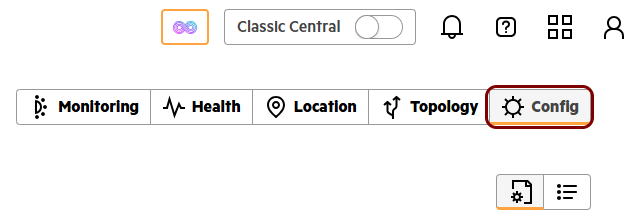
In HPE Aruba Networking Central, click on the Config tab in the top-right corner.
-
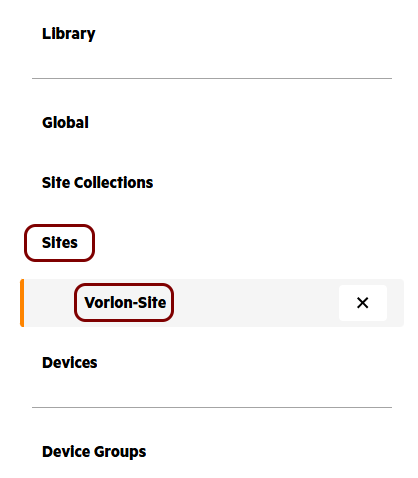
In the left-hand side menu, click on the Sites option, and then click on the name of your
site.
-
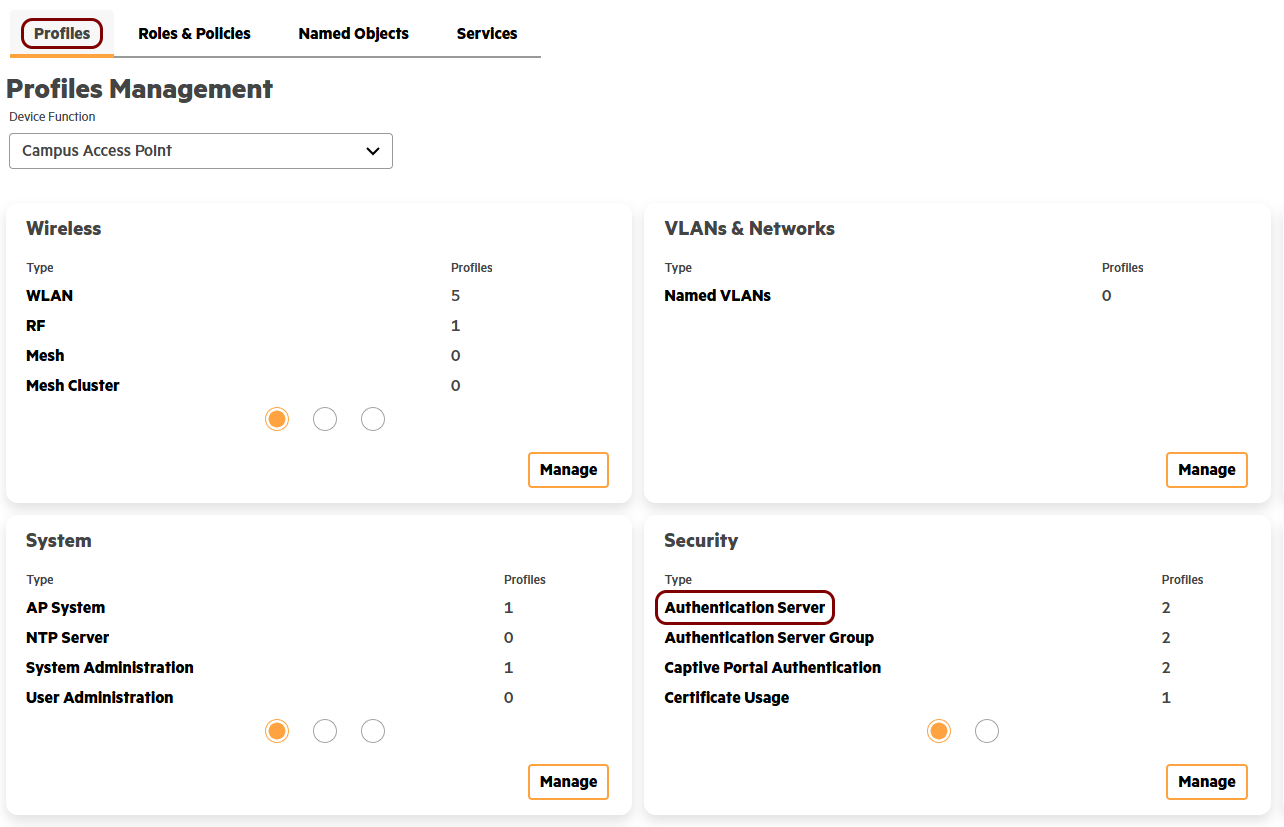
On the Profiles tab, in the Profiles Management pane, click on the
Authentication Server entry in the Security card.
-
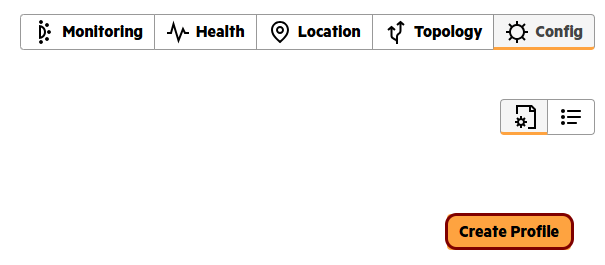
Click on the Create Profile button to create a new authentication server profile.
-
Configure the new authentication server profile:
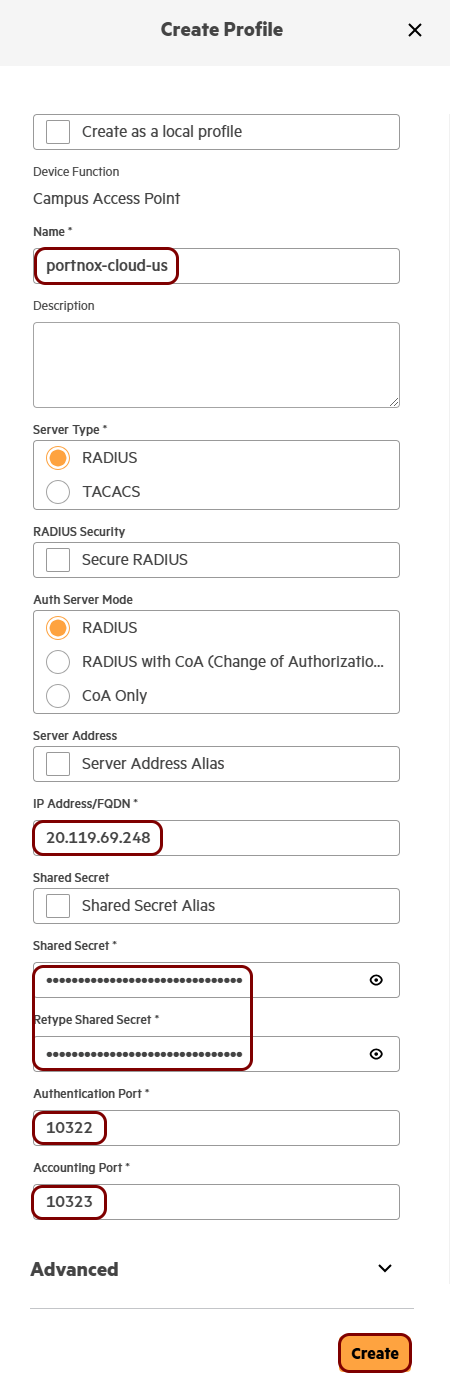
- In the Name field, enter a name for this server.
- Leave the Secure RADIUS checkbox cleared, and leave the RADIUS option selected in the Server Type and Auth Server Mode fields.
- In the IP Address/FQDN field, enter the Cloud RADIUS IP value from Portnox Cloud.
- In the Shared Secret and Retype Shared Secret fields, enter the Shared Secret value from Portnox Cloud.
- In the Authentication Port and Accounting Port fields, enter the Authentication port and Accounting port values from Portnox Cloud.
- Click on the Create button.
-
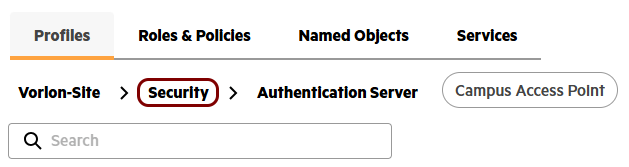
Click on the Security entry in the breadcrumb.
-
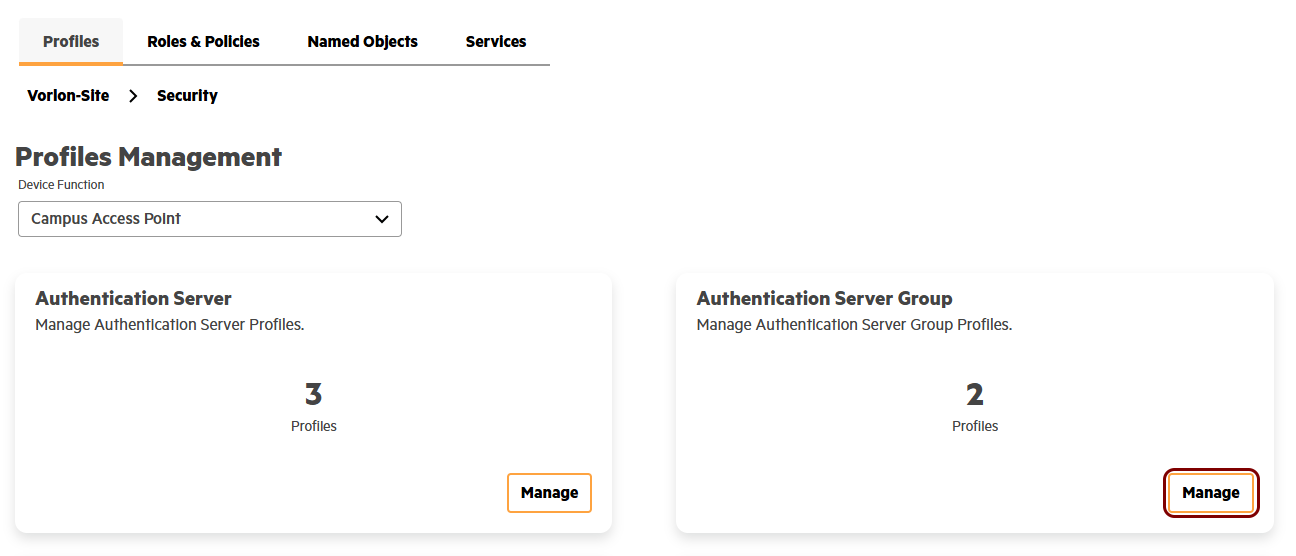
In the Profiles Management pane, click on the Manage button in the
Authentication Server Group card.
-
Click on the Create Profile button to create a new authentication server group.
-
Configure the new authentication server group:
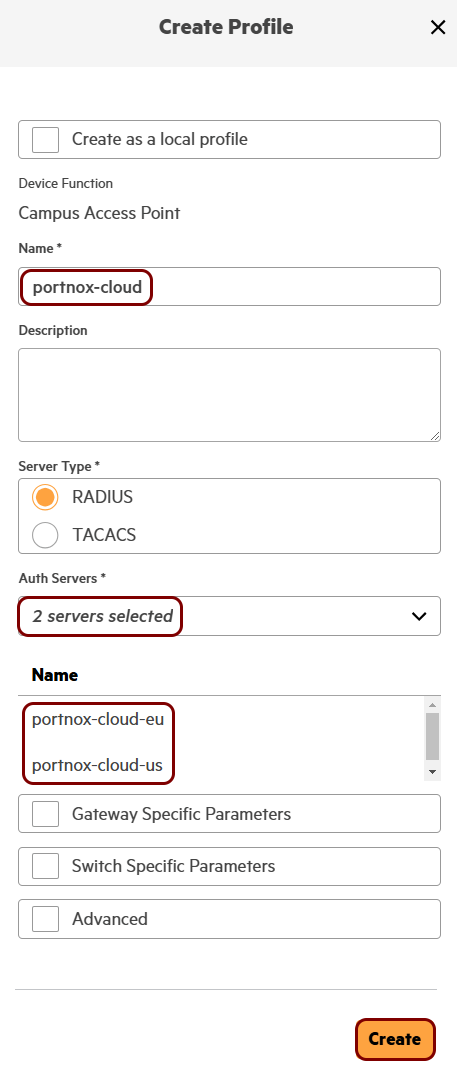
- In the Name field, enter a name for this server group.
- In the Auth Servers field, select the authentication server profiles that you created earlier, starting with the primary server.
- Click on the Create button.
Result: You created an authentication server group that contains the Portnox Cloud RADIUS servers.
Create a captive portal authentication profile
In this section, you will create a captive portal authentication profile that redirects guests to the Portnox™ Cloud captive portal. You will use this profile later when you configure your guest SSID.
Before you begin, configure the guest network in Portnox Cloud and note down the value of the Captive Portal URL field.
-
In HPE Aruba Networking Central, click on the Config tab in the top-right corner.
-
In the left-hand side menu, click on the Sites option, and then click on the name of your
site.
-
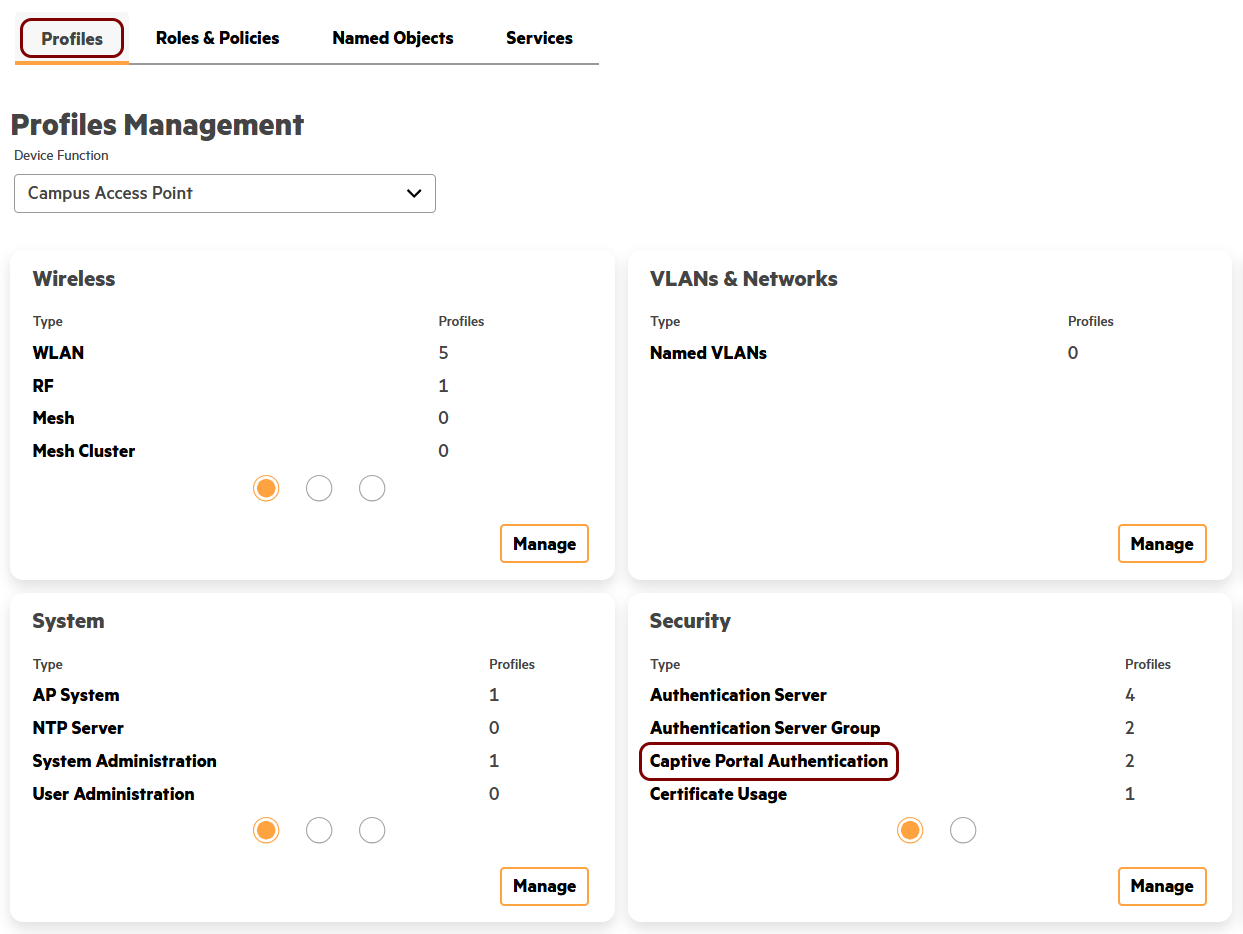
On the Profiles tab, in the Profiles Management pane, click on the
Captive Portal Authentication entry in the Security card.
-
Click on the Create Profile button to create a new captive portal authentication
profile.
-
Configure the new captive portal authentication profile:
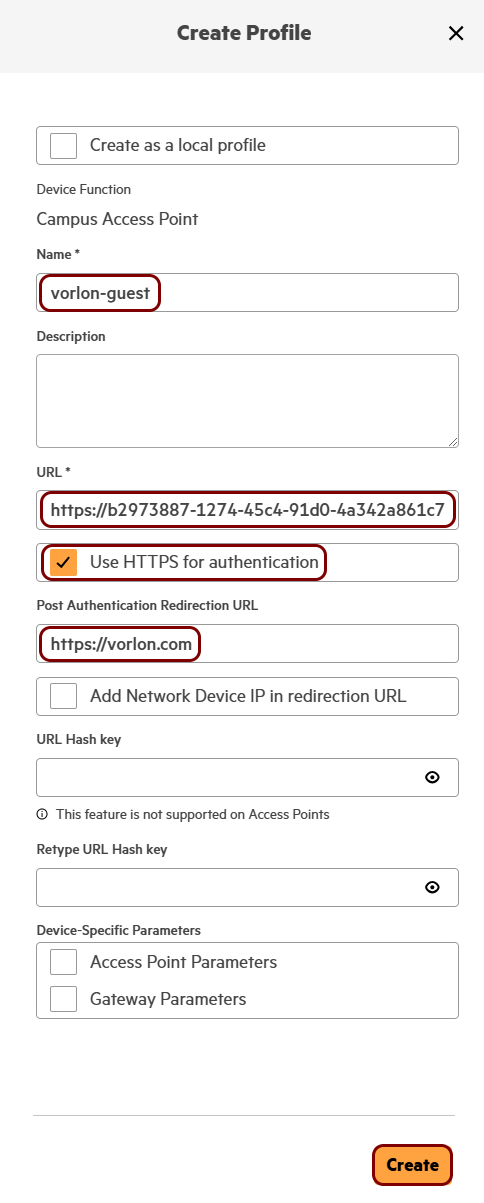
- In the Name field, enter a name for this profile.
- In the URL field, paste the value of the Captive Portal URL, including the leading https://.
- Leave the Use HTTPS for authentication checkbox selected.
- Optional: In the Post Authentication Redirection URL field, enter the address of the page that guests see after they authenticate.
- Click on the Create button.
Result: You created a captive portal authentication profile that points to the Portnox Cloud captive portal.
Create an SSID for guest access
In this section, you will create an open WLAN profile that sends guests to the Portnox™ Cloud captive portal and authenticates them using the Portnox Cloud RADIUS servers.
-
In HPE Aruba Networking Central, click on the Config tab in the top-right corner.
-
In the left-hand side menu, click on the Sites option, and then click on the name of your
site.
-
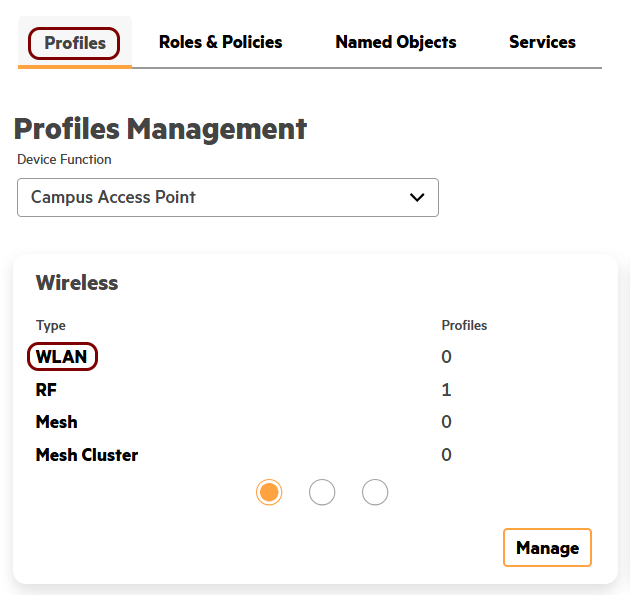
On the Profiles tab, in the Profiles Management pane, click on the
WLAN entry in the Wireless card.
-
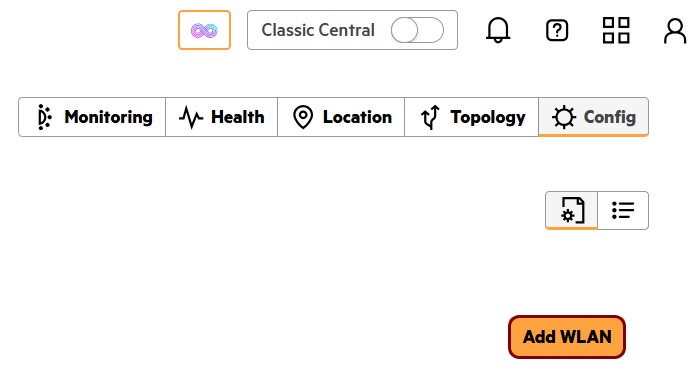
Click on the Add WLAN button to create a new WLAN profile.
-
In the General section, in the Name field, enter a display name for
this profile, and in the ESSID Name field, enter the network name that devices see when they
search for Wi-Fi networks. Then, in the Bands section, deactivate the 6
GHz checkbox and in the Wi-Fi Protocols section, deactivate the
Wi-Fi 7 (802.11be) checkbox.
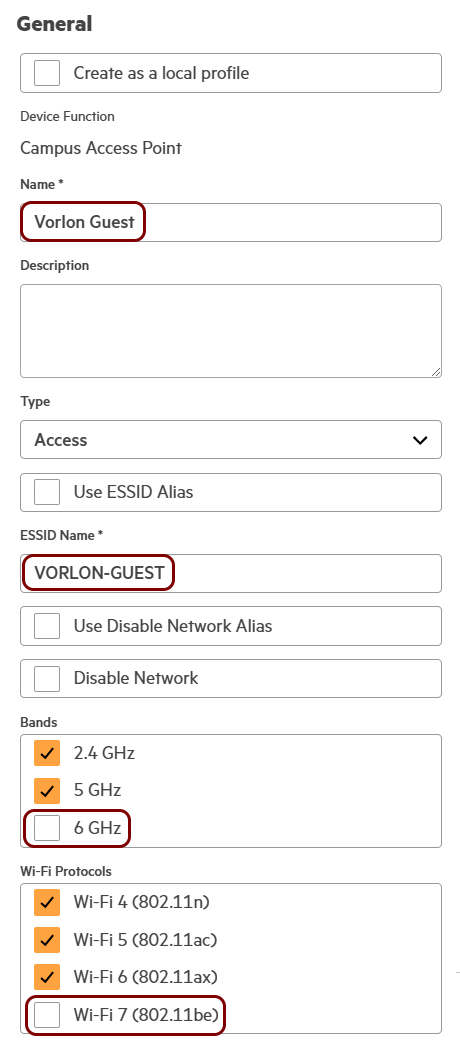 Note:If 6 GHz is selected in the Bands section or if Wi-Fi 7 (802.11be) is selected in the Wi-Fi Protocols section, the Open option is not available in the Key Management field.
 -
In the Security section:
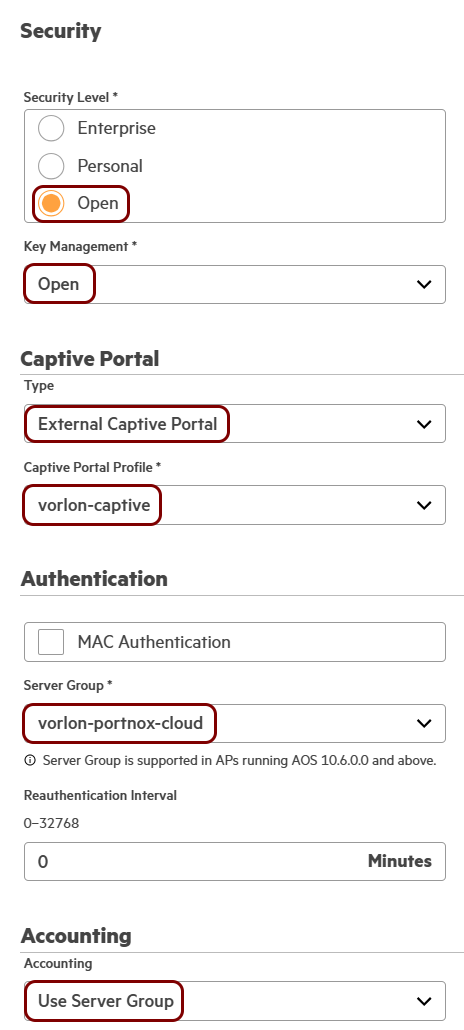
- In the Security Level field, select the Open option.
- In the Key Management field, select the Open option.
- In the Captive Portal section, in the Type field, select the External Captive Portal option.
- In the Captive Portal Profile field, select the captive portal authentication profile that you created earlier.
- In the Server Group field, select the authentication server group that you created earlier.
- In the Accounting field, select the Use Server Group option.
Result: You created an open guest SSID that redirects guests to the Portnox Cloud captive portal.
Legacy solutions
Classic Central
In this section, you will learn how to configure access points managed using Aruba Central to work together with the Portnox™ Cloud captive portal for guest user authentication.
-
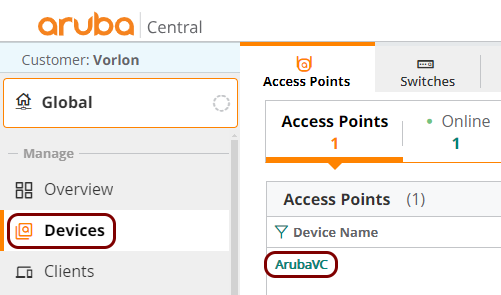
In the left-hand side main menu, click on the Devices option and then, in the right-hand
side pane, click on the name of the device that you want to configure.
-
In the left-hand side menu for the selected device, click on the
Device option. Then, in the right-hand side pane, make sure that the
WLANs tab is active, and under the Wireless SSIDs list, click
on the Add SSID button to add a new SSID.
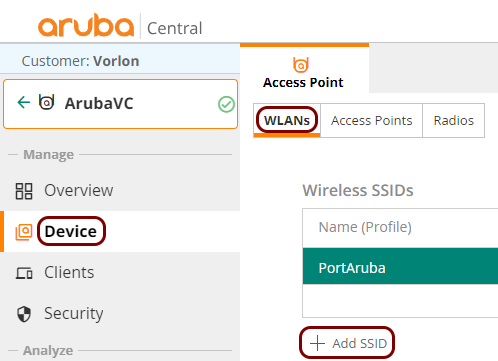 Note:You can also edit an existing SSID by clicking on its name on the Wireless SSIDs list.
 -
In the Security step:
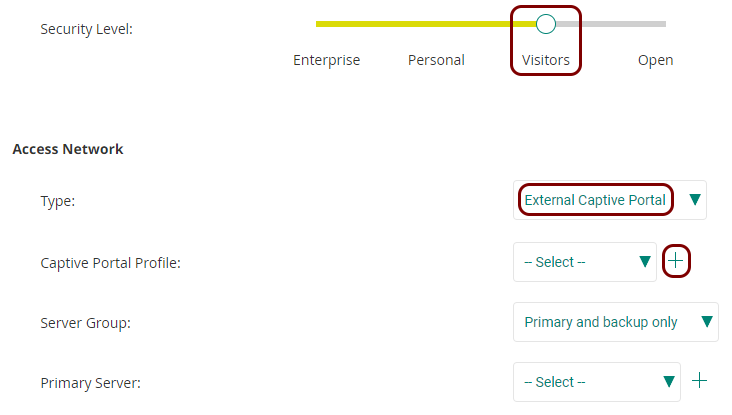
- Set the Security Level slider to the Visitors position.
- In the Type field, select the External Captive Portal option.
- Click on the + icon to the right of the Captive Portal Profile label to create a captive portal profile.
-
In the External Captive Portal – New window:
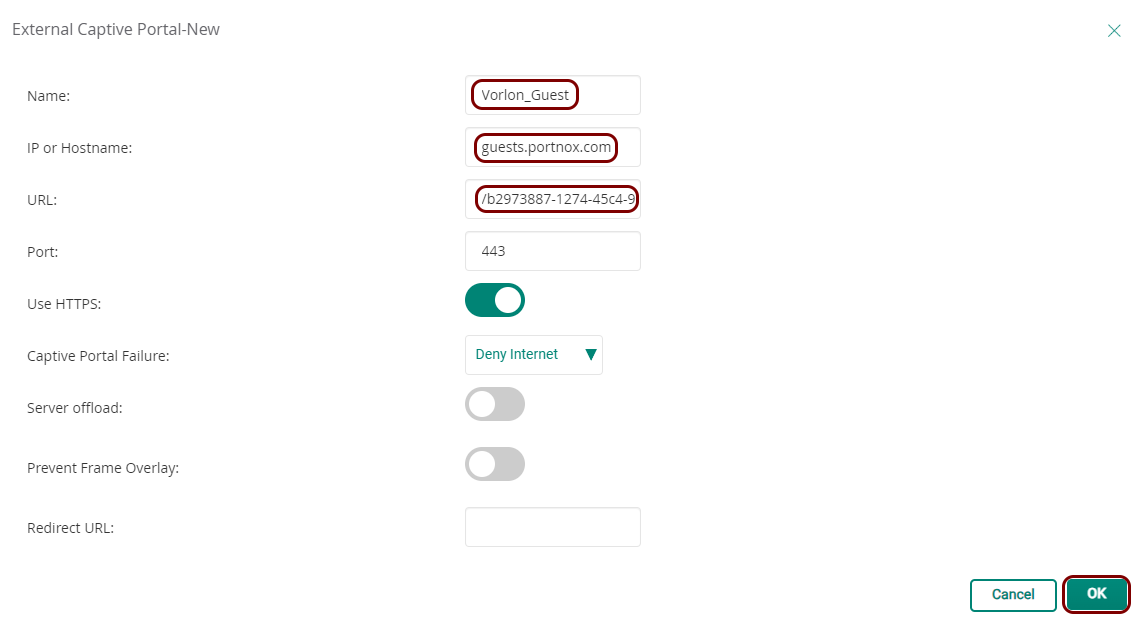
-
Back in the Create a New Network wizard’s Security step, click on
the + icon to the right of the Primary Server
label to create a RADIUS server configuration.
 Note:If you already created a RADIUS server profile, for example, when configuring wireless access for employees, you can use the existing profile instead of creating a new one.
 -
In the New Server window:
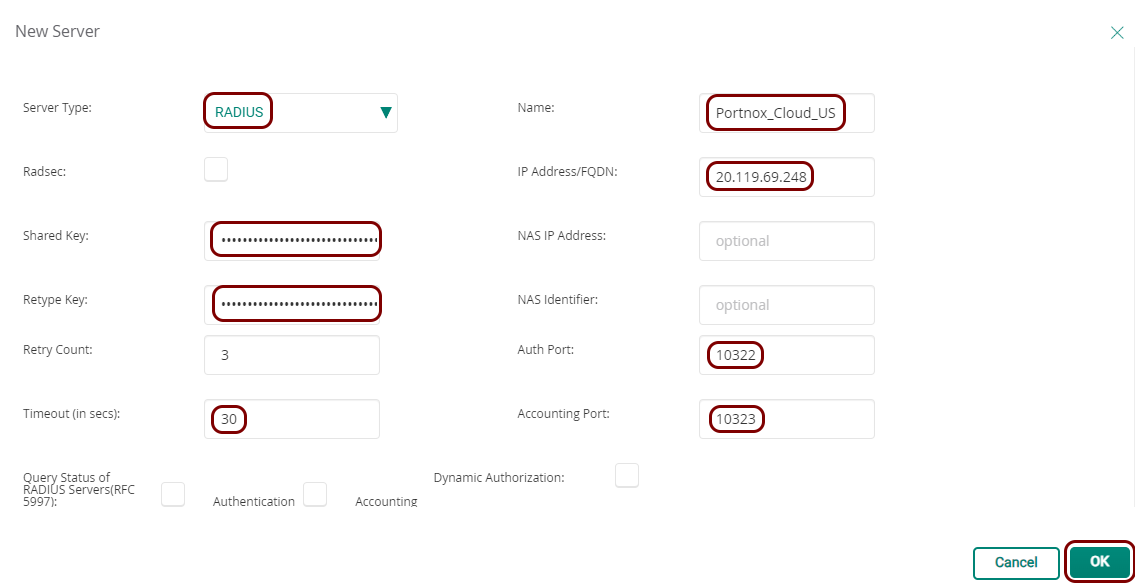
- In the Server Type field, select the RADIUS option.
- In the Name field, enter a name for this RADIUS server configuration.
- In the IP Address/FQDN field, enter your Cloud RADIUS IP, which you obtained when you created the Cloud RADIUS server.
- In the Shared Key and Retype Key fields, paste your Shared Secret, also obtained when you created the Cloud RADIUS server.
- In the Auth Port field, enter your Authentication port number, also obtained when you created the Cloud RADIUS server.
- In the Accounting Port field, enter your Accounting port number, also obtained when you created the Cloud RADIUS server.
- In the Timeout (in secs) field, enter 30 to avoid timeouts due to any intermittent Internet connection delays.
- Click on the OK button to save your configuration.
- Optional:
Back in the Create a New Network wizard’s Security step, click on
the + icon to the right of the Secondary Server
label to create a second RADIUS server configuration.
 Note:Do this only if your Portnox Cloud tenant is configured with two Cloud RADIUS servers or if you’re using a local RADIUS server in addition to the Cloud RADIUS server. If you already created a secondary RADIUS server profile, for example, when configuring wireless access for employees, you can use the existing profile instead of creating a new one.
 -
Proceed to the Access step of the Create a New Network
wizard:
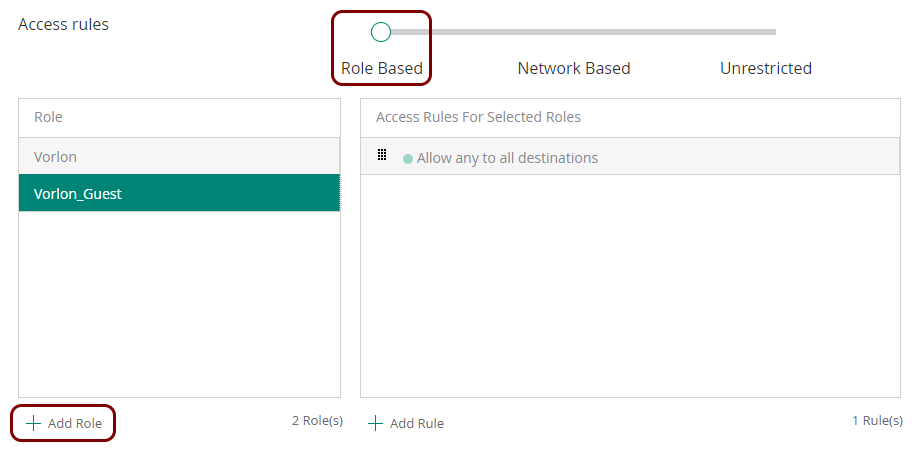
- Set the Access rules slider to the Role Based position.
- Click on the Add Role button below the Role table to create a new role.
-
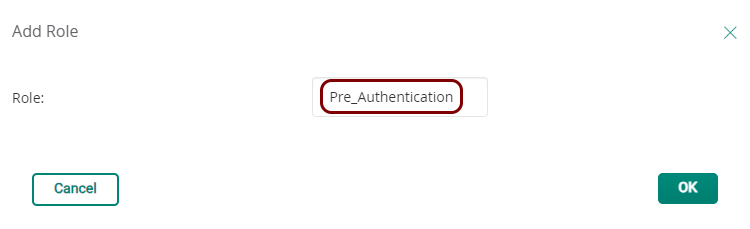
In the Add Role window, enter a name for the new role.
This role controls network access before the user authenticates with the captive portal. Use a name such as Pre_Authentication.
-
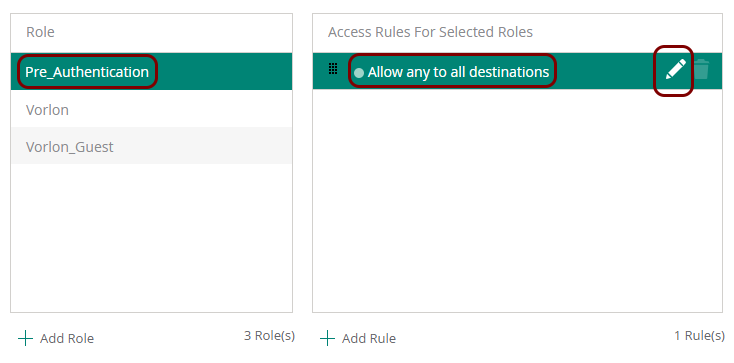
In the Access rules table, in the Role column, click on the newly
created role. In the Access Rules For Selected Roles column, click on the
Allow any to all destinations entry. Then, click on the ✎ icon to edit the rule.
-
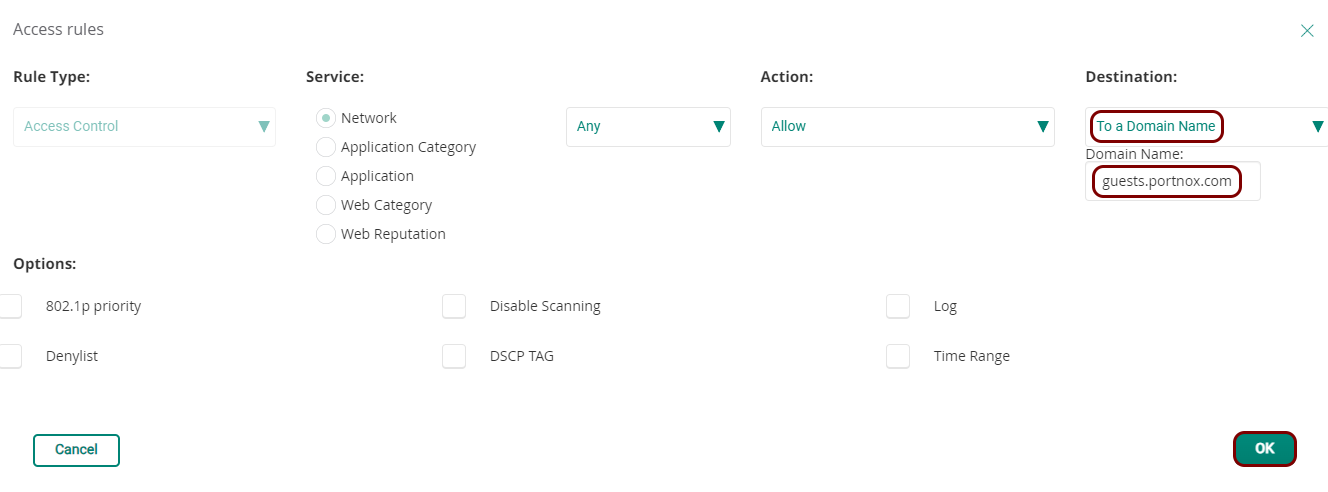
In the Access rules window, in the Destination field, select the
To a Domain Name option, and in the Domain Name field, enter
guests.portnox.com. Then, click on the OK button to save the
edited rule.
-
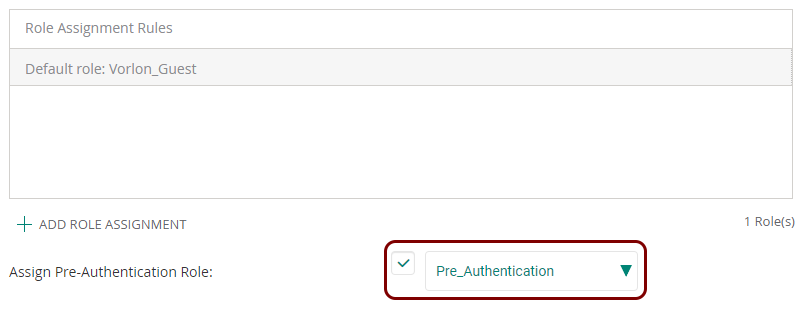
Scroll all the way to the bottom of the Access rules pane, activate the checkbox next to
the Assign Pre-Authentication Role field, and in the selection field, select the name of
the pre-authentication role that you just created and configured.
Aruba Mobility Controller
In this section, you will learn how to configure an Aruba Mobility Controller to work together with the Portnox™ Cloud captive portal for guest user authentication.
Before you begin configuring your access point, you must configure the guest network in Portnox Cloud and note down the values of the fields: IP (for walled garden) and Captive Portal URL.
-
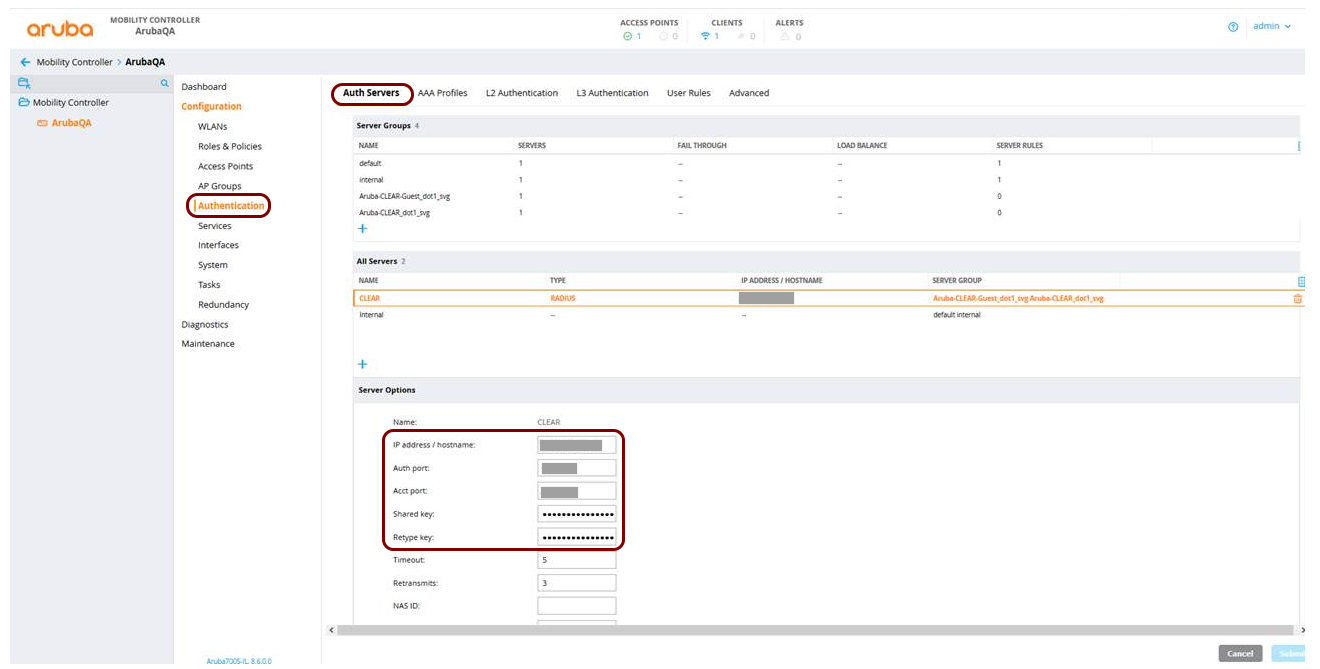
In the Aruba Mobility Controller web interface, navigate to , and add a new server. Then, enter the details of the Portnox
Cloud RADIUS server that you created earlier: the IP Address, the
Auth port, the Acct port, and the Shared
key.
-
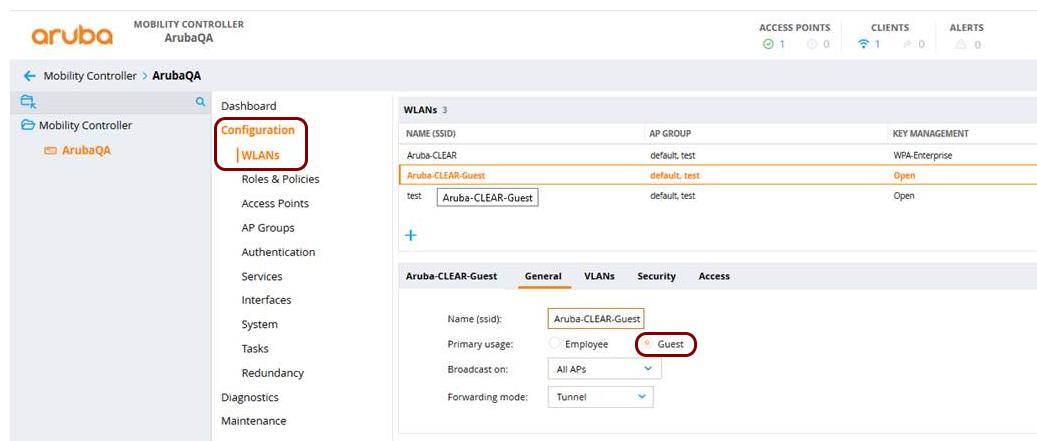
Navigate to and add a new SSID or edit an existing SSID.
-
In the General tab, in Primary usage, select
Guest.
-
In Page, enter the remaining part of the Captive Portal
URL that you obtained when you configured the guest
network in Portnox Cloud.
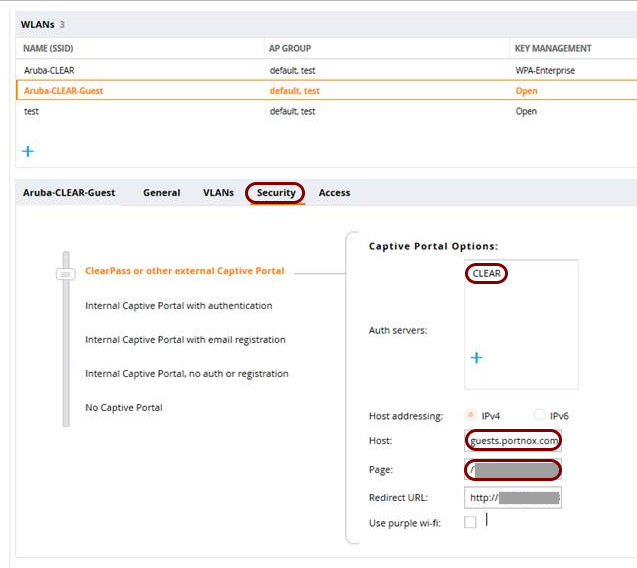
For example, if Captive Portal URL is https://guests.portnox.com/12345-12345-12345, in Page, enter /12345-12345-12345.
-
In the General tab, in Primary usage, select
Guest.