Guest access – Ubiquiti UniFi
In this topic, you will learn how to configure Ubiquiti UniFi controllers to work together with the Portnox™ Cloud captive portal for guest user authentication.
Before you begin configuring your controller, you must configure the guest network in Portnox Cloud and note down the values of the following fields:
-
Captive Portal ID
For example: b2973887-1274-45c4-91d0-4a342a861c76-homeworld
(Also shown in the PORTNOX_ECP_ID field)
-
Captive Portal Proxy URL (for UniFi)
For example: https://b2973887-1274-45c4-91d0-4a342a861c76-homeworld.proxy.guests.portnox.com
-
IP (for walled garden)
For example:134.33.139.160 50.85.37.114 -
The API access token generated in
For example: mk1yiGyEatNa_qFR8ibnr9HWht4
You will need these values later. We recommend that you keep your Portnox Cloud configuration open in another browser tab for easy copying and pasting.
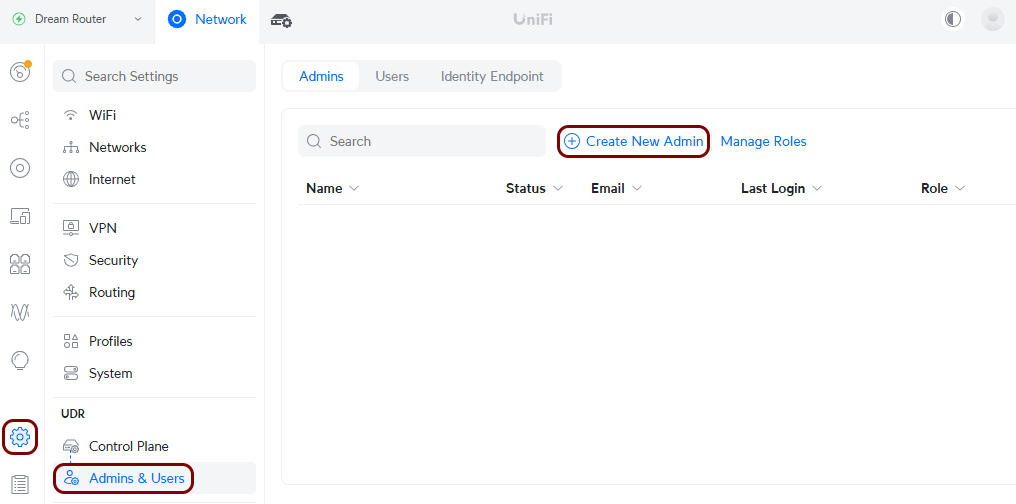
Create a service account in the controller
In this section, you will create a service account in your Ubiquiti UniFi controller, which you will later use in the portnox-unifi-agent Docker container configuration.
-
In the UniFi Web UI, go to .
-
Create a service account for UniFi Captive Portal integrations:
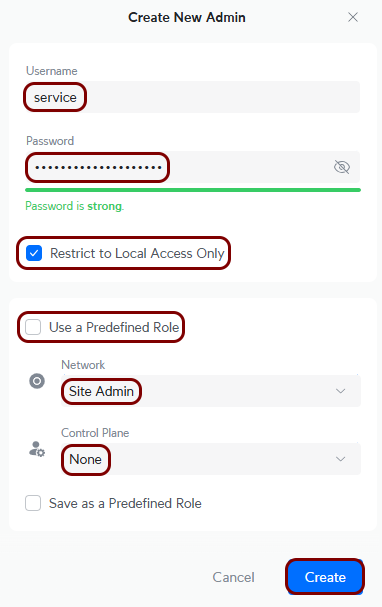
- Activate the Admin checkbox.
- In the Username and Password fields, enter a username and a password for this service account.
- Deactivate the Super Admin checkbox.
- In the Network field, select the Site Admin option.
- In the Control Plane field, select the None option.
- Click on the Create button.
Set up the Docker container
In this section, you will run the portnox-unifi-agent Docker container using parameters copied from Portnox Cloud and credentials for your UniFi controller.
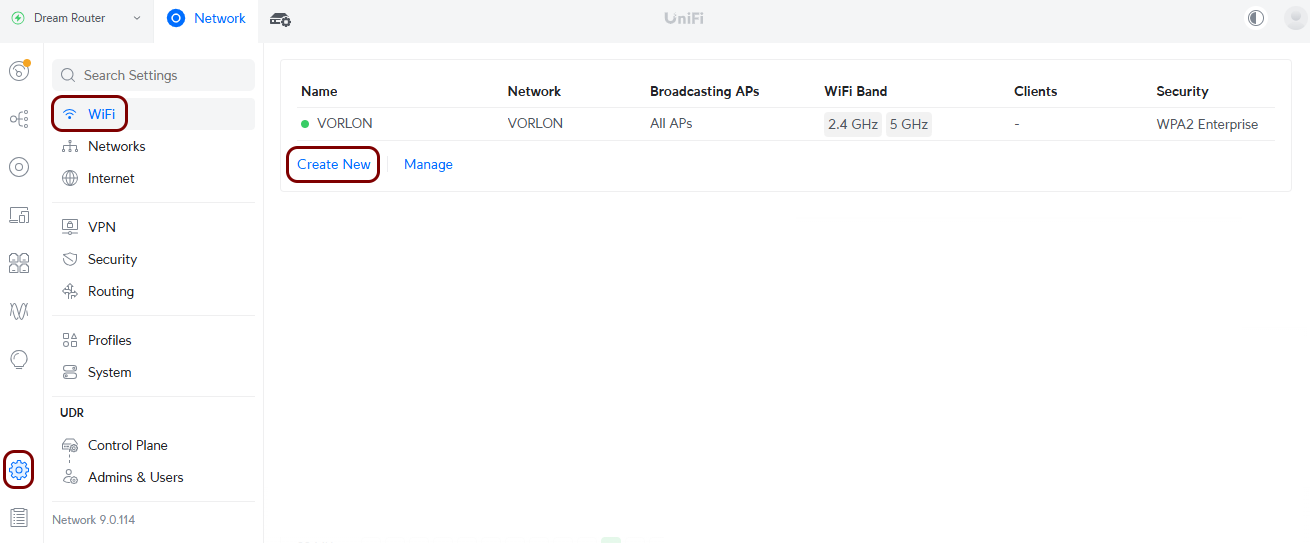
Create a guest network SSID
In this section, you will use the UniFi web UI to create an SSID for your guest network.
-
In the UniFi Web UI, go to .
-
In the new WiFi pane:
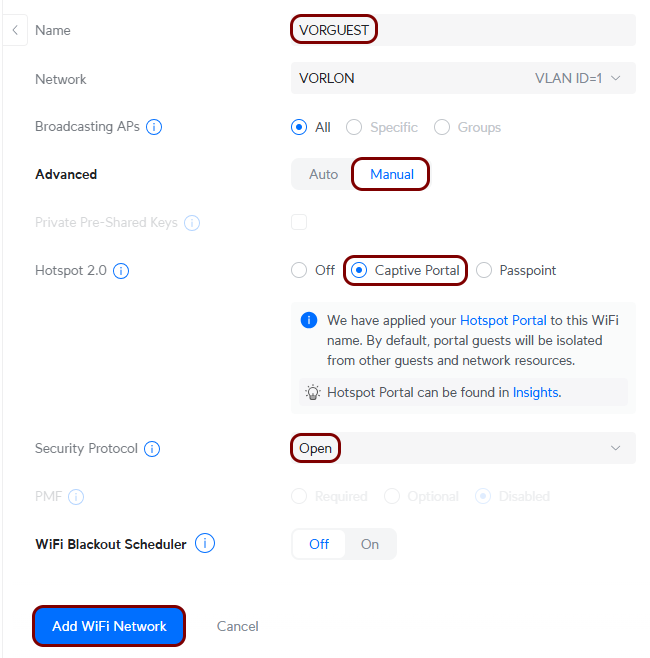
- In the Name field, enter the SSID of your guest network.
- In the Application field, select the Hotspot option.
- In the Hotspot Type field, select the Captive Portal option.
- Configure remaining fields as required for your network configuration, and then click on the Add WiFi Network button.
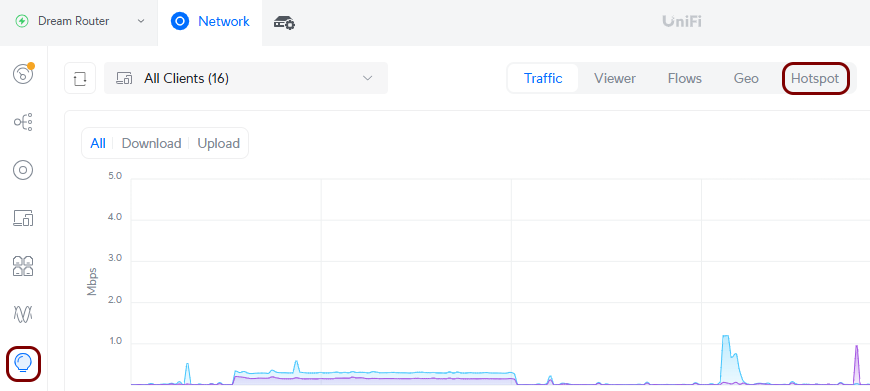
Set up the UniFi captive portal
In this section, you will configure the UniFi Captive Portal to work with Portnox Cloud via the portnox-unifi-agent Docker container.
-
In the UniFi Web UI, go to , and then click on the Landing Page button.
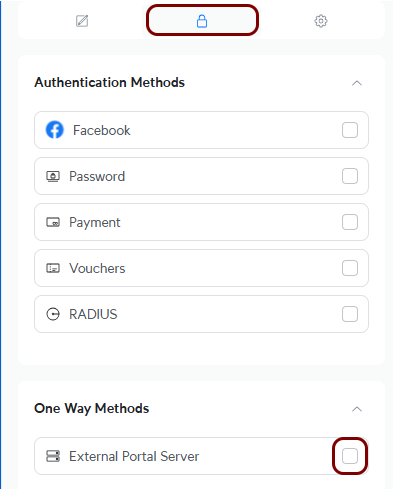
-
In the left-hand side pane, in the One Way Methods section, activate the External
Portal Server checkbox.
-
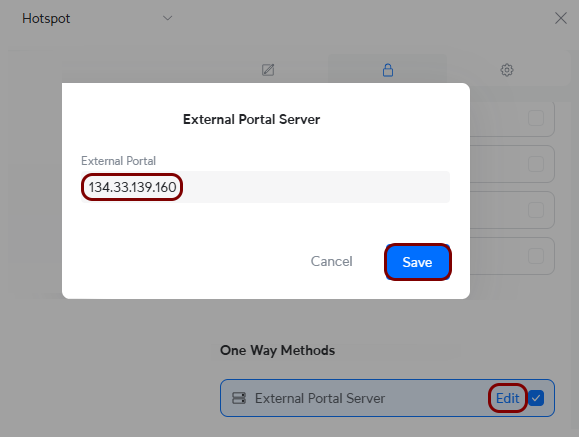
Click on the Edit link in the External Portal Server field, and in
the External Portal Server windows, enter the following IP address:
134.33.139.160 (US) or 50.85.37.114 (EU), and then click on the
Save button to close the window.
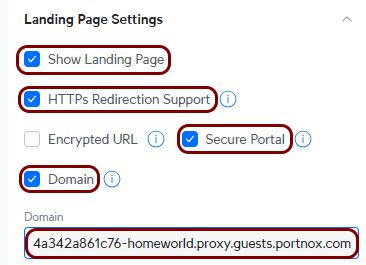
-
In the Landing Page Settings section, activate the Show Landing Page,
HTTPs Redirection Support, Secure Portal and
Domain checkboxes, and in the Domain field, paste the value of the
Captive Portal Proxy URL (for UniFi) field from Portnox Cloud, and remove the
https:// from the start of this value.
-
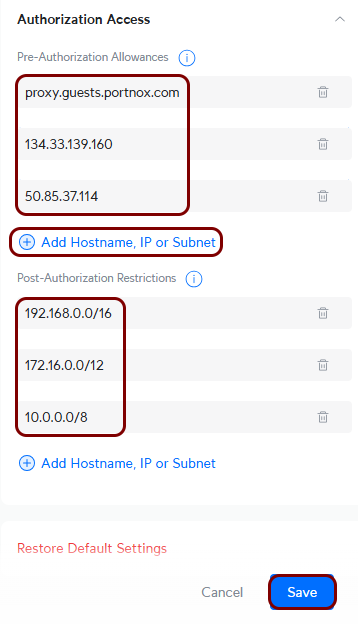
In the Authorization Access section, in the Pre-Authorization
Allowances fields, add proxy.guests.portnox.com and the values that you
copied from the IP (for walled garden) field in Portnox cloud, for example,
134.33.139.160, 50.85.37.114,
52.224.68.160, 104.40.139.161,
20.85.190.232/29, 20.67.6.144/29. In the
Post-Authorization Restrictions fields, add the following values (if not present
already): 192.168.0.0/16, 172.16.0.0/12, and
10.0.0.0/8.
Note:Click on the Add Hostname, IP or Subnet link to add more fields if necessary.