Onboard Android devices with certificates using Workspace ONE UEM and SCEP
In this topic, you will learn how to deploy Portnox™ Cloud certificates to Android devices via Workspace ONE UEM and SCEP.
Turn on the Portnox Cloud SCEP services
In this section, you will configure Portnox™ Cloud to provide SCEP services to your devices.
If you have previously turned on the Portnox Cloud SCEP services, skip to the later steps.
Portnox Cloud SCEP services let devices contact the Cloud SCEP server and get a unique certificate for the device or for the specific user of the device.
-
In the Cloud portal top menu, click on the Settings option.

-
In the Cloud portal left-hand side menu, click on the option.
-
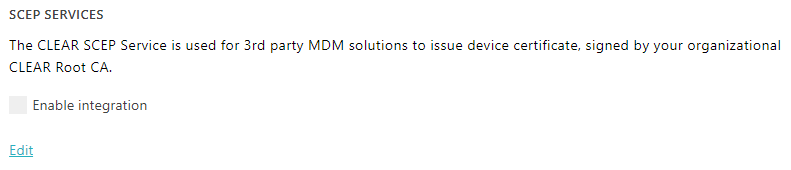
Enable integration with SCEP services.
- Click on the Edit link.
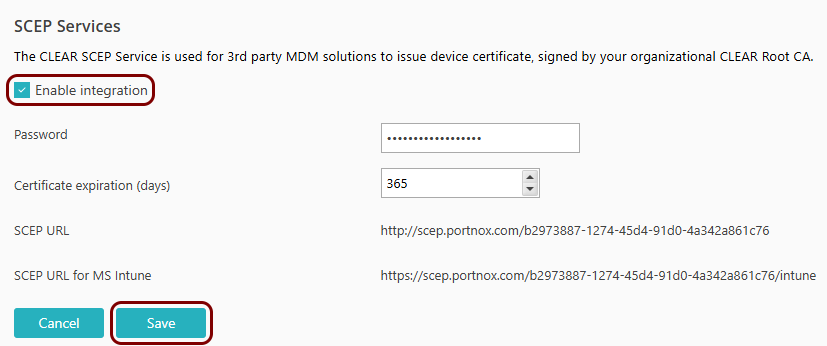
- Activate the Enable integration checkbox.
- Click on the Save button.
-
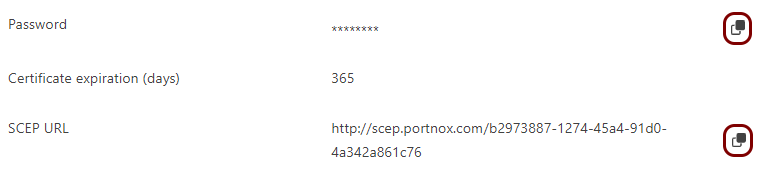
Click on the ⧉ icon next to the Password field to
copy the SCEP password, and paste it in a text file for later use.
Download the root CA certificate from Portnox Cloud
In this section, you will download the Portnox™ Cloud root CA certificate from the Cloud portal.
You need the root CA certificate so that your managed devices can verify the validity of Cloud RADIUS servers, which have certificates signed by this root CA certificate. If the root CA certificate is not distributed to managed devices, some devices may show a security warning each time that the user connects to networks managed by Portnox Cloud.
-
In the Cloud portal top menu, click on the Settings option.
-
In the Cloud portal left-hand side menu, click on the option.
The right-hand pane shows the list of active servers.

-
Click on the Download root certificate link to download the root CA certificate.

Save the file on your disk to use it later. The default name of the file is rootCertificate.cer.
Create the SCEP CA configuration and the SCEP request template
In this section, you will create the SCEP CA configuration and the SCEP request template in Workspace ONE UEM. This configuration and this template will be used by the profiles that you will create later.
-
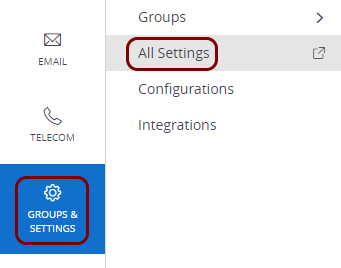
In the left-hand side menu, select: .
-
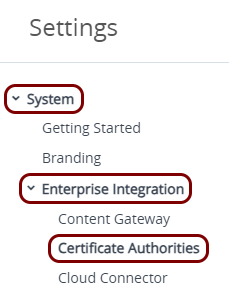
In the Settings pane, in the left-hand side menu, select: .
-
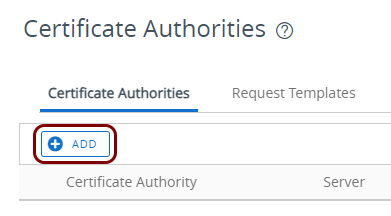
In the Certificate Authorities pane, click on the Add button.
-
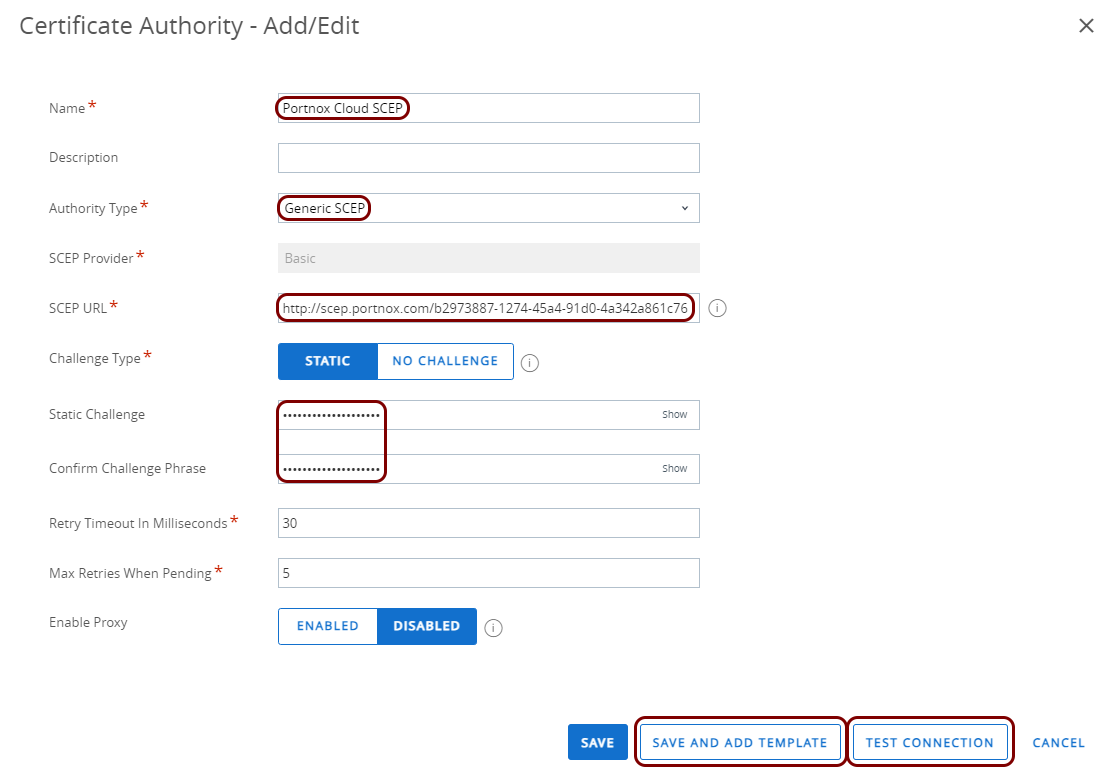
In the Certificate Authority – Add/Edit pane:
-
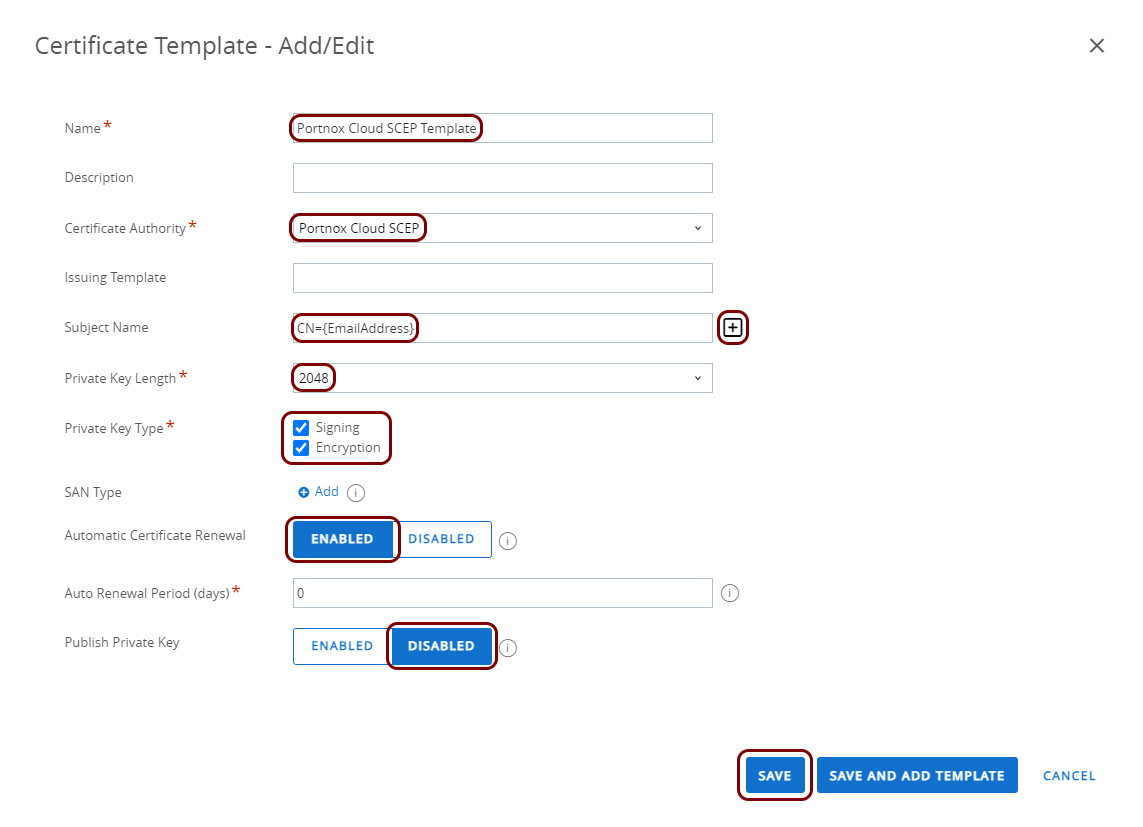
In the Certificate Template – Add/Edit pane:
Result: You created a configuration for the Portnox Cloud SCEP CA and the SCEP request template.


Optional: Hand over information from the Portnox Cloud team to the Workspace ONE team
In this section, you will learn what information was collected in previous steps from Portnox Cloud, which is needed to configure Workspace ONE to work with Portnox Cloud.
If different people are responsible for managing Portnox Cloud and Workspace ONE, here is the information you need to hand over:
-
The URL of the Portnox Cloud SCEP server. For example, https://scep.portnox.com/b2973887-1274-45d4-91d0-4a342a861c76.
-
The password for the SCEP server.
-
The root CA certificate file in the Base-64 encoded X.509 format. For example, rootCertificate.cer.
Create a profile for Android
In this section, you will create a profile in Workspace ONE UEM for Android devices. This profile will contain the necessary certificates as well as SCEP and Wi-Fi configurations.
-
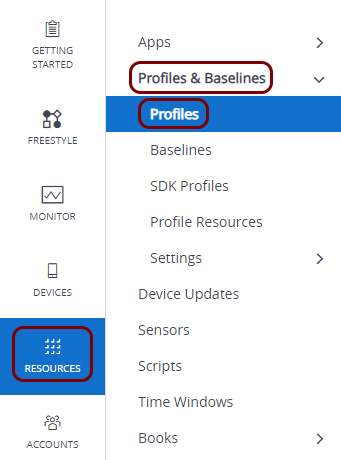
In the left-hand side menu, select: .
-
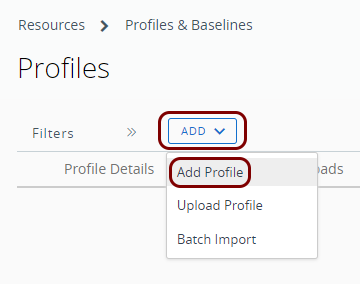
In the Profiles pane, click on the Add button and select the
Add Profile option.
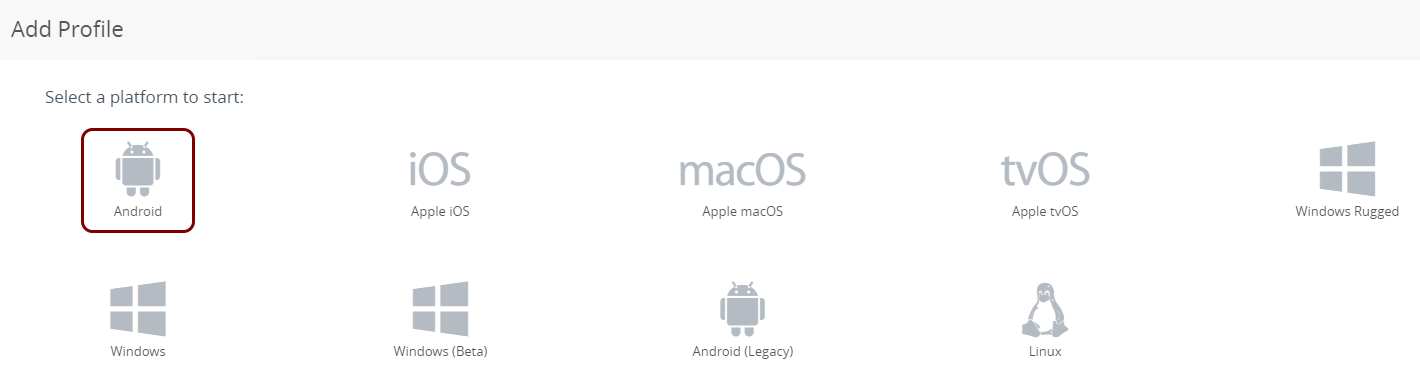
-
In the Add Profile pane, click on the Android icon.
-
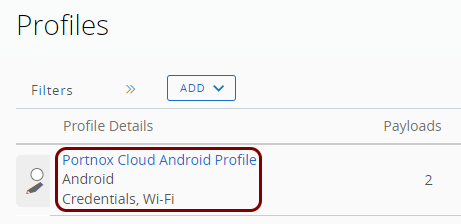
In the Name Your Profile field, enter a name for the profile.
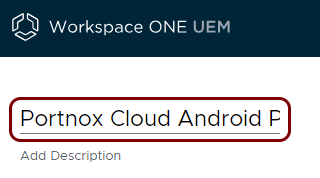
In this example, we used the name Portnox Cloud Android Profile, but you can use any name you like.
-
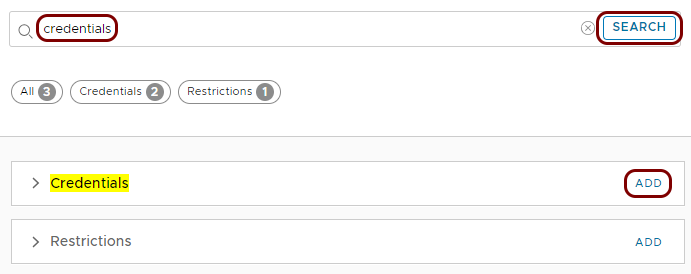
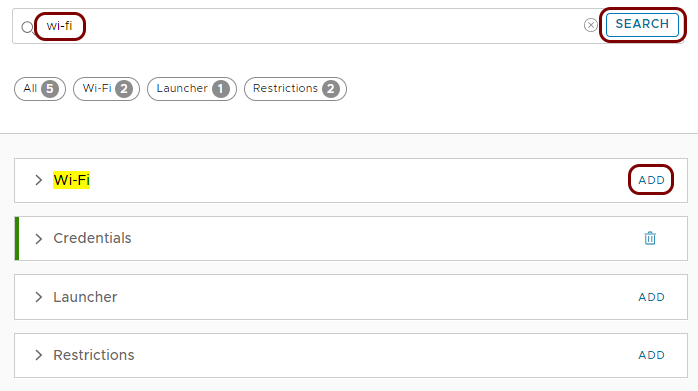
In the Start typing to search for payloads and settings field, type
credentials, and then click on the SEARCH button. Then, click on
the ADD button in the Credentials row.
-
In the Credentials section:
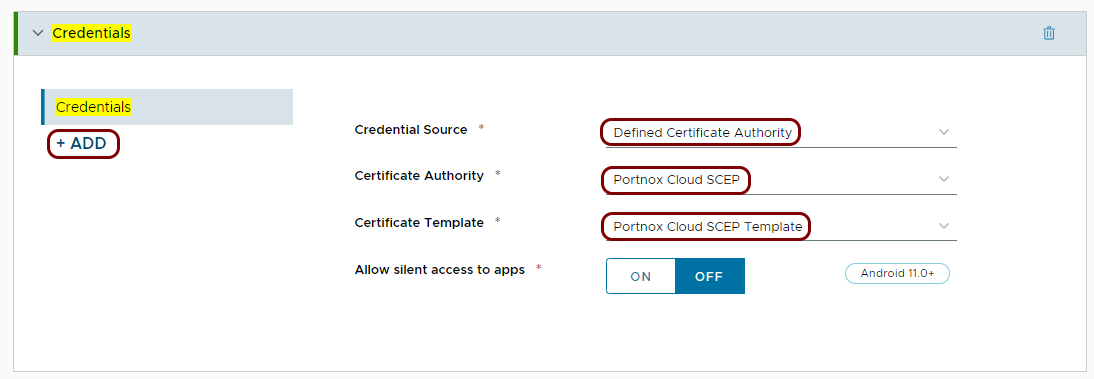
- In the Credential Source field, select the Defined Certificate Authority option.
- In the Certificate Authority field, select the name of the SCEP CA configuration you created earlier.
- In the Certificate Template field, select the name of the SCEP request template you created earlier.
- Click on the ADD button under the Credentials heading to add another credentials payload.
-
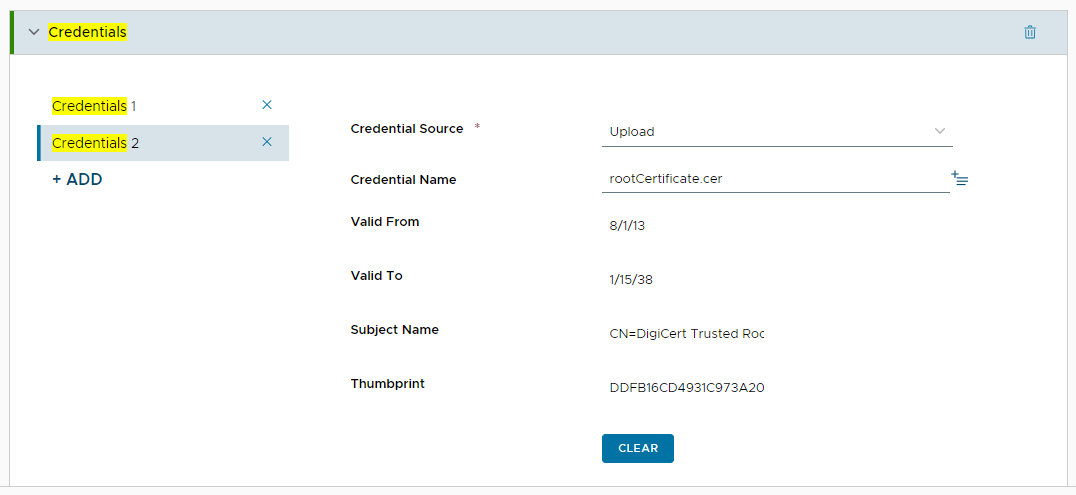
In the second Credentials section:

- In the Credential Source field, select the Upload option.
- In the Certificate section, click on the CHOOSE FILE button and select the root CA certificate file that you downloaded earlier. Then, click on the ATTACH CERTIFICATE button.
-
In the Start typing to search for payloads and settings field, type
wi-fi, and then click on the SEARCH button. Then, click on the
ADD button in the Wi-Fi row.
-
In the Wi-Fi section:
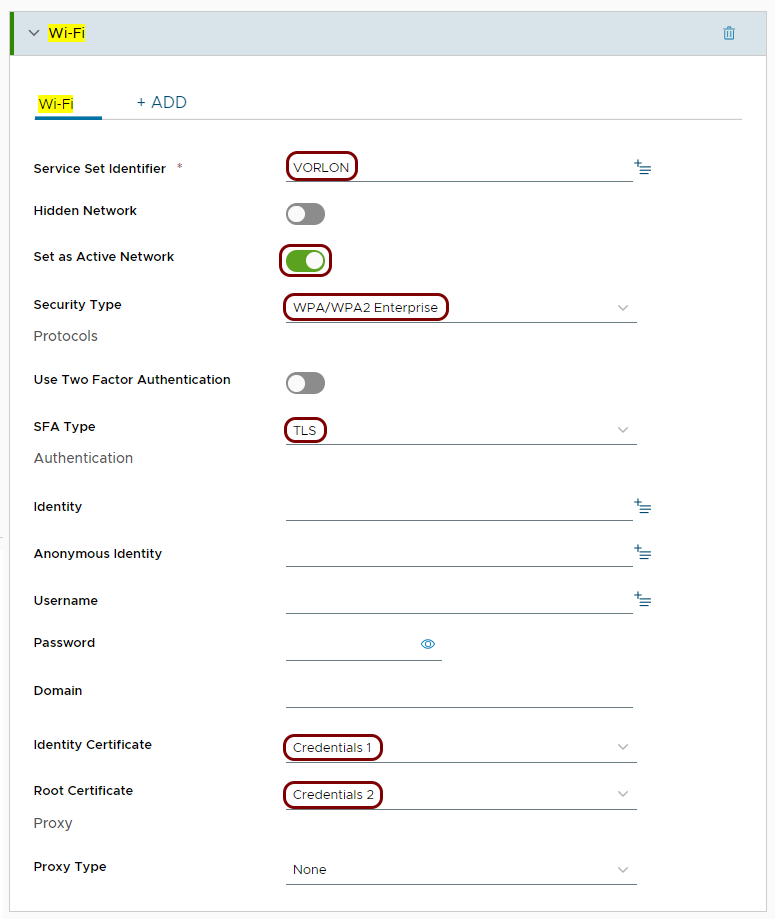
- In the Service Set Identifier field, enter the SSID of your Wi-Fi network.
- Activate the Set as Active Network switch.
- In the Security Type field, select the WPA/WPA2 Enterprise option.
- In the SFA Type section, select the TLS option.
- In the Identity Certificate field, select the Credentials 1 option.
- In the Root Certificate section, activate the Credentials 2 checkbox.
Important:Newer Android versions may also require you to fill in the Identity and Domain fields, even if the values you input here are effectively ignored and the actual information is acquired from the certificate fields. The Identity field can contain any string, and the Domain field should specify the corporate domain supported by your authentication repository. -
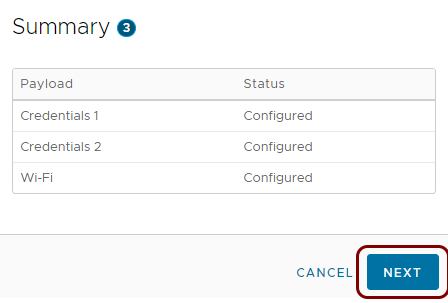
Check if your summary information is the same as on the screenshot, and then in the bottom-right corner of the
profile pane, click on the NEXT button.
-
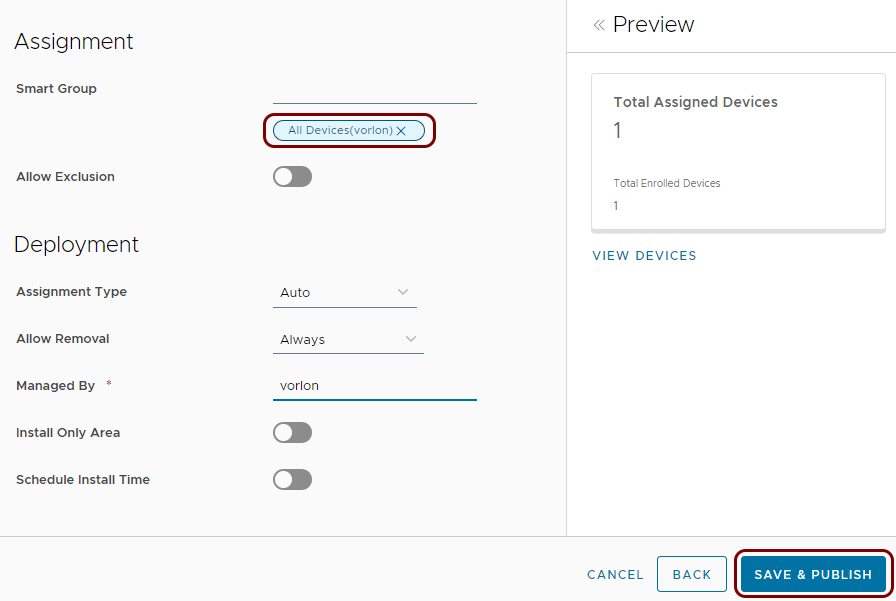
In the Assignment section, select the Smart Group as needed to push
this profile to correct devices, configure any other options as needed in your environment, and then click on the
SAVE & PUBLISH button.
Result: You created a profile for Portnox Cloud and Android devices.
After you created your profile, you can use your regular Workspace ONE UEM procedures to push it to managed devices immediately and see if it works correctly. For information on managing devices, pushing profiles, and troubleshooting, consult the Workspace ONE UEM documentation.