Onboard Android devices with certificates using SOTI MobiControl and SCEP

In this topic, you will learn how to deploy Portnox™ Cloud certificates to Android devices via SOTI MobiControl and SCEP.

Important: As of the moment of writing, SOTI MobiControl only supports Android devices with Portnox Cloud SCEP servers. SOTI MobiControl allows you to manage also Windows, macOS, and iOS devices, but there are issues in the SOTI MobiControl administrative interface that prevent it from working with the Portnox Cloud SCEP servers. If you need an option to manage devices other than Android, please contact SOTI for an update on when these issues will be resolved.

Turn on the Portnox Cloud SCEP services

In this section, you will configure Portnox™ Cloud to provide SCEP services to your devices.

If you have previously turned on the Portnox Cloud SCEP services, skip to the later steps.

Portnox Cloud SCEP services let devices contact the Cloud SCEP server and get a unique certificate for the device or for the specific user of the device.

  1. In the Cloud portal top menu, click on the Settings option.

  2. In the Cloud portal left-hand side menu, click on the Services > GENERAL SETTINGS > SCEP Services option.

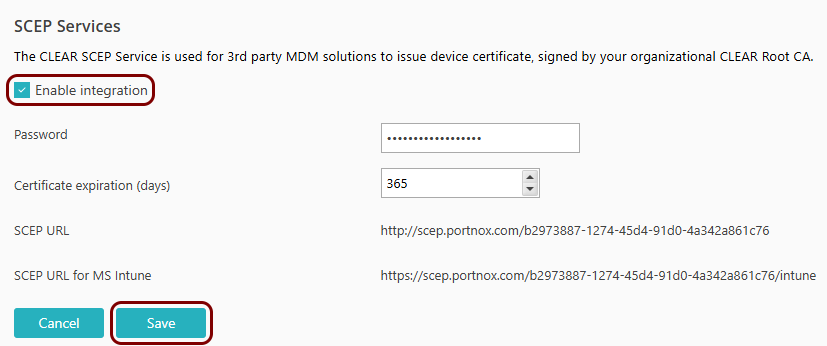
  3. Enable integration with SCEP services.

    1. Click on the Edit link.
    2. Activate the Enable integration checkbox.
    3. Click on the Save button.
  4. Click on the  ⧉  icon next to the SCEP URL field to copy the SCEP URL, and paste it in a text file for later use.
  5. Click on the  ⧉  icon next to the Password field to copy the SCEP password, and paste it in a text file for later use.

Download the root CA certificate from Portnox Cloud

In this section, you will download the Portnox™ Cloud root CA certificate from the Cloud portal.

You need the root CA certificate so that your managed devices can verify the validity of cloud RADIUS servers, which have certificates signed by this root CA certificate. If the root CA certificate is not distributed to managed devices, some devices may show a security warning each time that the user connects to networks managed by Portnox Cloud.

  1. In the Cloud portal top menu, click on the Settings option.

  2. In the Cloud portal left-hand side menu, click on the Services > CLEAR RADIUS SERVICE > CLEAR RADIUS instance option.

    The right-hand pane shows the list of active servers.

  3. Click on any of the active RADIUS services to show its configuration.
  4. Click on the Download root certificate link to download the root CA certificate.

    Save the file on your disk to use it later. The default name of the file is rootCertificate.cer.

Copy the tenant CA certificate thumbprint from Portnox Cloud

In this section, you will copy the tenant CA certificate thumbprint from the Cloud portal and save it, so you can use it later in SOTI MobiControl configuration.

  1. In the Cloud portal top menu, click on the Settings option.

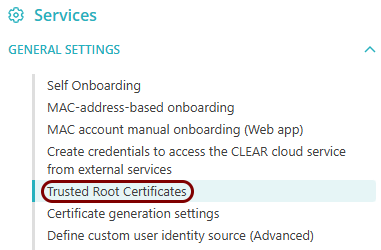
  2. In the Cloud portal left-hand side menu, click on the Services > GENERAL SETTINGS > Trusted Root Certificates option.

  3. n the Trusted Root Certificates section, select the value of the Thumbprint next to the certificate that you are currently using (if more than one) and use your operating system’s copy function to copy this value to the clipboard.

  4. Save the value from the clipboard in a temporary text file to use it later during configuration.

Create the SCEP CA configuration and the SCEP request template

In this section, you will create the SCEP CA configuration and the SCEP request template in SOTI MobiControl. This configuration and this template will be used by the profiles that you will create later.

  1. Open your SOTI MobiControl tenant dashboard in your browser, and log in as the administrator.
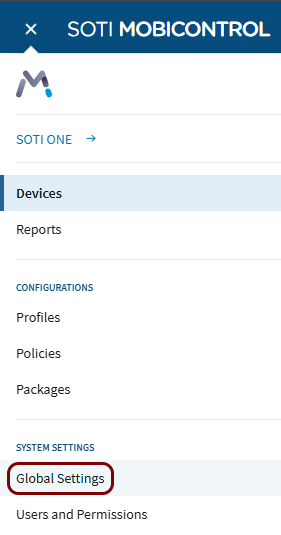
  2. In the left-hand side menu, select: SYSTEM SETTINGS > Global Settings.

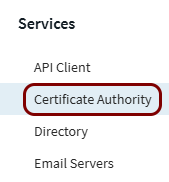
  3. In the Global Settings menu, scroll down and select: Services > Certificate Authority.

  4. In the Certificate Authority window, click on the  +  button.

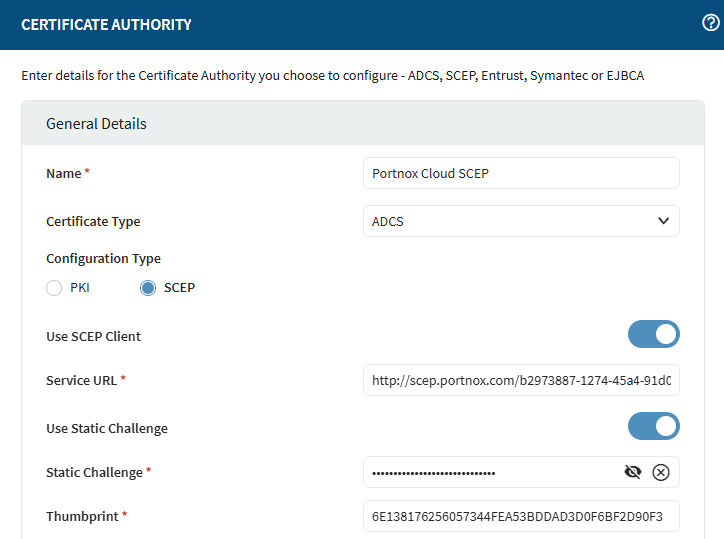
  5. In the CERTIFICATE AUTHORITY window:

    1. In the Name field, enter a name for this configuration.

      In this example, we used the name Portnox Cloud SCEP, but you can use any name you like.

    2. In the Certificate Type field, select the ADCS option.
    3. In the Configuration Type field, select the SCEP option.
    4. Activate the Use SCEP Client switch.
    5. In the Service URL field, paste the SCEP URL that you copied earlier from Portnox Cloud.
    6. Activate the Use Static Challenge switch.
    7. In the Static Challenge field, paste the password that you copied earlier from Portnox Cloud.
    8. In the Thumbprint field, paste the thumbprint value that you copied earlier from Portnox Cloud.
  6. Scroll down the CERTIFICATE AUTHORITY window to the Certificate Templates section and click on the  +  button.

  7. In the Template Details section:

    1. In the Name field, type a name for this template.

      In this example, we used the name Portnox Cloud SCEP Template, but you can use any name you like.

    2. In the Subject Name field, enter the value for the Subject of the certificates issued by the SCEP server.
      Important: The value that you use in this field is the value that you will see on your Devices screen in Portnox Cloud for the Cloud account that will be created for the device. You can create the Cloud accounts manually for each device or create rules in Portnox Cloud so that these Cloud accounts are created for each new device that attempts to connect. You can use any unique value that you like, for example, the serial number or the MAC address of the device.

      In this example, we used the format CN=%SERIALNUM%, which generates the subject name on the basis of the device serial number.

    3. In the Certificate Target field, select the Device option.
    4. Turn off the Provision Certificate to Authenticated Users Only switch.
    5. Turn on the Preserve Private Key switch.
    6. In the Certificate Usage field, select the Signing and Encryption option.
    7. In the Key Size field, we recommend that you select the 2048 option.
      Note: If you’re likely to experience network packet fragmentation due to the structure of your network, for example, due to firewalls, choose 1024 instead to prevent issues due to fragmentation. If such problems occur, see the following topic: Certificate fragmentation issues.
    8. Turn on the Remove old certificates upon successful renewal switch and the Use Automatic Renewal switch.
    9. In the Days Before Automatic Renewal field, we recommend that you select at least 14 DAYS.
    10. Click on the ADD button to save the template.
  8. Click on the SAVE button to save the SCEP configuration.

Result: You created a configuration for the Portnox Cloud SCEP CA and the SCEP request template.

Create a profile for Android

In this section, you will create a profile in SOTI MobiControl for Android devices. This profile will contain the necessary certificates as well as SCEP and Wi-Fi configurations.

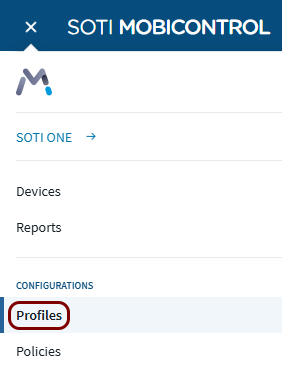
  1. In the left-hand side menu, select: CONFIGURATIONS > Profiles.

  2. In the top-right corner of the Profiles pane, click on the NEW PROFILE button.

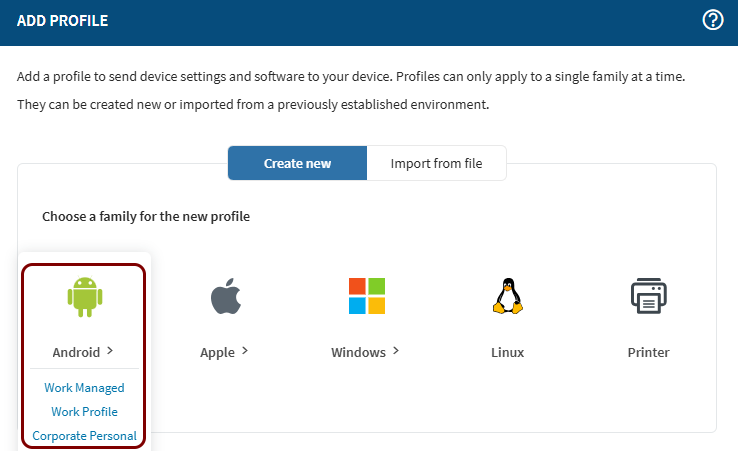
  3. In the ADD PROFILE window, click on the Android icon, and then select the type of profile that your Android devices use.

    Note: Android devices can be managed using three different profile types. Work Managed is a profile where the entire device is owned by the enterprise and managed by the enterprise. Work Personal is a personal device that has a separate work profile, which is managed by the enterprise. Corporate Personal is a device owned and managed by the enterprise, where the user has a separate personal profile not managed by the enterprise and not accessible to the enterprise.
    Important: You must select the type of profile that your Android devices use. If you have Android devices with different profile types, you must create a separate Android profile in SOTI for each of these profile types.
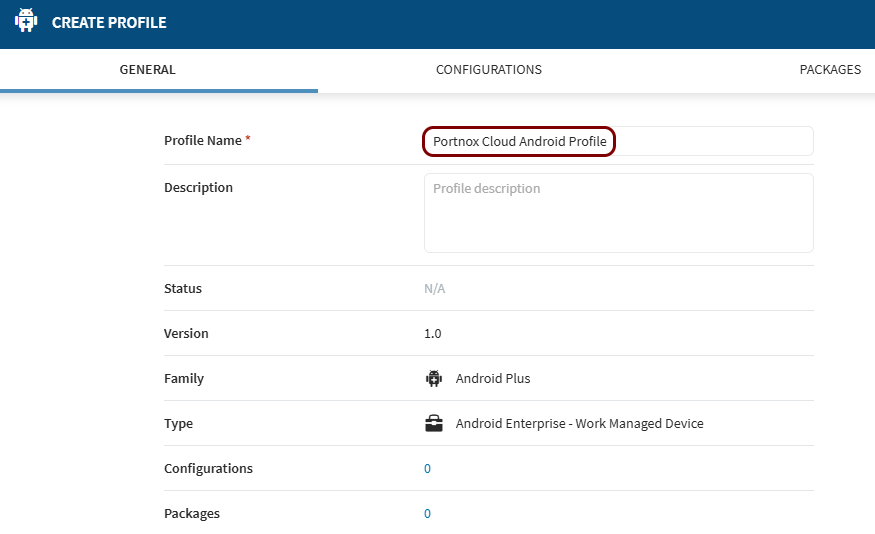
  4. In the CREATE PROFILE window, in the GENERAL tab, in the Profile Name field, enter a name for the profile.

    In this example, we used the name Portnox Cloud Android Profile, but you can use any name you like.

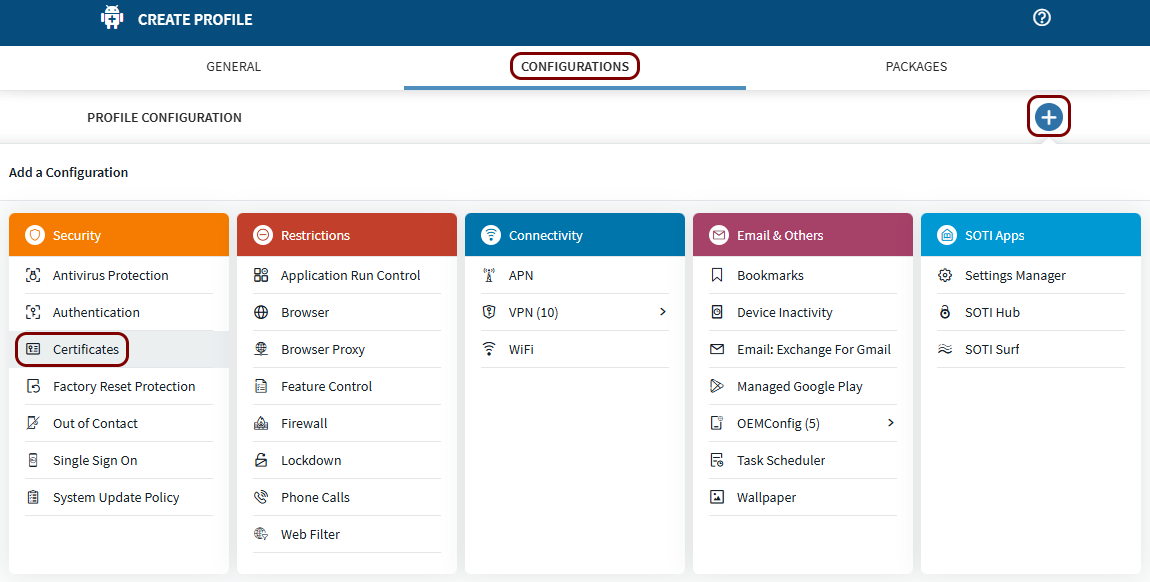
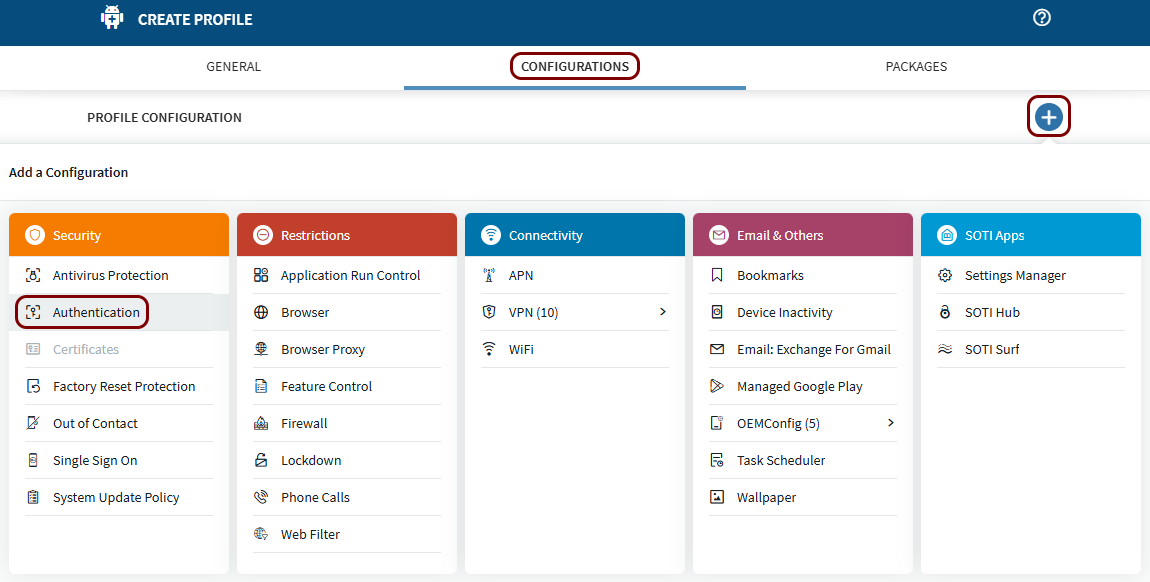
  5. Click on the CONFIGURATIONS tab and then click on the  +  button in the top-right corner. Then, select the Certificates option.

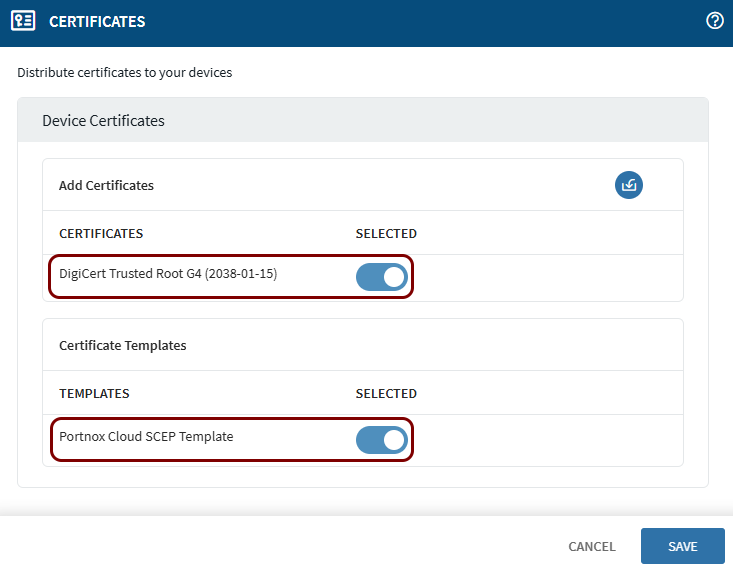
  6. In the Certificates window, in the Add Certificates row, click on the button on the right-hand side to import a new certificate.

  7. In the Add Certificate window, click on the Browse button, find the root CA certificate file that you downloaded earlier from Portnox Cloud, and then click on the IMPORT button.

  8. In the Certificates window, activate the switches next to the DigiCert Trusted Root G4 certificate (root CA certificate) and the SCEP request template that you added earlier. Then, click on the Save button.

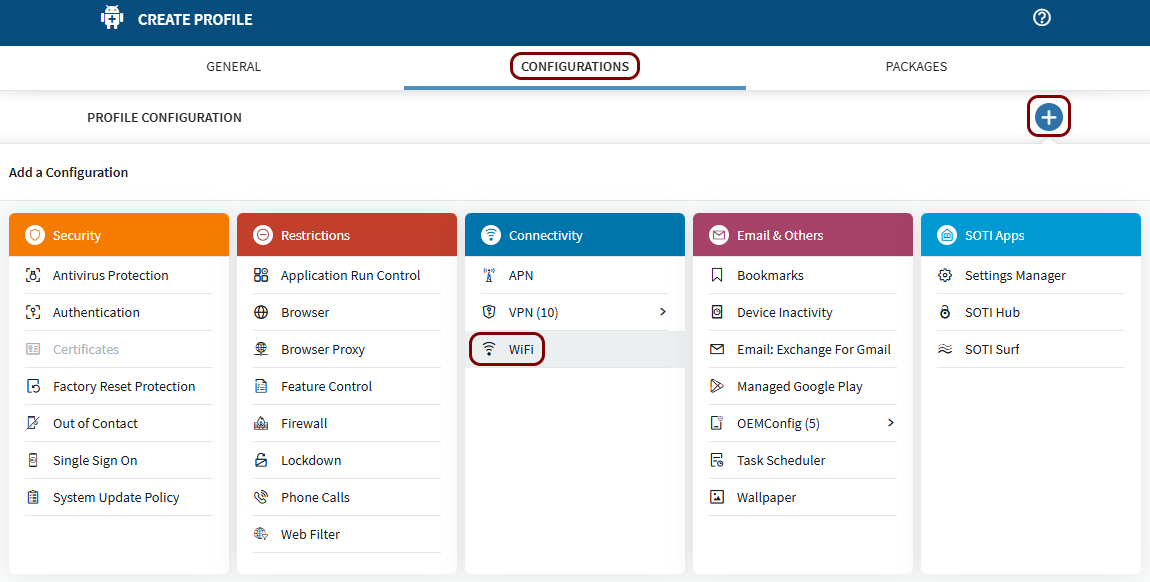
  9. In the CONFIGURATIONS tab, click on the  +  button in the top-right corner. Then, select the WiFi option.

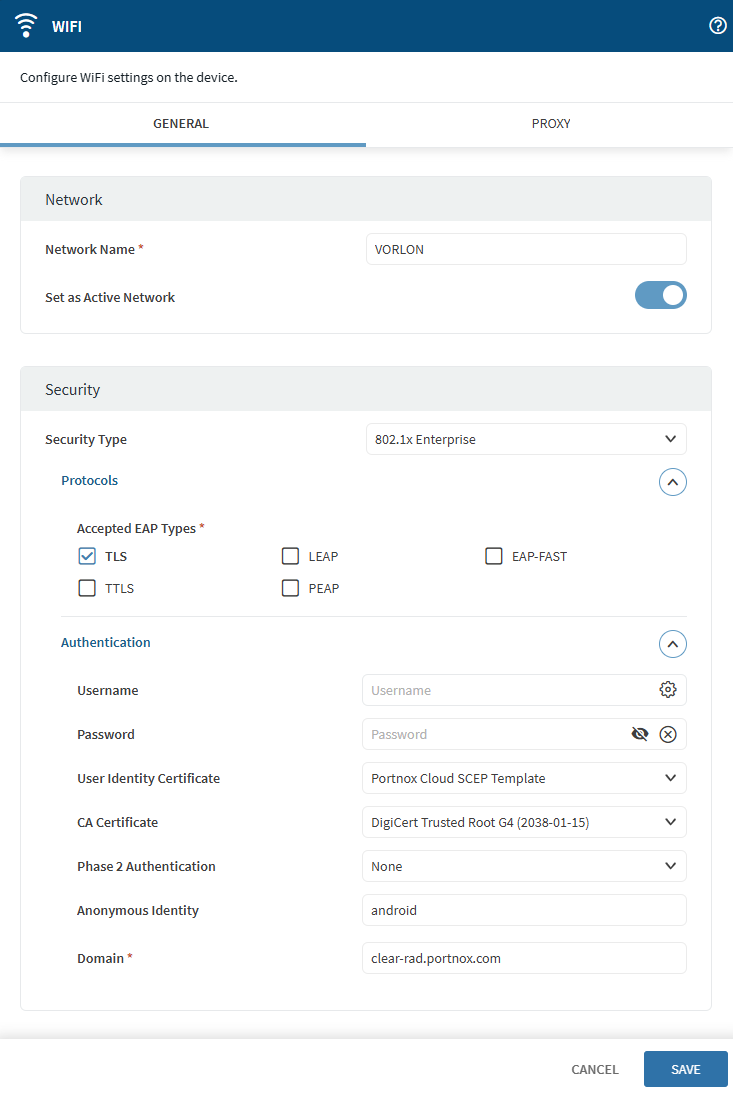
  10. In the WIFI window:

    1. In the Network Name field, enter the SSID of your network managed by Portnox Cloud.
    2. Turn on the Set as Active Network switch.
    3. In the Security Type field, select the 802.1x Enterprise option.
    4. Expand the Protocols section.
    5. In the Accepted EAP Types section, activate the TLS checkbox.
    6. Expand the Authentication section.
    7. In the User Identity Certificate section, select the SCEP request template that you added earlier.
    8. In the CA Certificate section, select DigiCert Trusted Root G4 (the root CA certificate that you uploaded earlier).
    9. In the Phase 2 Authentication field, select the None option.
    10. In the Anonymous Identity field, type any identifier you like.
      Note: The anonymous identity string is required by some Android devices. This is an identifier that these devices use when connecting to the network and it can be any string of characters you like that identifies your group of devices.
    11. In the Domain field, type: clear-rad.portnox.com.
    12. Click on the Save button to save the Wi-Fi profile.
  11. In the CONFIGURATIONS tab, click on the  +  button in the top-right corner. Then, select the Authentication option.

  12. In the AUTHENTICATION window, configure your device authentication policy according to your preferences.
    Note: This configuration is not required by Portnox Cloud but it is required by SOTI MobiControl if you add certificates. Therefore, you must add this payload but you can configure it any way you like.
  13. Click on the SAVE AND ASSIGN button to save your configuration profile and assign it to your managed devices.

Result: You created a profile for Portnox Cloud and Android devices.
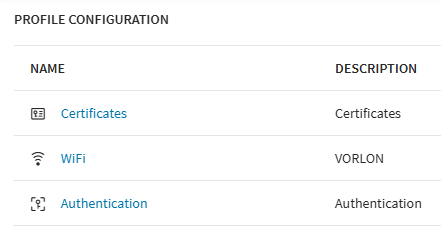
After you created your profile, you can use your regular SOTI MobiControl procedures to push it to managed devices immediately and see if it works correctly. For information on managing devices, pushing profiles, and troubleshooting, consult the SOTI MobiControl documentation.