Onboard an iOS device through self-onboarding
In this topic, you will learn how to onboard using the self-onboarding portal, an iOS device such as an iPhone, and a wireless network managed by Portnox™ Cloud.
Authenticate with the self-onboarding portal
In this section, you will learn how to authenticate with the self-onboarding portal using your corporate identity.
-
Press one of the available buttons representing authentication repositories. Then, complete the authorization
process as required by your authentication repository.
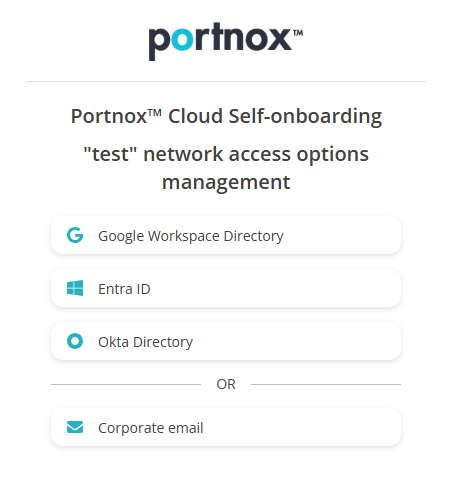 Note:The buttons available on this page will depend on the authentication repositories integrated with your Portnox Cloud. It is very likely that your organization will only use one of them. The Corporate email option is available only if you configured the self-onboarding portal to allow end-users to use and create Portnox accounts using the self-onboarding portal.
Get and install the profile for Wi-Fi
In this section, you will learn how to use the self-onboarding portal to download the profile and install the profile on your iOS device. This profile contains your certificate (if applicable) and the Wi-Fi network configuration.
-
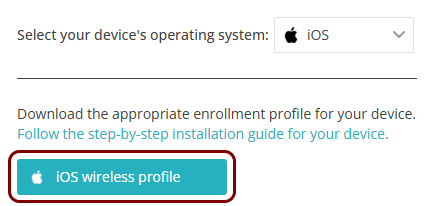
Press the iOS wireless profile button.
-
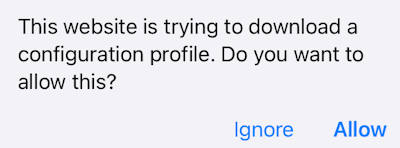
In the pop-up that says The website is trying to download a configuration profile, press
Allow.
-
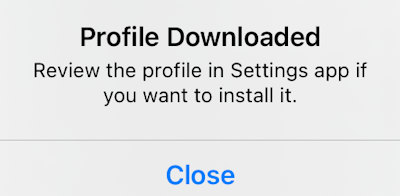
In the Profile Downloaded pop-up, press Close.
-
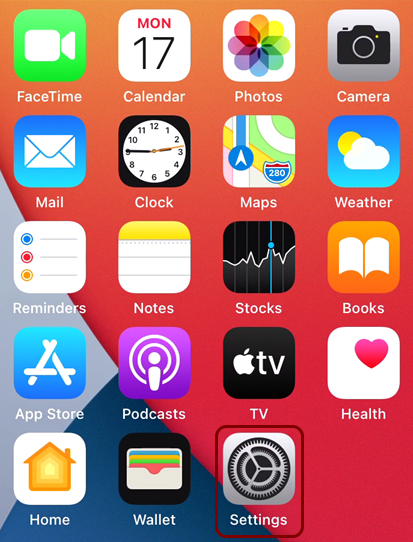
Press the Home button and press the icon of the Settings app.
-
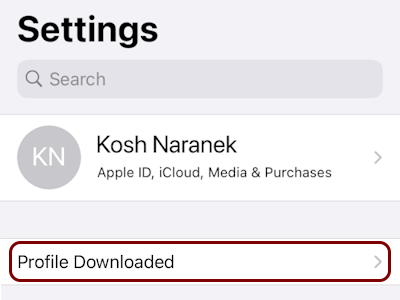
In the Settings app, press the Profile Downloaded row.
 Warning:On some iOS versions, a downloaded profile is saved as a file and is not automatically queued for installation, so the Profile Downloaded prompt will not appear in Settings. In that case, open the profile manually by navigating to and tapping the .mobileconfig file to launch the installer. Note that the profile is automatically deleted if not installed within 8 minutes of downloading.
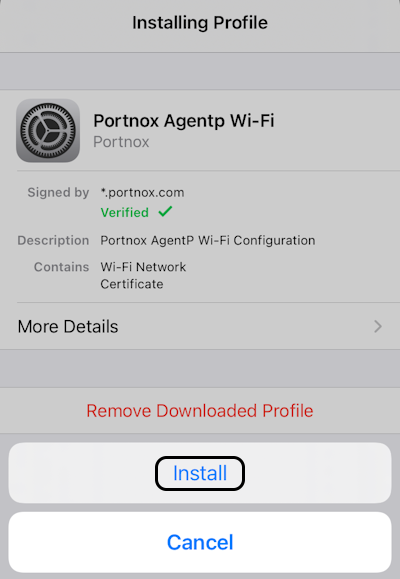
 -
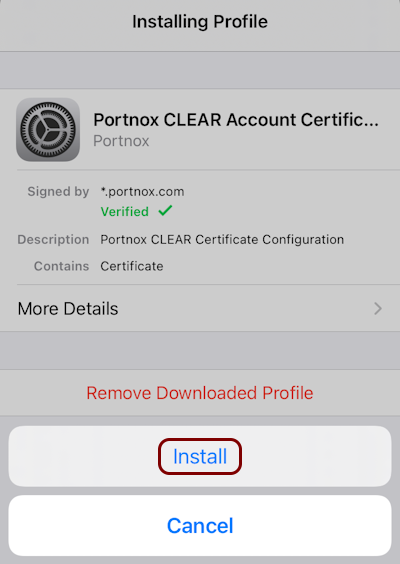
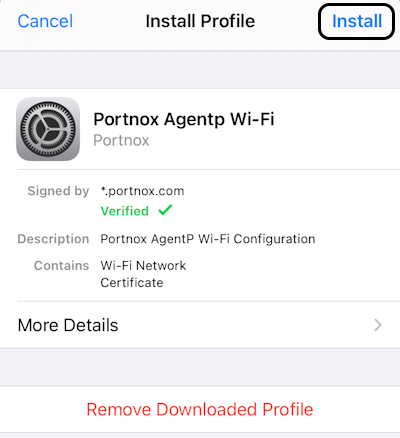
In the Install Profile pane, press Install.
-
Enter your passcode.
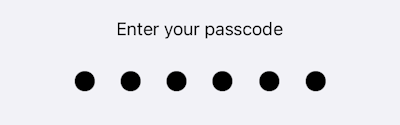
-
Press Install.
-
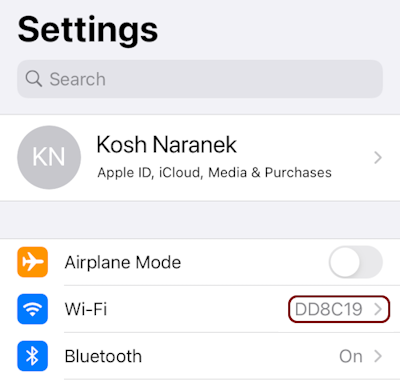
Go back to the Settings app and press the Wi-Fi row to change the Wi-Fi settings.
-
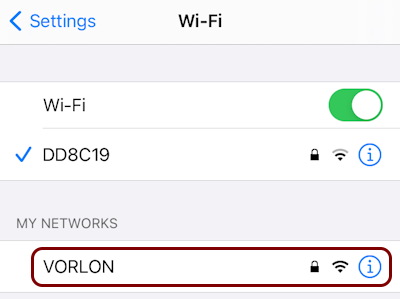
Press the configured Wi-Fi network in the MY NETWORKS section to connect.
Reissue a certificate before it expires
In this section, you will learn how to issue a new certificate if your current certificate is about to expire, and what steps you need to do after you reissue the certificate to remain connected to the network.
When you reissue the certificate, the old certificate is revoked, which means it becomes invalid even if it has not yet expired. If you just reissue the certificate but you do not download and install the profile, you will lose access to the network before the certificate expires.
-
Click on the Reissue certificate button.
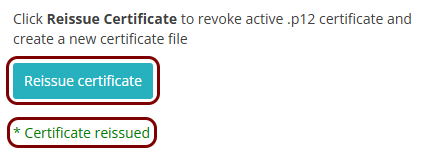
When the process finishes, you will see the information: * Certificate reissued.
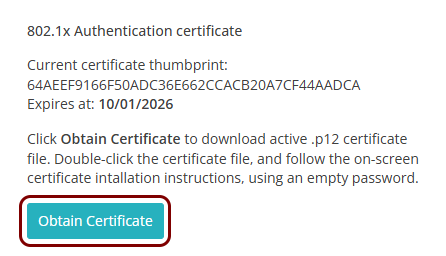
Optional: Get and import the certificate only
In this section, you will learn how to download and install the profile that only contains the certificate issued by Portnox Cloud. You can use this profile instead of the Wi-Fi profile if you only use Portnox Zero Trust Network Access (ZTNA) and you don’t need to configure the network.
-
Press the Obtain Certificate button.
-
In the pop-up that says The website is trying to download a configuration profile, press
Allow.
-
In the Profile Downloaded pop-up, press Close.
-
Press the Home button and press the icon of the Settings app.
-
In the Settings app, press the Profile Downloaded row.
Warning:On some iOS versions, a downloaded profile is saved as a file and is not automatically queued for installation, so the Profile Downloaded prompt will not appear in Settings. In that case, open the profile manually by navigating to and tapping the .mobileconfig file to launch the installer. Note that the profile is automatically deleted if not installed within 8 minutes of downloading.
-
In the Install Profile pane, press Install.

-
Enter your passcode.
-
Press Install.