Onboard a Windows device through self-onboarding
In this topic, you will learn how to onboard using the self-onboarding portal, a Windows 10 computer, and a wired or wireless network managed by Portnox™ Cloud.
Authenticate with the self-onboarding portal
In this section, you will learn how to authenticate with the self-onboarding portal using your corporate identity.
-
Click on one of the available buttons representing authentication repositories. Then, complete the login process as
required by your authentication repository.
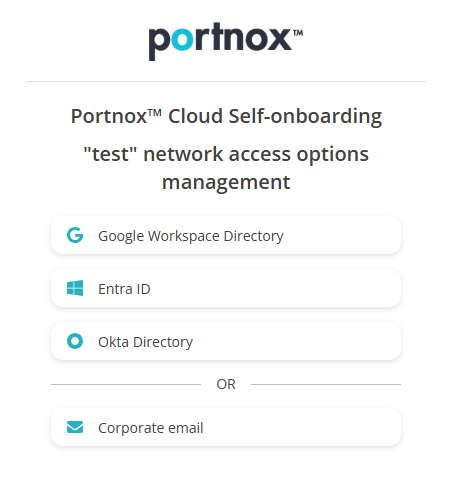 Note:The buttons available on this page will depend on the authentication repositories integrated with your Portnox Cloud. It is very likely that your organization will only use one of them. The Corporate email option is available only if you configured the self-onboarding portal to allow end-users to use and create Portnox accounts using the self-onboarding portal.
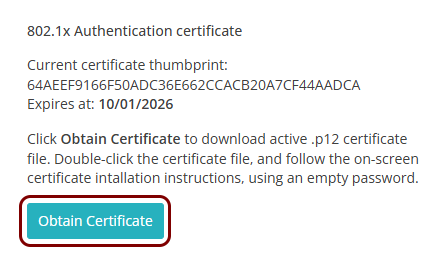
Get and import the certificate
In this section, you will learn how to get the certificate issued by Portnox Cloud for your Windows machine and how to import it into the operating system.
-
Click on the Obtain Certificate button to download the certificate.
-
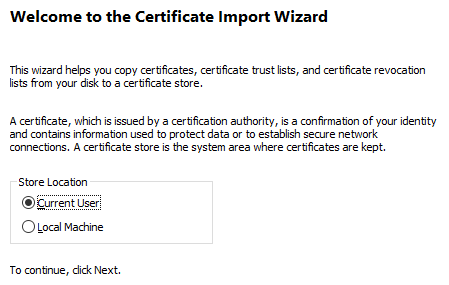
Double-click on the downloaded certificate file (for example, kosh.p12) to install it:
-
In the Certificate Import Wizard, select the Current User
option and click on the Next button.
-
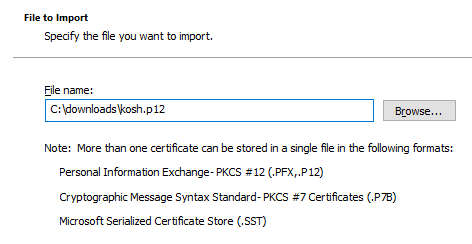
In the File to import step, click on the Browse button to
select the downloaded certificate file, and click on the Next button.
-
In the Private key protection step, keep the Password field
empty and click on the Next button.
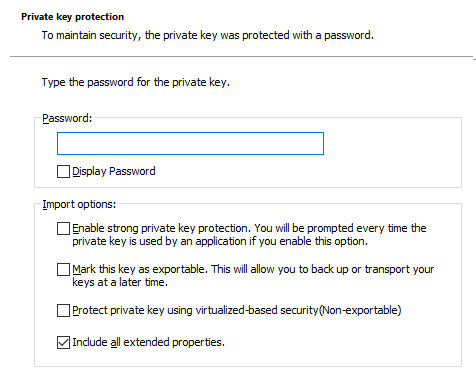
You can select the advanced option checkboxes as needed.
-
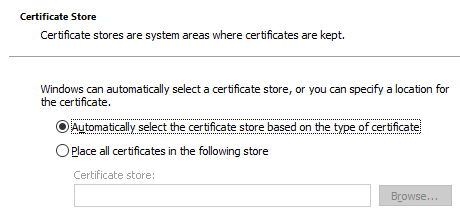
In the Certificate Store step, select the Automatically select the
certificate store based on the type of certificate option and click on the
Next button.
-
In the Security Warning window, click on the Yes button.

-
In the Certificate Import Wizard, select the Current User
option and click on the Next button.
Configure the wireless network adapter
In this section, you will learn how to use the self-onboarding portal to automatically configure the wireless network adapter (Wi-Fi) on your Windows machine.
-
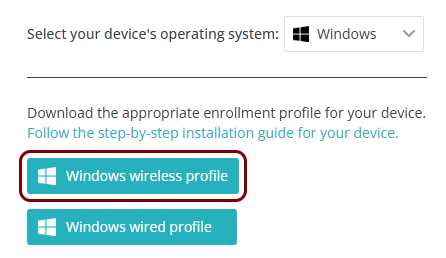
Click on the Windows wireless profile button.
-
Double-click on the downloaded ProfileInstaller.exe file.
Windows configures your wireless adapter.
-
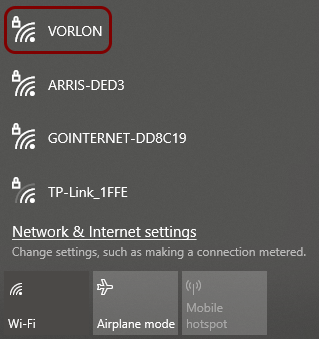
In the Windows Notification Area (System Tray), click on the network icon to open the list of available Wi-Fi
networks, and select the network configured in previous steps.
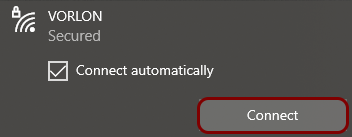
-
Click on the Connect button.
- Optional:
If your group is configured for credential-based authentication, Windows shows the Sign in
window. Enter your credentials, and click on the OK button.

You can also enter your identity in the down-level logon name format: domain\user, for example, vorlon.com\kosh.
If your group is configured for certificate-based authentication, and you downloaded the certificate, the Sign in window is not displayed because it is not necessary.
Optional: Configure the wireless network adapter manually
In this section, you will learn how to configure your wireless network adapter manually to use the certificate that you downloaded earlier.
-
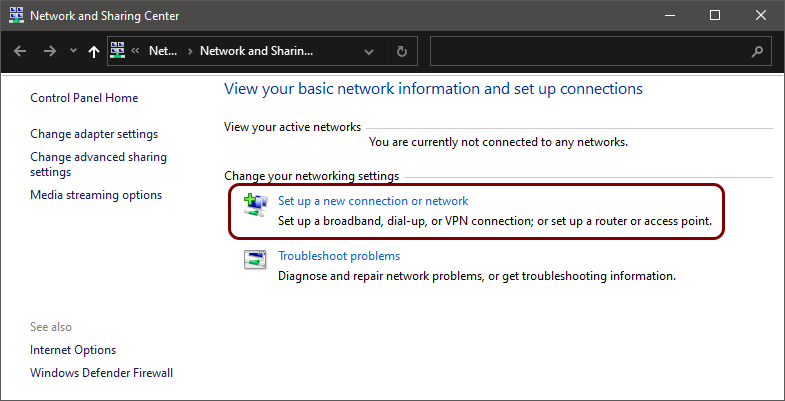
Click on the Set up a new connection or network link.
-
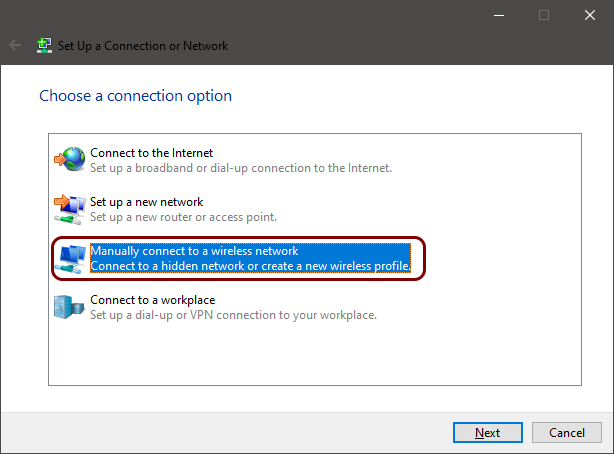
In the Set Up a Connection or Network window, select the Manually connect to a
wireless network option and click on the Next button.
-
In the Manually connect to a wireless network window, enter the name (SSID) of the network
managed by Portnox Cloud in the Network name field and select the
WPA2-Enterprise option in the Security type field. Then, click on
the Next button.

-
Click on the Change connection settings link.

-
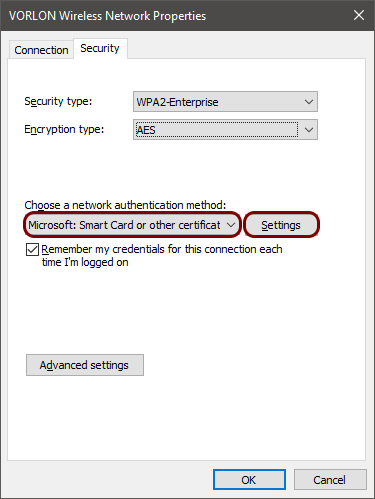
In the Wireless Network Properties window, click on the Security tab,
in the Choose a network authentication method field, select Microsoft: Smart Card
or other certificate, and click on the Settings button.
-
In the Smart Card or other Certificate Properties window, select the Use a certificate
on this computer option. Then, activate the Verify the server’s identity by validating the
certificate checkbox. Finally, in the Trusted Root Certification Authorities
list, find and activate the DigiCert Trusted Root G4 checkbox (the root CA certificate) and click on the
OK button.
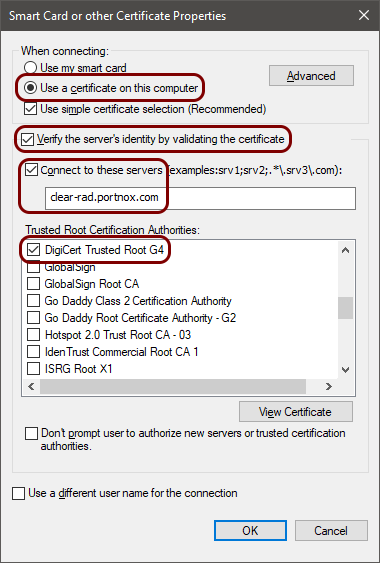 Note:For extra security, we recommend that in addition to activating the DigiCert Trusted Root G4 certificate (the root CA certificate) on the Trusted Root Certification Authorities list, you also enter clear-rad.portnox.com in the Connect to these servers field. If so, only certificates that have this domain name in Subject or SAN will be trusted. Do not activate this checkbox leaving the field empty, because this will cause connectivity problems. To learn more about this option, read the following topic: Trusted certificate server names.
 -
In the Windows Notification Area (System Tray), click on the network icon to open the list of available Wi-Fi networks,
and select the network configured in previous steps.

-
Click on the Connect button.

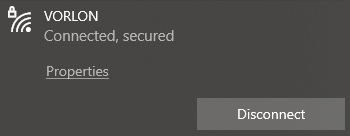
Result: Your Windows 10 computer is connected to a Wi-Fi network managed by Portnox Cloud.
Configure the wired network adapter
In this section, you will learn how to use the self-onboarding portal to automatically configure the wired network adapter (Ethernet) on your Windows machine.
-
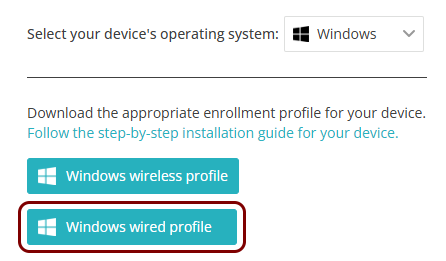
Click on the Windows wired profile button.
-
Double-click on the downloaded ProfileInstaller.exe file.
Windows configures your wired adapter.
- Optional:
If your group is configured for credential-based authentication, when you connect the adapter to the network,
Windows shows the Sign in window. In the Sign in window, enter your
credentials, and click on the OK button.

You can also enter your identity in the down-level logon name format: domain\user, for example, vorlon.com\kosh.
If your group is configured for certificate-based authentication, and you downloaded the certificate, the Sign in window is not displayed because it is not necessary.
Optional: Configure the wired network adapter manually
In this section, you will learn how to configure your Windows wired network adapter manually to use the certificate that you downloaded earlier.
-
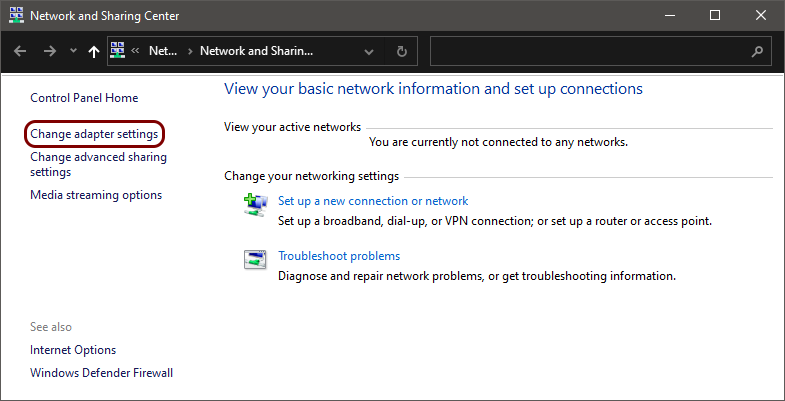
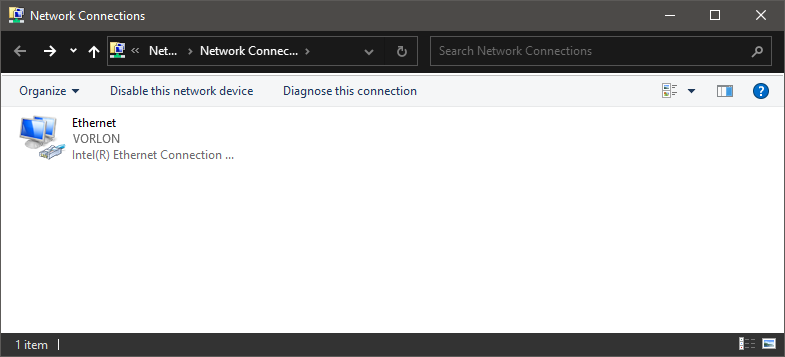
Open the Windows 10 Network and Sharing Center window () and click on the Change adapter settings option.
-
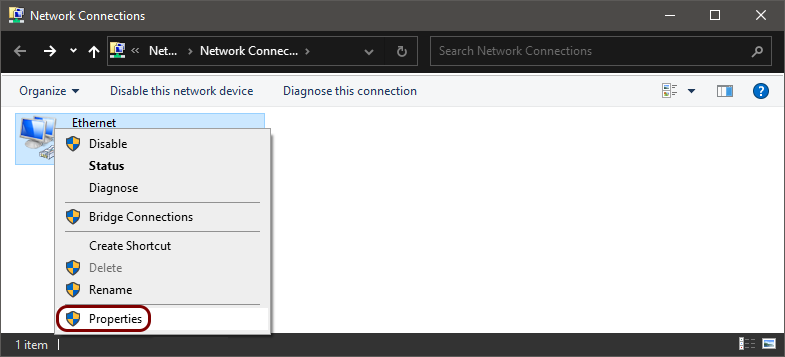
Right-click on the Ethernet connection that represents the adapter connected to the wired
network managed by Portnox Cloud and select the Properties option from the pop-up menu.
-
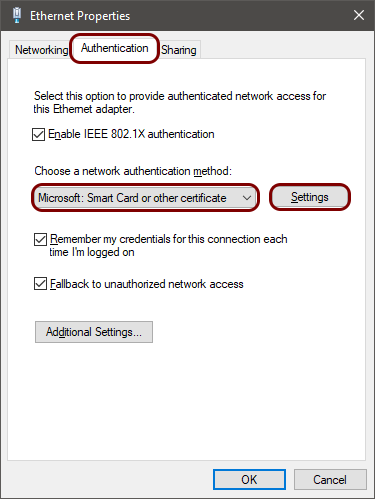
In the Ethernet Properties window, click on the Authentication tab and
in the Choose a network authentication method field, select Microsoft: Smart Card
or other certificate. Then, click on the Settings button.
 Note:If there is no Authentication tab, open the Windows Services app, find the Wired AutoConfig service, Start it, and in its Properties, set Startup type to Automatic.
 -
In the Smart Card or other Certificate Properties window, select the Use a
certificate on this computer option. Then, activate the Verify the server’s identity by
validating the certificate checkbox. Finally, in the Trusted Root Certification
Authorities list, find and activate the DigiCert Trusted Root G4 checkbox
(the root CA certificate) and click on the
OK button.
Note:For extra security, we recommend that in addition to activating the DigiCert Trusted Root G4 certificate (the root CA certificate) on the Trusted Root Certification Authorities list, you also enter clear-rad.portnox.com in the Connect to these servers field. If so, only certificates that have this domain name in Subject or SAN will be trusted. Do not activate this checkbox leaving the field empty, because this will cause connectivity problems. To learn more about this option, read the following topic: Trusted certificate server names.
Result: Your Windows 10 computer is connected to a wired network managed by Portnox Cloud.
Reissue a certificate before it expires
In this section, you will learn how to issue a new certificate if your current certificate is about to expire, and what steps you need to do after you reissue the certificate to remain connected to the network.
When you reissue the certificate, the old certificate is revoked, which means it becomes invalid even if it has not yet expired. If you just reissue the certificate but you do not download and install it, you will lose access to the network even before the old certificate expires.
-
Click on the Reissue certificate button.
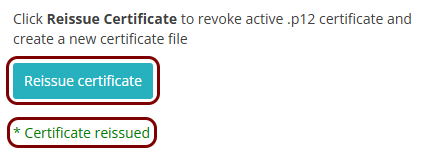
When the process finishes, you will see the information: * Certificate reissued.
You do not need to reconfigure the network profiles when a new certificate is added to Windows. Windows dynamically selects a certificate from the store at connection time. However, if you encounter connection problems, Windows may be selecting the old (expired or revoked) certificate instead. If so, open the Windows certificate store and delete the old certificate (you can also do that before installing the new certificate).