Onboard a macOS device through self-onboarding

In this topic, you will learn how to onboard using the self-onboarding portal, a macOS computer, and a wired or wireless network managed by Portnox™ Cloud.

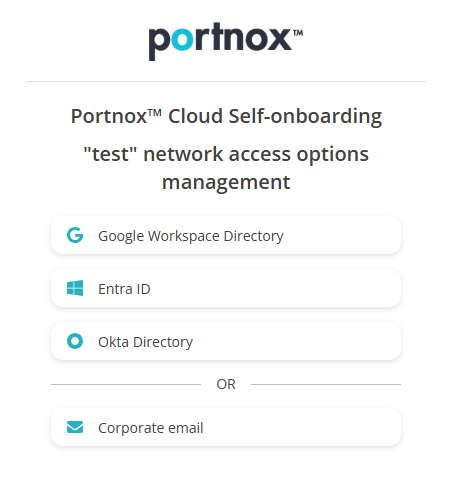
Authenticate with the self-onboarding portal

In this section, you will learn how to authenticate with the self-onboarding portal using your corporate identity.

  1. Enter the URL of the self-onboarding portal in your browser.

    To learn how to set up the self-onboarding portal and obtain the URL, see the following topic: Set up the self-onboarding portal.

  2. Click on one of the available buttons representing authentication repositories. Then, complete the authorization process as required by your authentication repository.

    Note: The buttons available on this page will depend on the authentication repositories integrated with your Portnox Cloud. It is very likely that your organization will only use one of them. The Corporate email option is available only if you configured the self-onboarding portal to allow end-users to use and create Portnox accounts using the self-onboarding portal.
    1. Optional: If the Corporate email option is available, and you want to use a Portnox account to authenticate with the self-onboarding portal, click on the button, enter your email address in the Email field, and then click on the Sign In button. Then, check your email account. You will receive a code via email. Copy the code, paste it in the Activation code field, and click on the Confirm button.

  3. In the Select your device’s operating system field, select the macOS option.
  4. Continue with the next sections depending on your requirements.

Get and import the certificate

In this section, you will learn how to get the certificate issued by Portnox Cloud for your macOS machine and how to import it into the operating system.

Note: You only need to obtain a certificate if your group in Portnox Cloud is set to use certificate-based authentication. If your group does not use certificates, you only need to configure the network adapters, either automatically or manually.
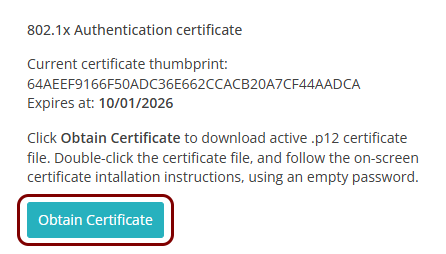
  1. Click on the Obtain Certificate button.

  2. Install the downloaded certificate configuration profile.
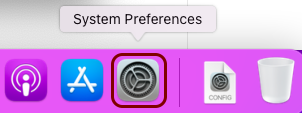
    1. Open the macOS System Preferences application.

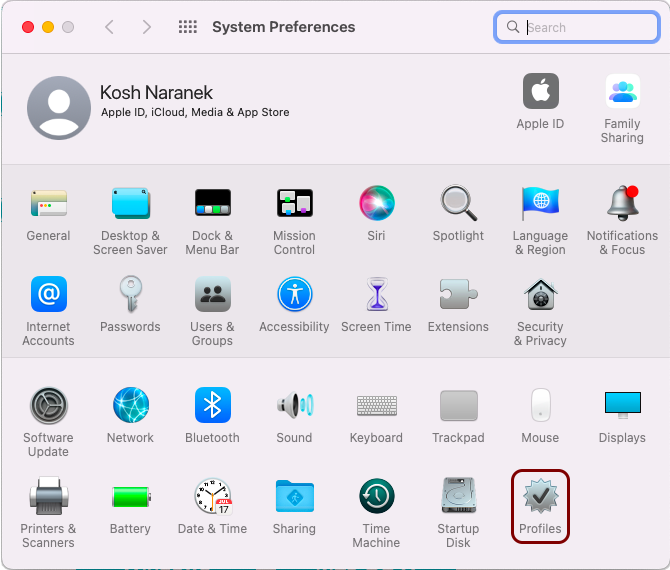
    2. In the System Preferences window, click on the Profiles icon.

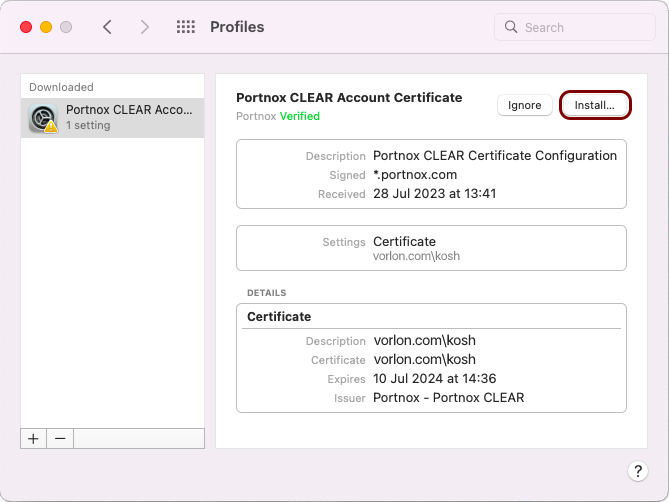
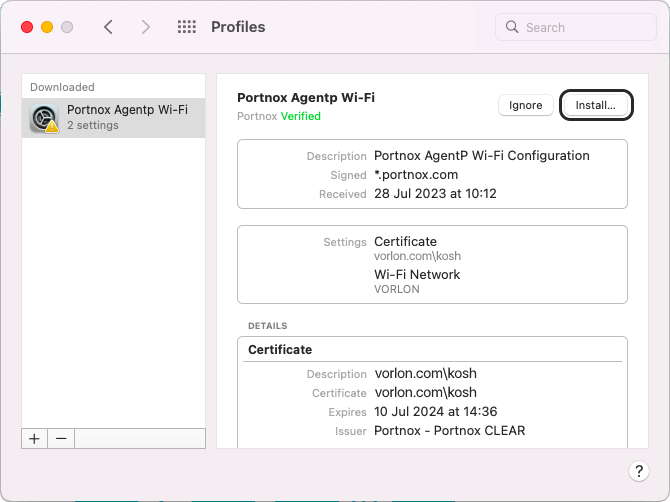
    3. In the Profiles window, click on the Install button.

Configure the wireless network adapter

In this section, you will learn how to use the self-onboarding portal to automatically configure the wireless network adapter (Wi-Fi) on your macOS machine.

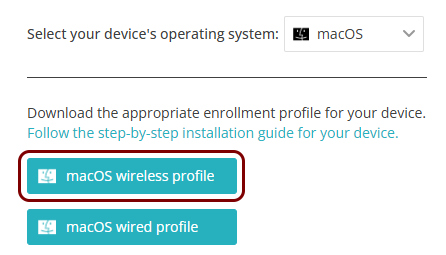
  1. Click on the macOS wireless profile button.

  2. Install the downloaded configuration profile.
    1. Open the macOS System Preferences application.

    2. In the System Preferences window, click on the Profiles icon.

    3. In the Profiles window, click on the Install button.

    macOS configures the network settings for the Wi-Fi network configured in your Portnox Cloud group.

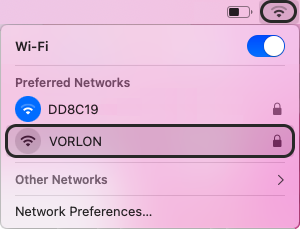
  3. In the status menu bar, click on the Wi-Fi icon to open the list of available Wi-Fi networks, and select the network configured in previous steps.

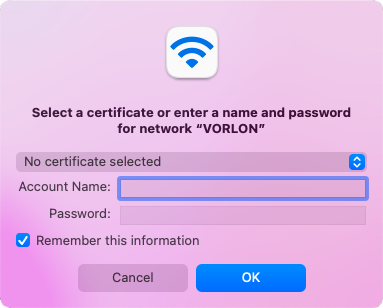
  4. Optional: If your group is configured for credential-based authentication, macOS shows a pop-up asking you to enter credentials. Enter your credentials, and click on the OK button.

    You can also enter your identity in the down-level logon name format: domain\user, for example, vorlon.com\kosh.

    If your group is configured for certificate-based authentication, the pop-up is not displayed because it is not necessary.

Configure the wired network adapter

In this section, you will learn how to use the self-onboarding portal to automatically configure the wired network adapter (Ethernet) on your macOS machine.

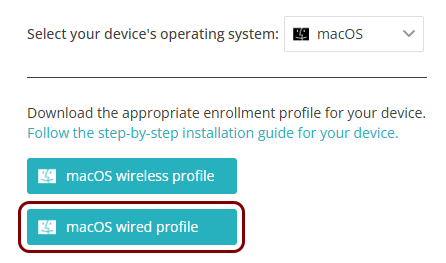
  1. Click on the macOS wired profile button.

  2. Install the downloaded configuration profile.
    1. Open the macOS System Preferences application.

    2. In the System Preferences window, click on the Profiles icon.

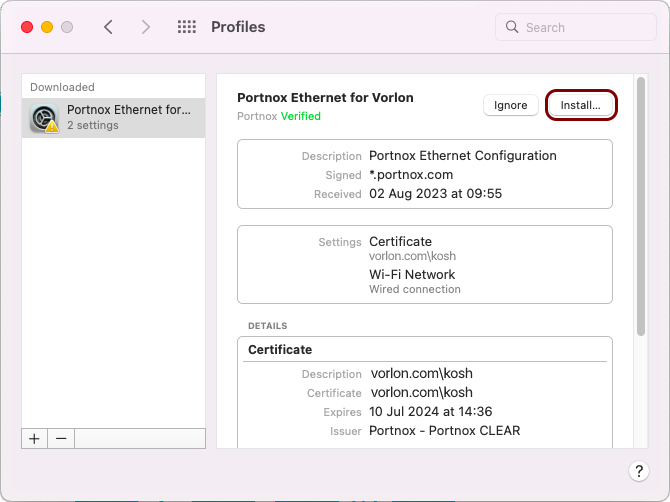
    3. In the Profiles window, click on the Install button.

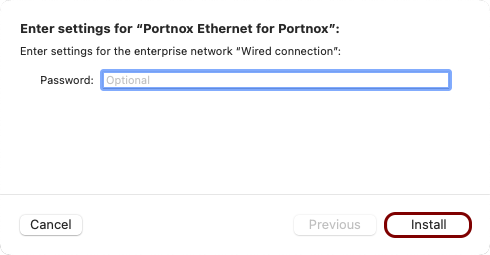
    4. When asked for a password, leave the Password field empty, and click on the Install button.

    macOS configures the network settings for the wired network configured in your Portnox Cloud group.

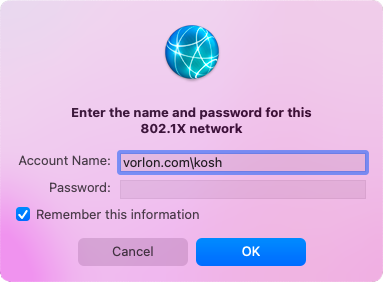
  3. Optional: If your group is configured for credential-based authentication, when you connect the Ethernet cable, macOS shows a pop-up asking you to enter credentials. Enter your credentials, and click on the OK button.

    You can also enter your identity in the down-level logon name format: domain\user, for example, vorlon.com\kosh.

    If your group is configured for certificate-based authentication, the pop-up is not displayed because it is not necessary.