
Integrate the Cisco Meraki dashboard with Zero Trust Network Access
In this topic, you will find general instructions on how to integrate the Cisco Meraki dashboard with Portnox™ Zero Trust Network Access.
Modify your identity provider configuration to support the Meraki dashboard
Meraki SAML integration requires your identity provider to send additional values that identify the username and user role for specific Meraki admin privileges. You must change your existing identity provider configuration or create a copy of the identity provider configuration especially for Meraki.
-
If you use an Entra ID IdP configuration, in another browser tab,
open the Entra ID SAML application that you created earlier and do the following steps.
-
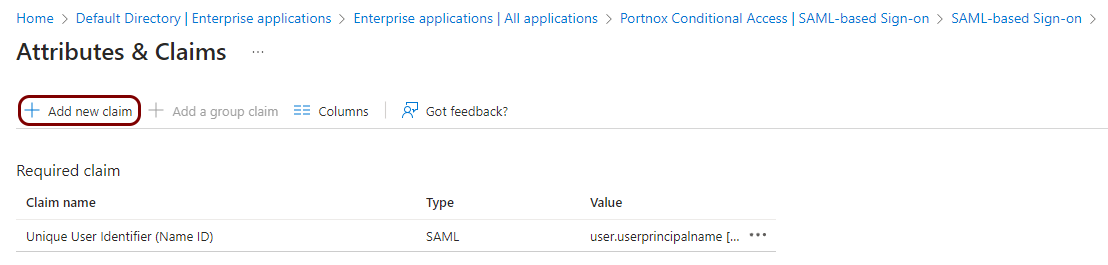
Open the Attributes & Claims pane () and click on the Add new claim button.
-
In the Name field, type
https://dashboard.meraki.com/saml/attributes/username, and in the
Source attribute field, select the user.mail attribute.
Then, click on the Save button.
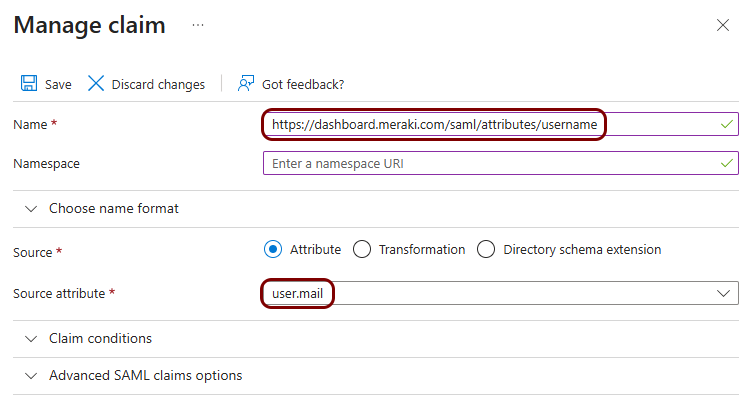 Note:You can use user.userprincipalname instead of user.mail. In most cases, both hold the same value. But for some accounts, such as guest accounts or service accounts, the user principal name can differ from the mail attribute, or it may not be a real email address. Use user.mail as your default choice. Use user.userprincipalname only if some admin accounts in Entra ID have no value in the mail attribute.
 -
Click on the Add new claim button again to create another claim. In the
Name field, type
https://dashboard.meraki.com/saml/attributes/role, and in the Source
attribute field, select a relevant role identifier field from the list. Then, click on the
Save button.
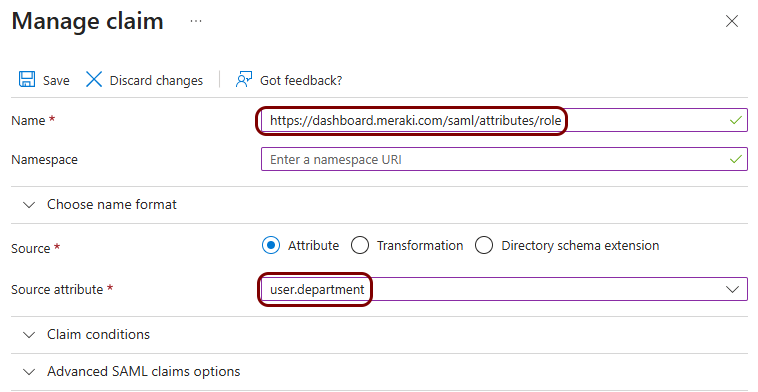 Note:You can use any attribute that holds a single value and is not already used for something else, such as user.department or user.jobtitle. If none of the built-in attributes can be used, you can also create a custom attribute for the role identifier, but this is a very complex process which includes creating a custom security attribute in Entra ID, writing your own Azure Function to read this attribute, registering this Azure Function as a custom claims provider in Entra ID, and connecting this custom claims provider to your application, so it is not recommended.
 -
Double-check if your claims include all of the above.
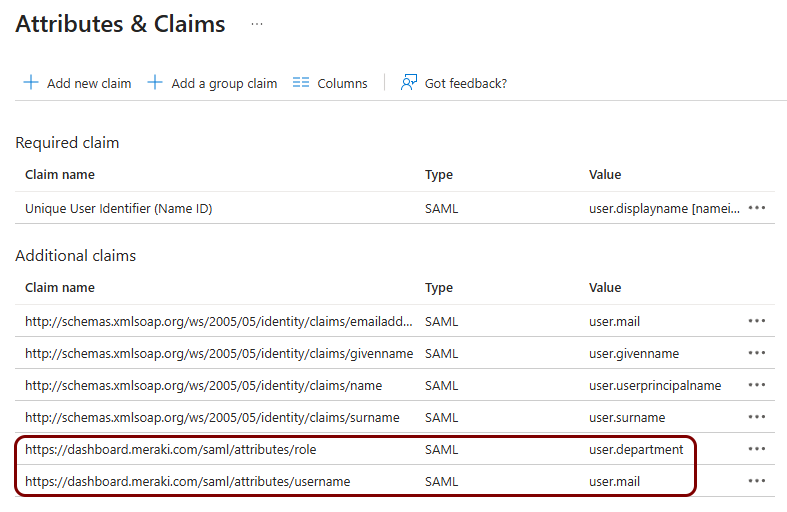 Note:You may have additional attribute mappings in this configuration. They will not influence the integration with Meraki.
-
Open the Attributes & Claims pane () and click on the Add new claim button.
-
If you use Google Workplace, open your admin console and do the following steps.
-
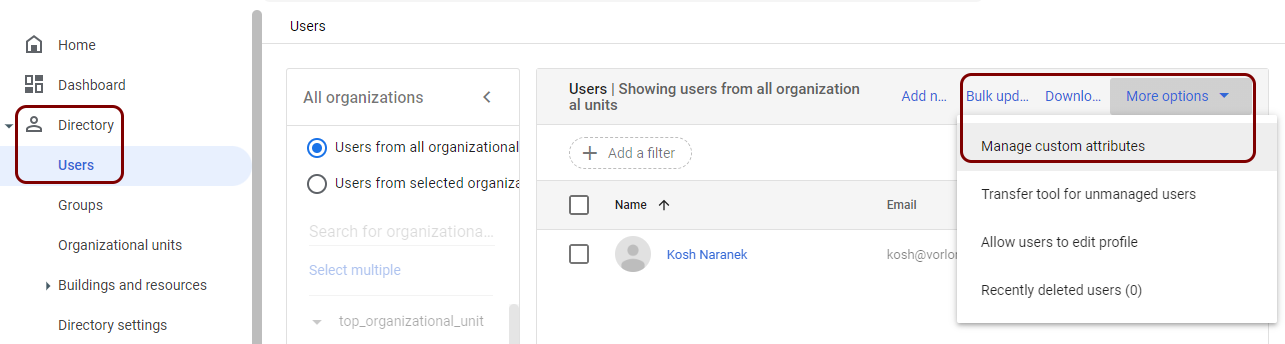
In Google Admin Console, go to . Then, click on the More options button, and select the
Manage custom attributes option.
-
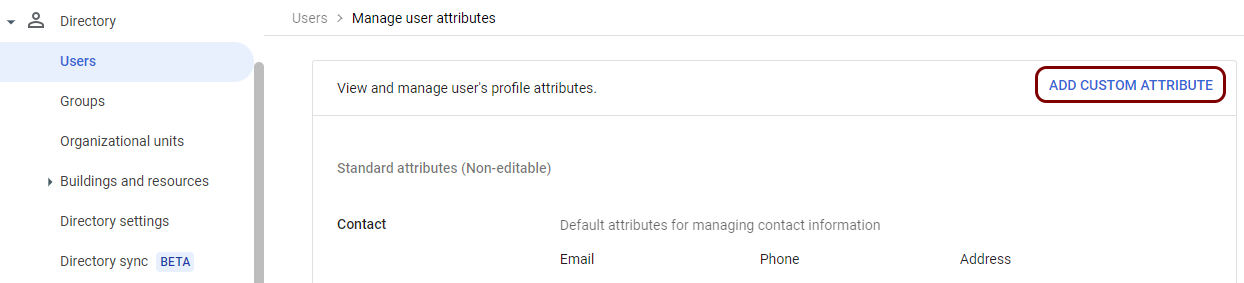
Click on the ADD CUSTOM ATTRIBUTE link.
-
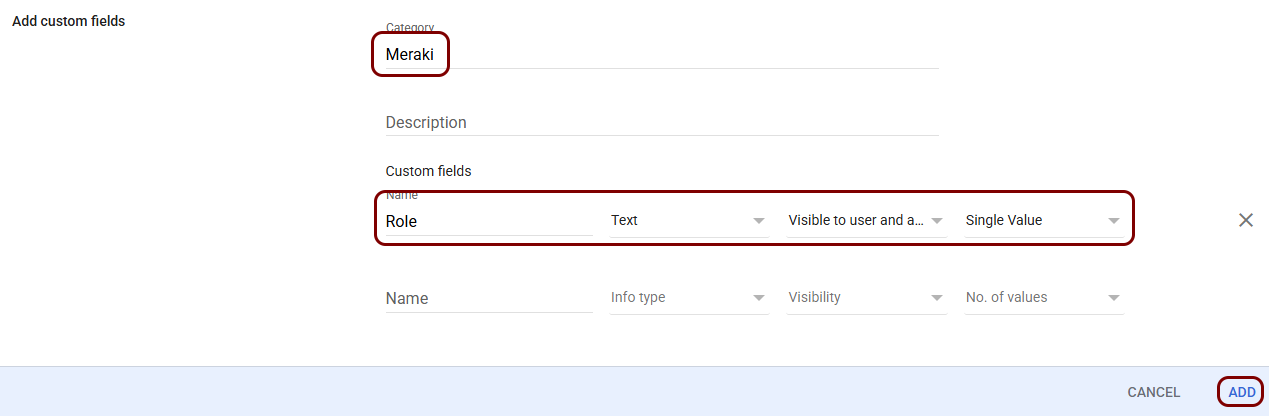
In the Add custom fields pane, enter a Category (for example,
Meraki) and add one attribute: Role. Set Info
type to Text, Visibility to Visible
to user and admin, and No. of values to Single
Value. Then, click on the ADD button.
-
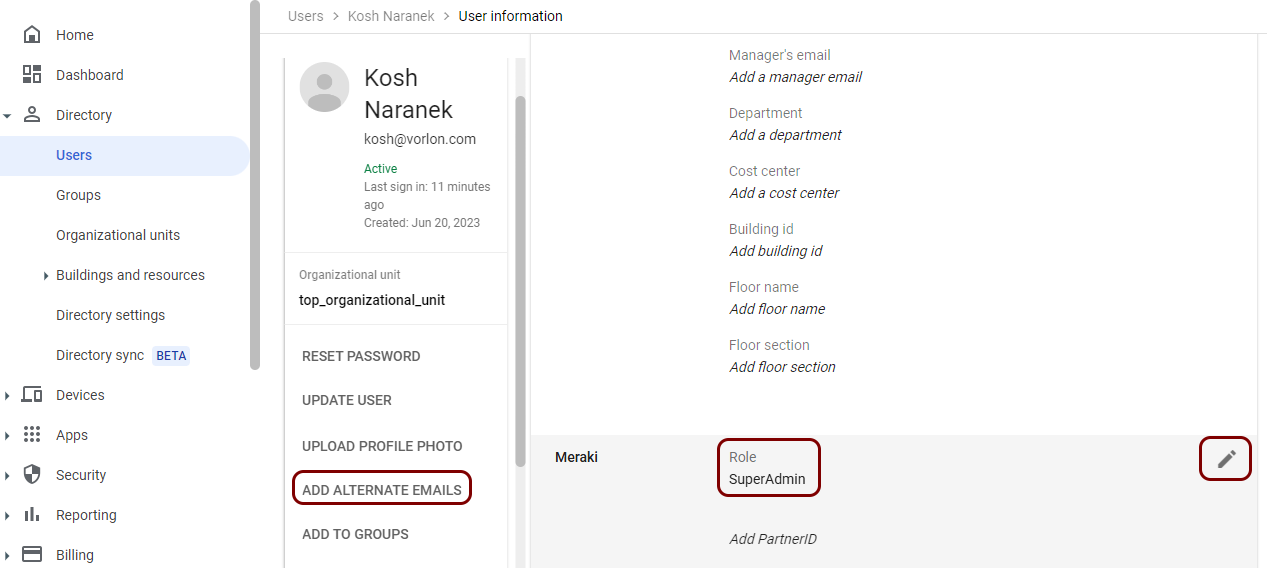
Go back to the list of users. Then, open a user that needs access to Meraki, click on the ADD
ALTERNATE EMAILS option, and scroll down to the category you added in the previous step.
Then, click on the ✎ icon to edit the values and enter the name
of the role that you want the user to have.
 Note:You can use any names for different roles but you will have to add each of these names to the Meraki configuration later.
 -
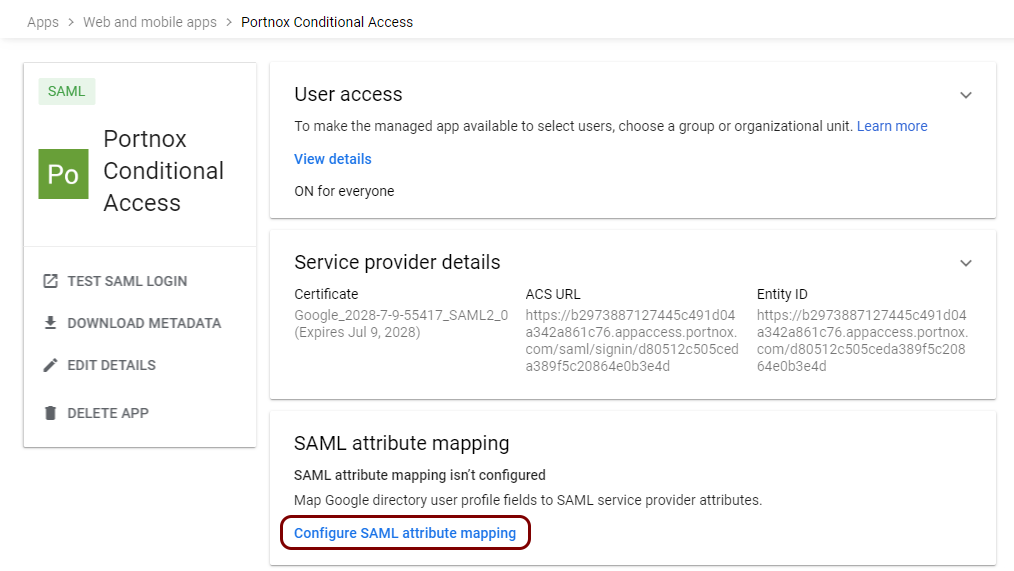
Open the SAML attribute mapping pane (.
-
Click on the ADD MAPPING button twice and add the following mappings:
Meraki > Role to
https://dashboard.meraki.com/saml/attributes/role and Basic
information > Primary email to
https://dashboard.meraki.com/saml/attributes/username. Then, click on the
Save button.
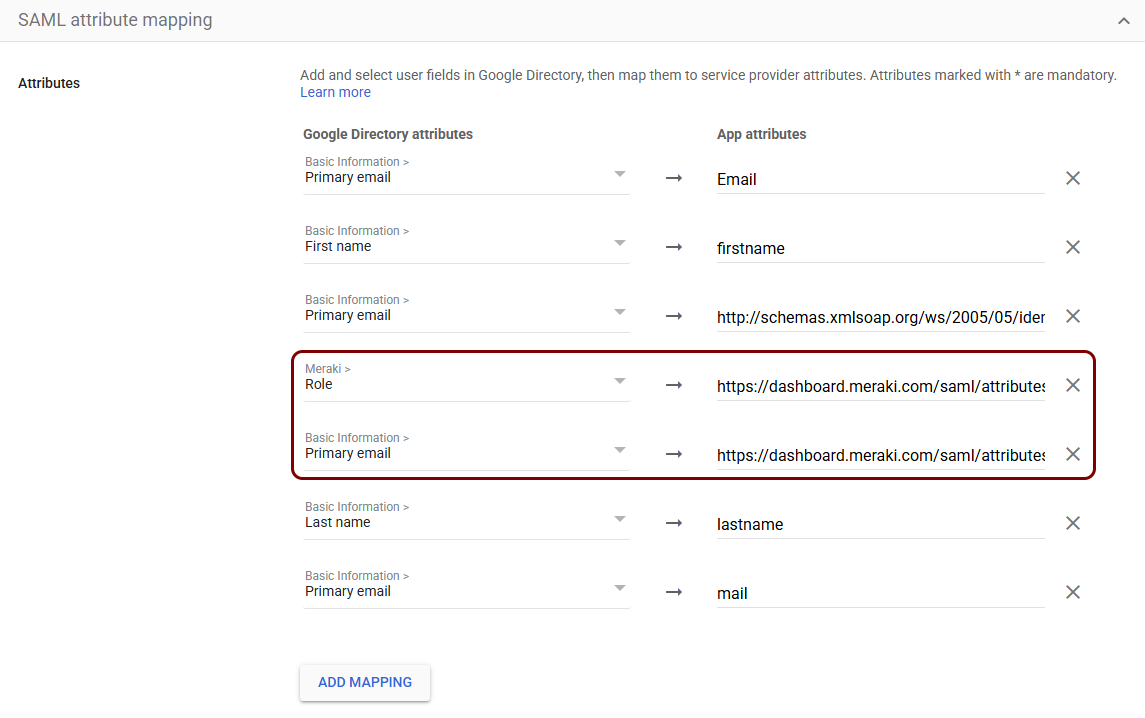 Note:You may have additional claims in this configuration. They will not influence the integration with Meraki.
-
In Google Admin Console, go to . Then, click on the More options button, and select the
Manage custom attributes option.
Create a Portnox Cloud application configuration
In this step, you will create a configuration in Portnox Cloud that will contain all the information necessary to integrate with Meraki.
-
In the Cloud portal top menu, click on the Zero Trust Resources option.

-
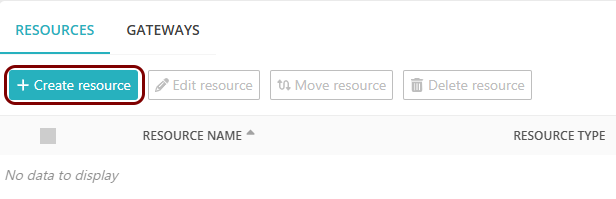
On the Resources screen, click on the Create resource button.
-
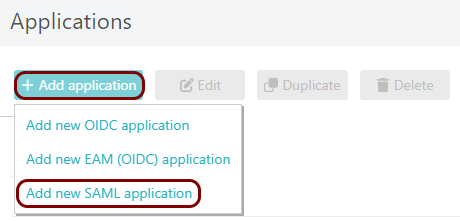
In the Authentication protocol section, select the SAML
option.
-
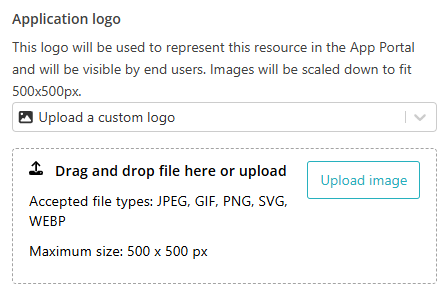
In the Application logo section, select one of the logos from the list, or select
the Upload a custom logo option and then click on the Upload
image button to upload a logo for the application.
The logo is used in the Secure Access Portal.
-
In the Authentication protocol section, select the SAML
option.
-
In the Resource details section, enter a Resource
name and optionally a Description.
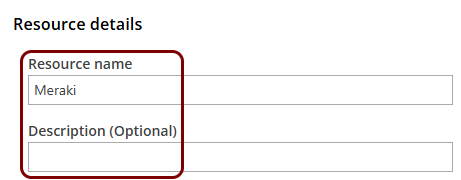
In this example, we used the name Meraki for the new application configuration but you can use any name you like.
Create your Meraki single sign-on roles
In this section, you will create single sign-on roles in the Meraki dashboard.
-
In the left-hand side menu, select the option.

-
In the right-hand side pane, click on the SAML tab, and then click on the Create
new SAML group button.

-
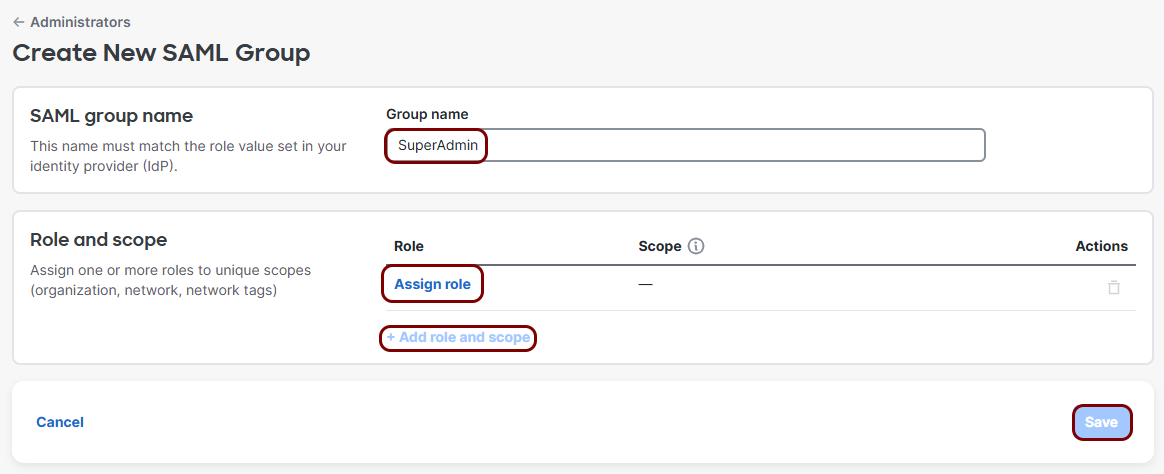
In the Group name field, add the name of the user role. Then, click on the Assign
role button to assign privileges to this role as needed. Optionally, click on the Add
role and scope to add more privileges. Finally, click on the Save button to
save this role.
Important:The Group name must exactly match the value assigned to the role claim in your authentication repository, for example, the value entered for the user in the Department or Job title Entra ID field, or in a custom Meraki > Role Google Workspace field.
Open the Meraki SAML settings
In this section, you will open the page in the Meraki Dashboard where you can configure SAML integration settings and provide basic information for the SAML integration.
-
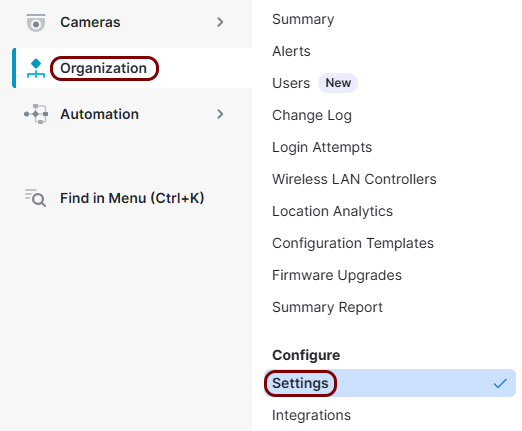
In the Meraki tab, in the left-hand side menu, select the option.
-
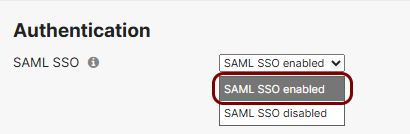
Scroll down to the Authentication section, and in the SAML SSO field,
select the SAML SSO enabled value.
-
In the SSO Subdomain field, enter the subdomain that you will use to access your SSO
integration.
Note:This must be a unique subdomain, not used by any other organization. This subdomain will be prepended to sso.meraki.com to create the URL.

For example, if you enter the subdomain vorlon, your SSO users will be able to log in by going to https://vorlon.sso.meraki.com/.
Copy configuration values from the Portnox tab to the Meraki tab
In this section, you will copy the values displayed by Portnox Cloud and paste them in the relevant fields in the Meraki SAML setup section.
-
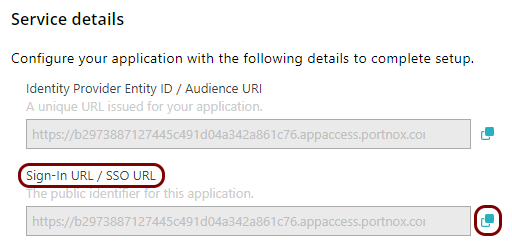
In the Portnox tab, in the Service details section, click on the ⧉ icon next to the Sign-In URL / SSO URL field to copy the
value.
-
In the Meraki tab, click on the empty field under the SSO login URL label and paste the
value copied from Portnox Cloud.

-
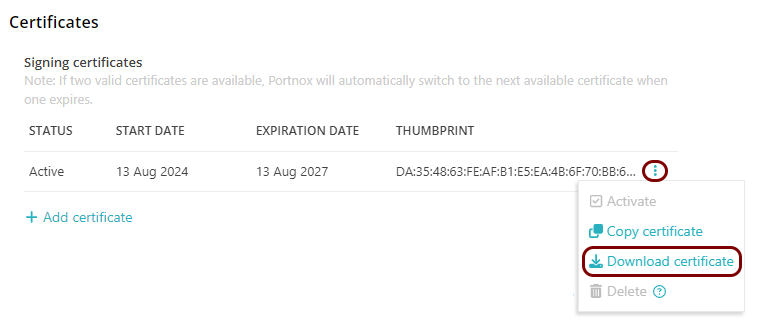
In the Portnox tab, in the section, click on the ⋮ icon next to the
Active certificate and select the Download certificate option to
download the certificate to the local drive.
-
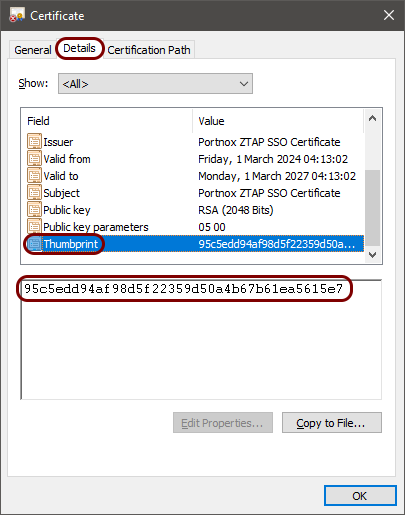
Open the certificate in your operating system. Then, find and copy its thumbprint value.
For example:
- In Windows:
-
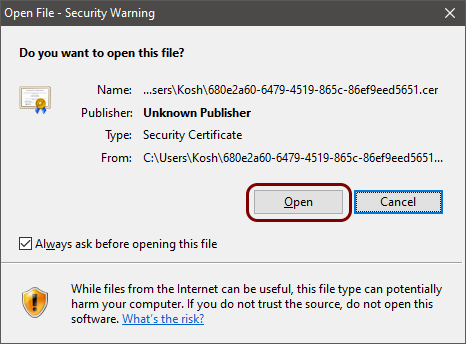
Double-click on the downloaded certificate file and click on the Open button.
-
In the Certificate window, go to the Details tab, scroll down the list to see the Thumbprint entry, click on it, and then double-click on the value in the field below and press the key combination CTRL + C to copy the value to the clipboard.
-
- In macOS:
-
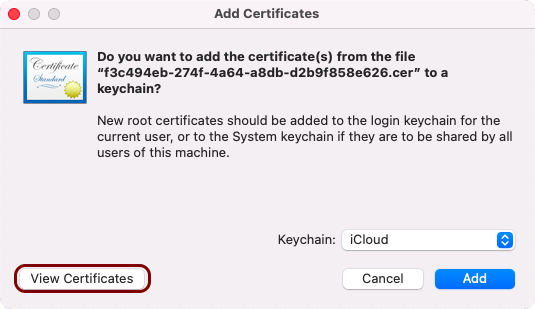
Double-click on the downloaded certificate file and click on the View Certificates button.
-
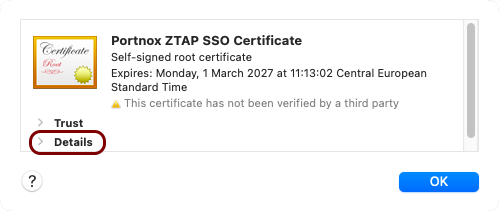
Click on the Details label to show certificate details.
-
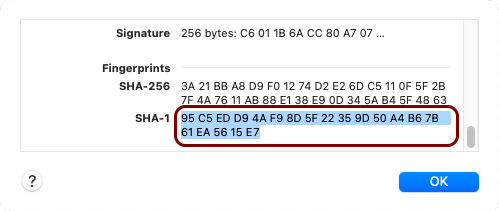
Scroll down to the Fingerprints section, mark the value of the SHA-1 field, and press the key combination Command + C to copy the value to the clipboard.
-
- In Windows:
-
In the Meraki tab, click on the empty field next to the X.509 cert SHA1 fingerprint label
and paste the fingerprint in the colon-separated format.

-
Scroll down to the Authentication section, and in the SP Initiated SAML
IdP field, select the value equal to your fingerprint pasted in the X.509 cert SHA1
fingerprint field.

Copy configuration values from the Meraki tab to the Portnox tab
In this section, you will copy the values displayed in your Meraki SSO setup section, and paste them in the relevant fields in Portnox Cloud.
-
In the Portnox tab, in the Resource properties section, click on the empty field under the
Entity ID / Service Provider Entity URL heading and type the value:
https://your_subdomain.sso.meraki.com, whereyour_subdomainis the value you entered in the SSO Subdomain field in the previous section.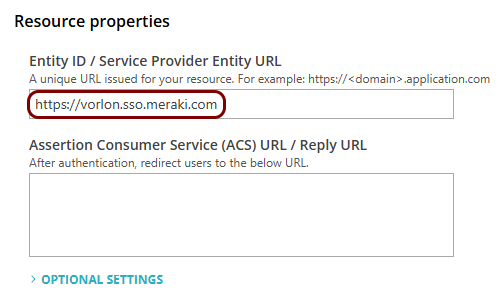
-
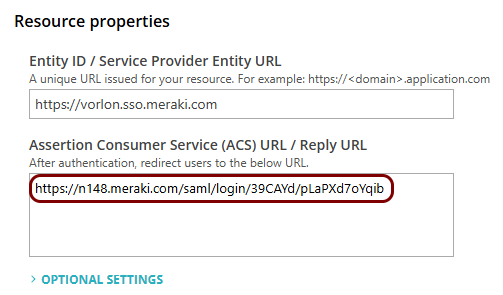
In the Meraki tab, select the text value next to the Consumer URL field and copy it to the
clipboard.

-
In the Portnox tab, in the Resource properties section, click on the empty field under the
Assertion Consumer Service (ACS) URL / Reply URL heading and paste the value copied from
Meraki.
Finalize the configuration
In this section, you will finalize the configuration in Portnox Cloud and the Meraki dashboard.
-
Finalize the configuration in the Portnox tab.
-
Click on the OPTIONAL SETTINGS link to show
additional fields, and then in the Application Login URI field, enter the
following value:
https://your_subdomain.sso.meraki.com, whereyour_subdomainis the value you entered in the SSO Subdomain field (the same value that you entered in the Entity ID / Service Provider Entity URL field).Note:This step is required if you want to show this application in the ZTNA Secure Access Portal.
-
Scroll all the way down to the end of the page, and then click on the Add resource
button.
-
Click on the OPTIONAL SETTINGS link to show
additional fields, and then in the Application Login URI field, enter the
following value:
-
Finalize the configuration in the Meraki tab.
Result: You have configured the Meraki dashboard to be accessible using Portnox Zero Trust Network Access.