
Integrate the Palo Alto Networks firewall web interface with Zero Trust Network Access
In this topic, you will find general instructions on how to integrate the web interface of a Palo Alto Networks firewall with Portnox™ Zero Trust Network Access.
Modify your identity provider configuration to support the Palo Alto Networks firewall
The firewall identifies administrators by a username without a domain, for example, kosh instead of kosh@vorlon.com. Your identity provider must send this username in a custom claim.
Other applications that use the same identity provider configuration also receive the username claim. This causes no technical issues.
-
If you use an Entra ID IdP configuration, in another browser tab,
open the Entra ID SAML application that you created earlier and do the following steps.
-
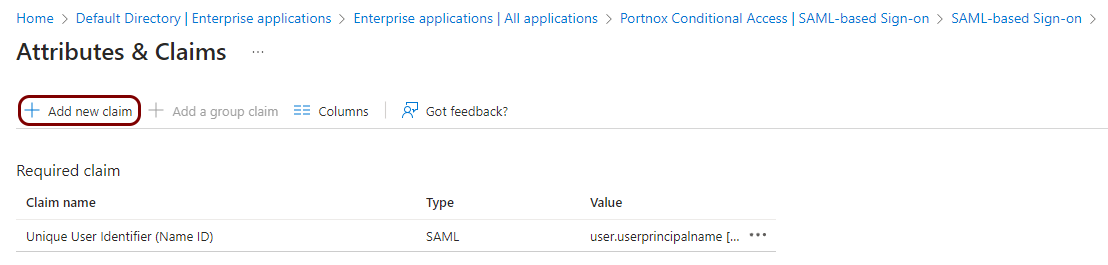
Open the Attributes & Claims pane () and click on the Add new claim button.
-
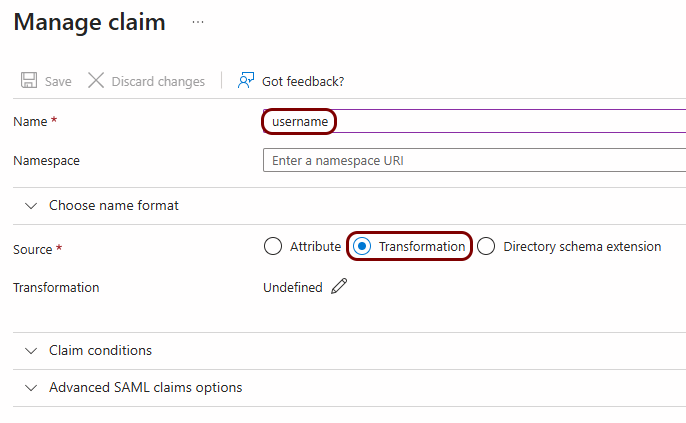
In the Name field, type username. Then, in the
Source section, select the Transformation option.
-
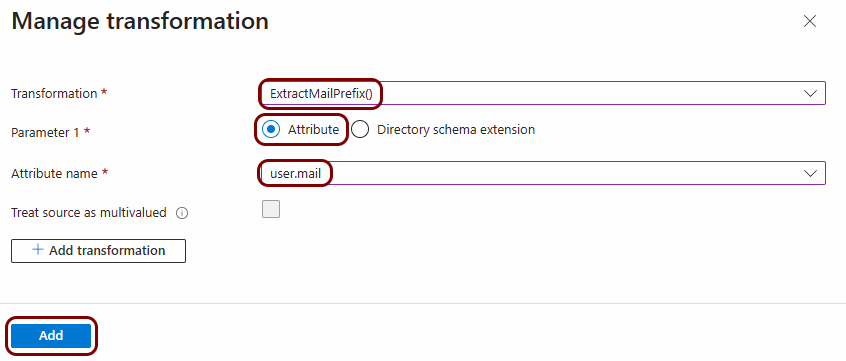
In the Manage transformation pane, in the Transformation field,
select the ExtractMailPrefix() option. In the Parameter 1
section, select the Attribute option and the user.mail
attribute. Then, click on the Add button.
This transformation takes the part of the email address before the @ sign.
 Note:You can use user.userprincipalname instead of user.mail. In most cases, both hold the same value. For some accounts, such as guest accounts or service accounts, the user principal name can differ from the mail attribute or not be a real email address. Check your directory before you choose. Use user.mail as your default choice. Use user.userprincipalname if some admin accounts have no value in the mail attribute.
-
Open the Attributes & Claims pane () and click on the Add new claim button.
-
If you use Google Workspace, open your admin console and do the following steps.
Note:Unlike Entra ID, Google Workspace can’t derive the username from the email address. You must enter the username for every user that needs access to the firewall.
-
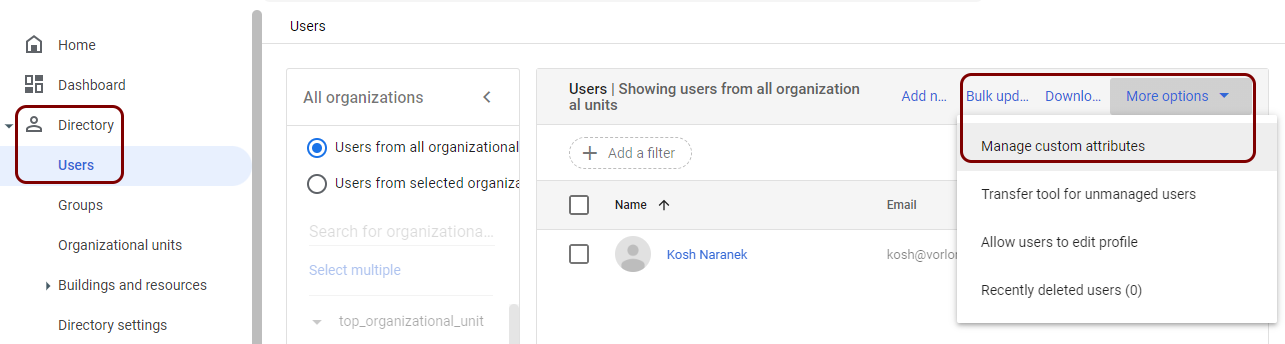
In Google Admin Console, go to . Then, click on the More options button, and select the
Manage custom attributes option.
-
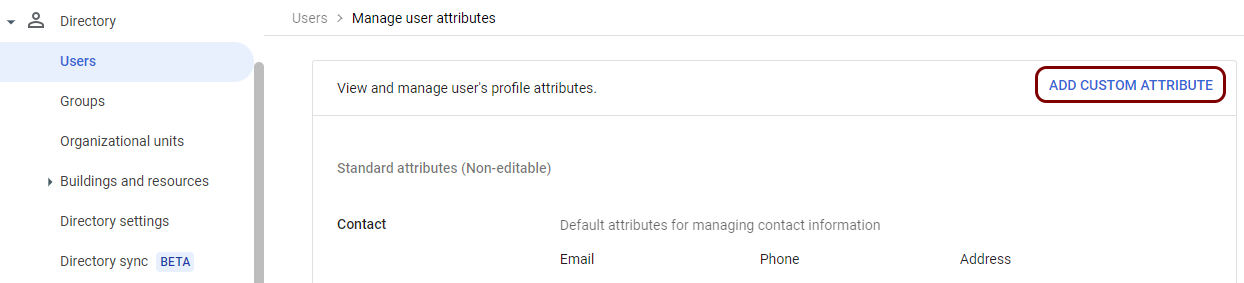
Click on the ADD CUSTOM ATTRIBUTE link.
-
In the Add custom fields pane, in the Category field, enter a
category name and add one attribute: username. Set Info type
to Text, Visibility to Visible to user and
admin, and No. of values to Single Value.
Then, click on the ADD button.
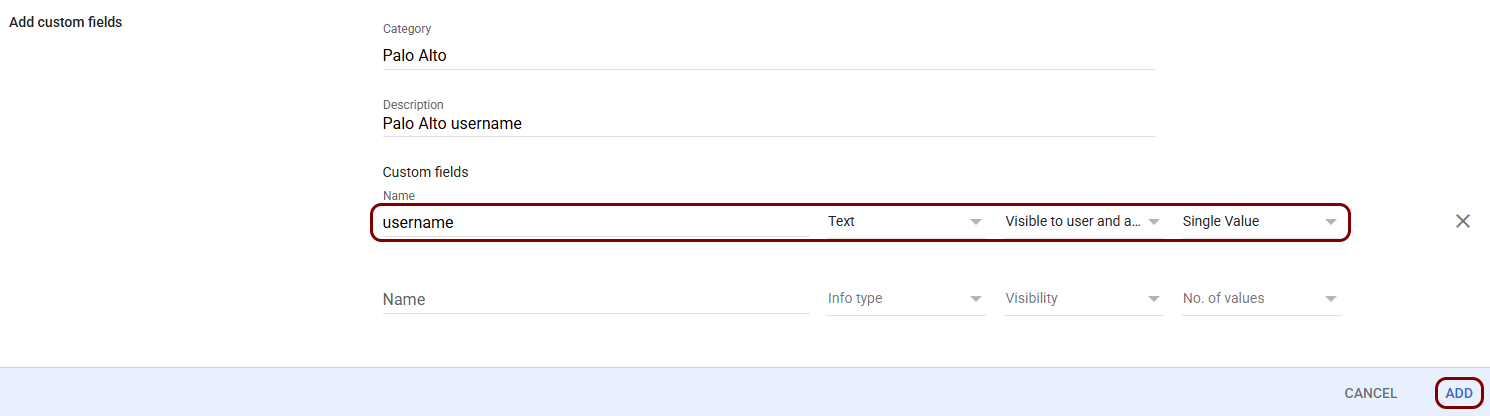
In this example, we used the category name Palo Alto, but you can use any name you like.
-
Go back to the list of users. Then, open a user that needs access to the firewall, click on the
ADD ALTERNATE EMAILS option, and scroll down to the Palo
Alto category. Then, click on the ✎ icon and
enter the username.

-
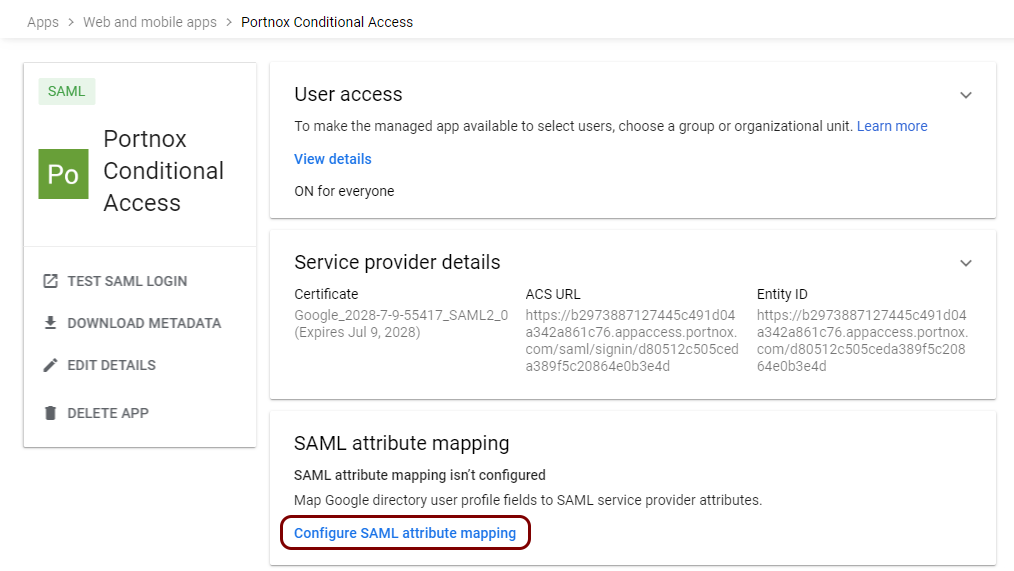
Open the SAML attribute mapping pane ().
-
Click on the ADD MAPPING button and map Palo
Alto > username to username. Then, click on the
Save button.
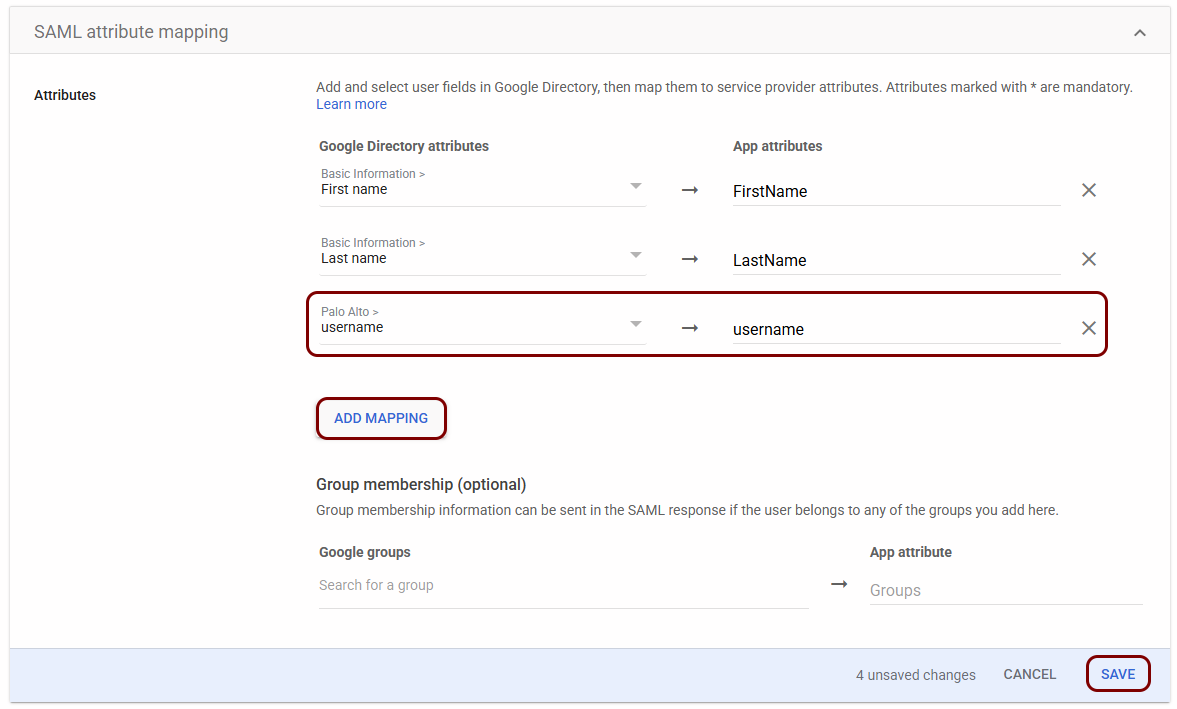 Note:You may have additional mappings in this configuration. They don’t affect the integration with the firewall.
-
In Google Admin Console, go to . Then, click on the More options button, and select the
Manage custom attributes option.
Create a Portnox Cloud application configuration
In this step, you will create a configuration in Portnox Cloud that will contain all the information necessary to integrate with the firewall.
-
In the Cloud portal top menu, click on the Zero Trust Resources option.

-
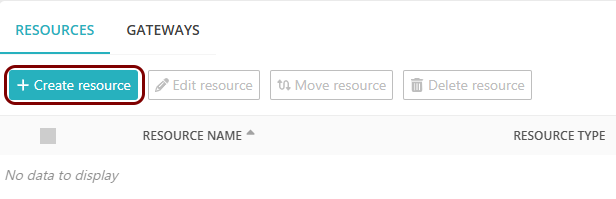
On the Resources screen, click on the Create resource button.
-
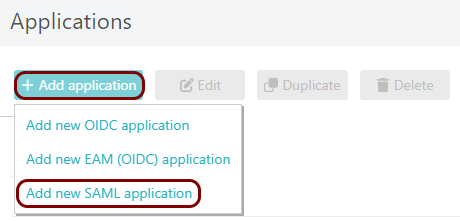
In the Authentication protocol section, select the SAML
option.
-
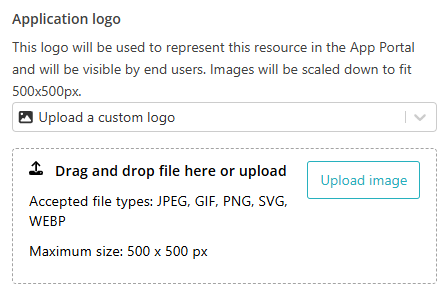
In the Application logo section, select one of the logos from the list, or select
the Upload a custom logo option and then click on the Upload
image button to upload a logo for the application.
The logo is used in the Secure Access Portal.
-
In the Authentication protocol section, select the SAML
option.
-
In the Resource details section, enter a Resource
name and optionally a Description.
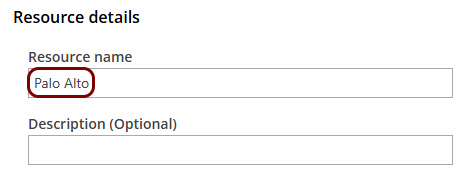
In this example, we used the name Palo Alto for the new application configuration but you can use any name you like.
Access the Palo Alto SAML settings
In this section, you will locate the page in the firewall web interface where you can configure SAML identity providers.
-
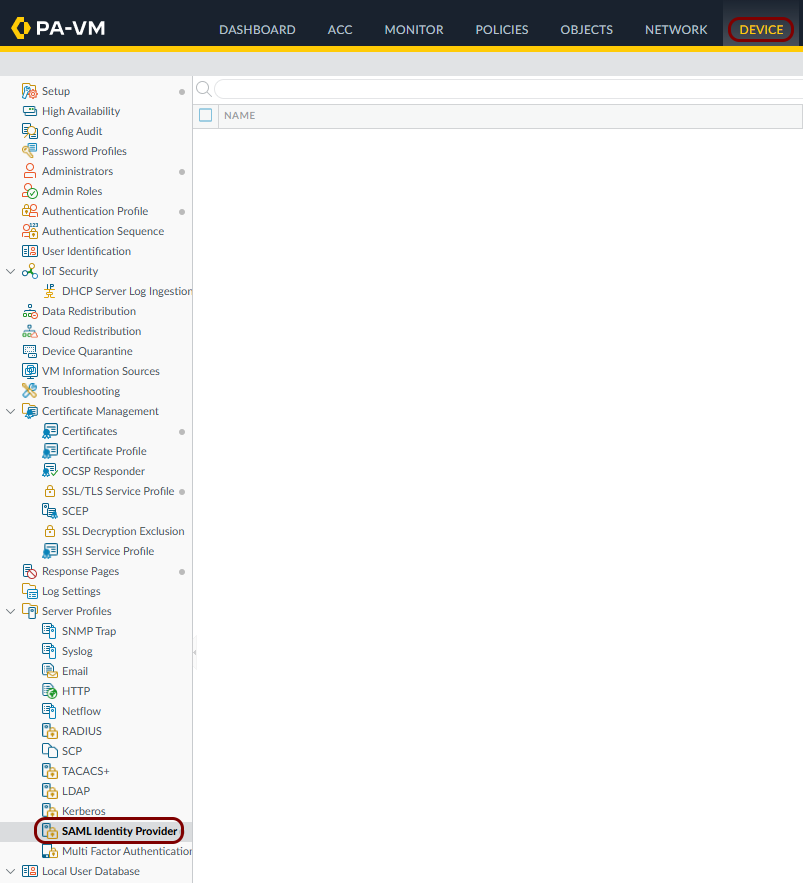
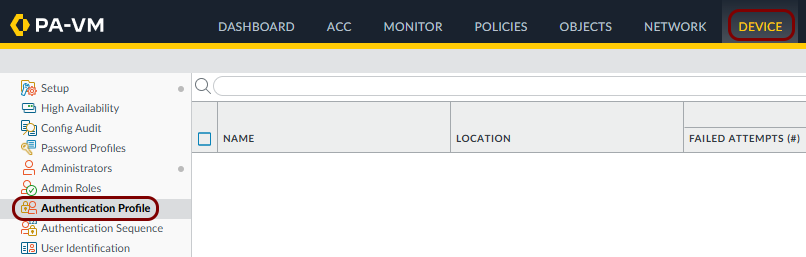
In the top menu, select the Device option. Then, in the left-hand side menu, select the option.
Enter configuration values in the Portnox tab
In this section, you will enter the firewall SAML values in the relevant fields in Portnox Cloud.
-
In the Portnox tab, in the Resource properties section, click on the empty field under the
Entity ID / Service Provider Entity URL heading and type the value:
https://firewall_address:443/SAML20/SP, wherefirewall_addressis the IP address or FQDN that you use to open the firewall web interface.Note:The firewall builds its SAML values from this address. It can be an IP address or a fully qualified domain name (FQDN). Users must always open the web interface with this exact address. If they use a different address, for example, the IP address instead of the FQDN, the login fails.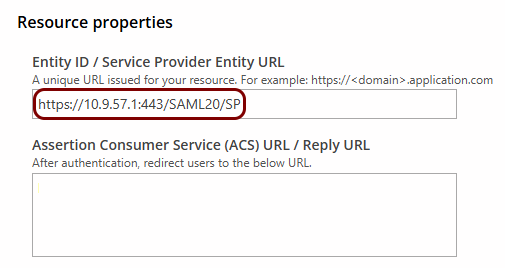
-
In the Portnox tab, in the Resource properties section, click on the empty field under the
Assertion Consumer Service (ACS) URL / Reply URL heading and type the value:
https://firewall_address:443/SAML20/SP/ACS, wherefirewall_addressis the same address as in the previous step.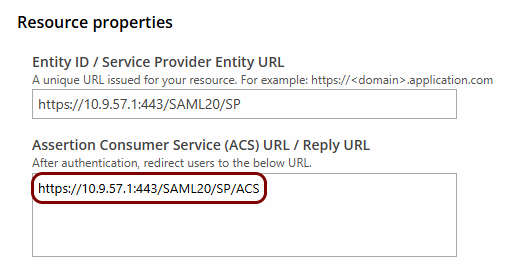
Copy configuration values from the Portnox tab to the Palo Alto tab
In this section, you will download the metadata file from Portnox Cloud and import it in the firewall to create a SAML identity provider server profile.
-
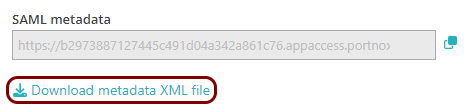
In the Portnox tab, in the SAML metadata section, click on the Download metadata
XML file link to download the XML file and save it to your local drive.
-
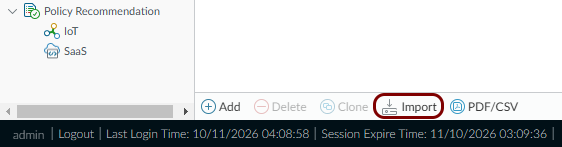
In the Palo Alto tab, click on the Import button at the bottom of the screen.
-
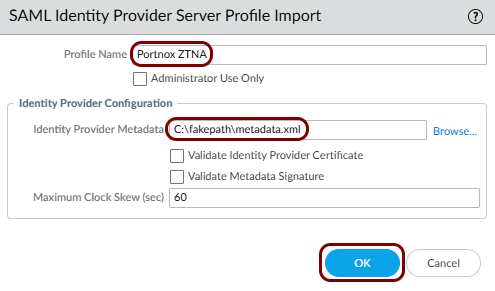
In the import window, do the following steps.
Create an authentication profile
In this section, you will create an authentication profile in the firewall that uses the SAML identity provider server profile.
-
In the Palo Alto tab, in the left-hand side menu, select the Authentication Profile
option.
-
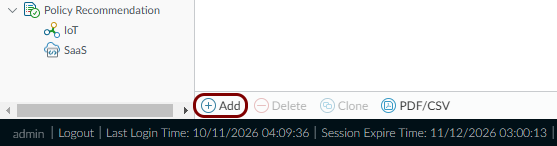
Click on the Add button at the bottom of the screen.
-
In the Authentication Profile window, do the following steps.
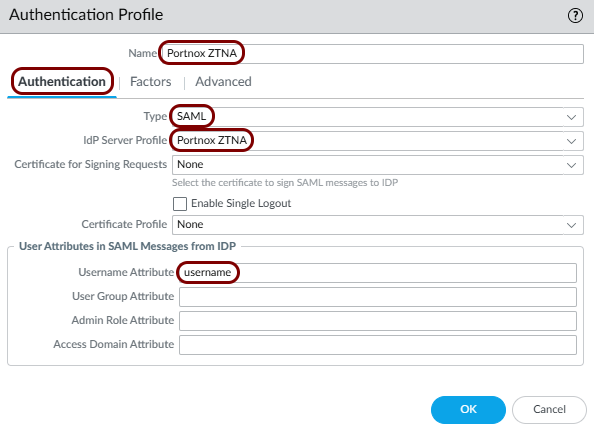
-
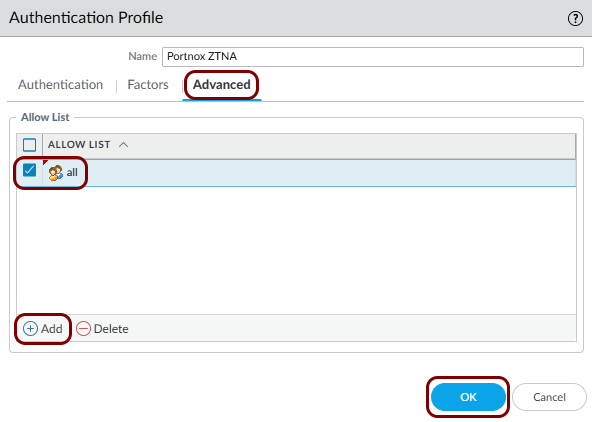
Click on the Advanced tab. In the Allow List section, click on the
Add button and select all.
Note:If the allow list is empty, the firewall rejects every SAML login.
Create firewall administrators for your users
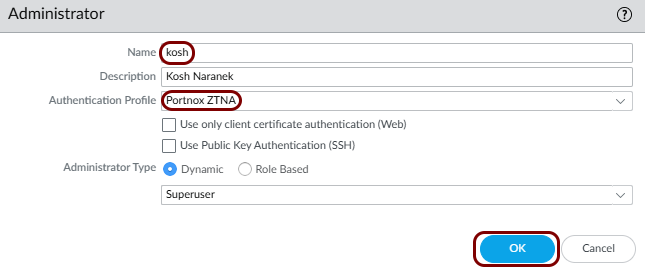
In this section, you will create an administrator account in the firewall for each user that needs access to the web interface.
-
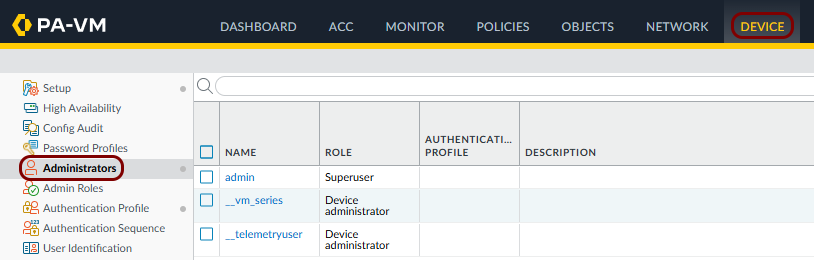
In the Palo Alto tab, in the left-hand side menu, select the Administrators option.
-
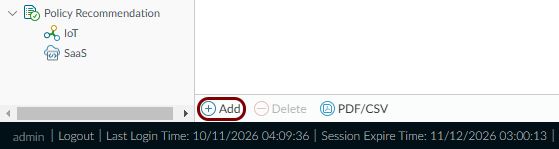
Click on the Add button at the bottom of the screen.
-
In the Administrator window, do the following steps.
-
Repeat the above two steps for every user that requires access to the firewall.
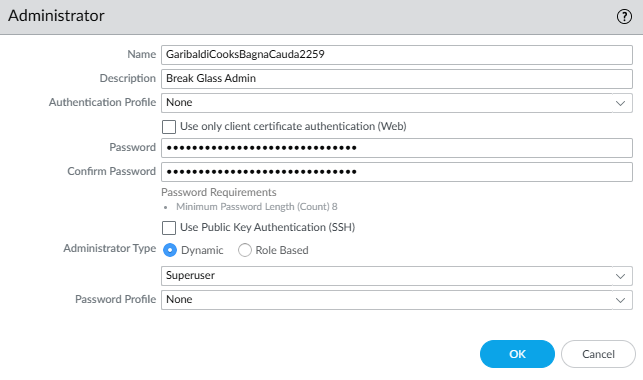
Note:We recommend that you deactivate the default admin account or switch it to SAML authentication. Attackers try admin first in password-guessing attacks. Instead, keep one break-glass account: a local administrator account with a password, which does not use SAML, and is only used in emergencies. Give this account a random or hard-to-guess username and a strong password. If your SAML configuration ever stops working, you can still use this account to log in and fix the problem.
Finalize the configuration
In this section, you will finalize the configuration in Portnox Cloud and the firewall.
-
Finalize the configuration in the Portnox tab.
-
Scroll all the way down to the end of the page, and then click on the Add resource
button.
-
Scroll all the way down to the end of the page, and then click on the Add resource
button.
-
Finalize the configuration in the Palo Alto tab.
-
Click on the Commit button in the top-right corner of the screen.
-
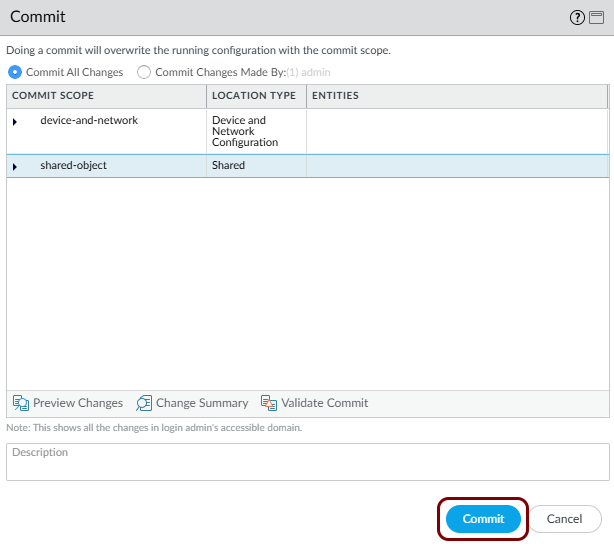
In the Commit window, click on the Commit button.
-
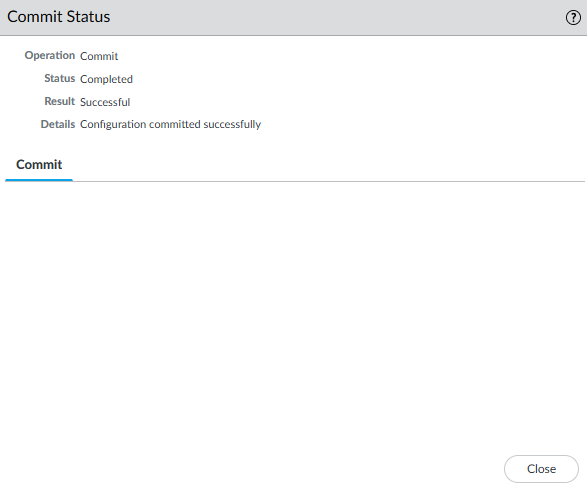
In the Commit Status window, wait until the Result field shows
Successful. Then, click on the Close button.
-
Click on the Commit button in the top-right corner of the screen.
Result: You have configured the Palo Alto Networks firewall web interface to be accessible using Portnox Zero Trust Network Access.